Monday, 30 September 2013

Pumpkin place mark

Are you planning an autumn brunch or party? Today I'm giving you a little idea to make your own pumpkin place marks. They are so cute and so easy to make.


Supply list:
  • Cardstock: Orange, green, craft
  • Distress Ink
  • Liquid glue

As you can see from the images they are so fast and easy to make, so they are a great craft to make with children on a saturday afternoon. Anyone else into a nice brunch to welcome the new season? :)

Happy Monday!
...............................

¿Estáis planeando una merienda o una pequeña fiesta otoñal? Hoy os doy una idea para hacer vuestros propios meseros en forma de calabaza. Son facilísimos de hacer además de muy monos.

Materiales:
  • Cartulina: Naranja, verde, craft
  • Tintas Distress
  • Adhesivo líquido
Tal como podéis ver por las imágenes, son muy rápidos y fáciles de hacer, así que son ideales para hacer con los niños una tarde de sábado. Porque... ¿A alguien más le apetece una buena merienda para dar la bienvenida a la nueva estación?  :)

¡Feliz lunes!

more Christmas gift ideas


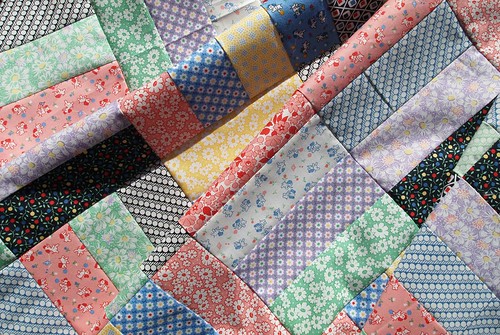
I've got another Christmas gift idea for you this week in the form of a really simple and fast jelly roll quilt.
Fat Quarter Shop have a new (and completely free) downloadable pattern that uses jelly rolls. Just 18 2.5" x width of fabric strips will give you a perfectly sized baby or small lap quilt (36" finished).
You can use the 2.5" strip die to cut your own strips instead of using a jelly roll, and make use of fabrics you already have in your stash. The strip die is one of my all time favourites, I use it to make binding, to cut sashing strips and also to make strippy quilts. Although it is one of the more expensive dies I've had my money's worth 100 times over with this die, and wouldn't be without it.

jelly roll jam

I made my quilt top in just a couple of hours, it's a lovely simple pattern - perfect for beginners as well as being something fast and easy for more experienced quilters.

Download the free Jelly Roll Jam pattern from the Fat Quarter Shop website and start cutting strips (there's a video tutorial too for those that prefer visual learning). A quilt is such a great gift, and the beauty of this pattern is that you can make it as scrappy as you like.


Sunday, 29 September 2013

Two projects by Gerry van Gent


Happy Sunday everyone!
Today I have two projects to share with you.
My first project is an altered item where I used a silhouette photo
of my daughter I "placed" in her dreams.
657900 Sizzix Big Shot Machine
658449 Sizzix ScoreBoards XL Album, Garden Gate
658530 Sizzix Bigz Die Mariposa
658260 Sizzix Bigz Die Christmas Cardinal
657492 Sizzix Bigz Die Tattered Pinecone
657176 Sizzix Sizzlits Dec. Strip Die Typeset Alphabet
657773 Sizzix Framelits Die Set w/Stamps Butterflies #3
657469 Sizzix Bigz Die Holiday Lamppost

I created the fence by die cutting Garden Gate twice from corrugated cardstock
and pattern paper.  I didn`t use the whole gates but part of them.
Then I distressed with ink and decorated with embellishment.


Behind the photo I adhered Mariposa butterfly.
For the tutorial how I created the butterfly with lace please
refer to one of my older blog posts (Father's Day Tag; 9 June, 2013)

Other Products I used:
Prima Marketing pattern papers
Prima Marketing flowers
Prima/Ingvild Bolme embellishments
Prima/Ingvild Bolme Chalk edgers 
Lets Get Beeze MDF wall clock

*  *  *
My second project today is a card where I handmade the flowers & leaves
by using the beautiful Dogwood Flower dies.
657900 Sizzix Big Shot Machine
658405 Sizzix Thinlits Die Set Flower, Dogwood
658367 Sizzix Movers & Shapers Magnetic Die Set - Butterflies
657906 Sizzix Framelits Die Set Frame, Snowflake
656634 Sizzix Bigz Die Caged Bird
658948 Sizzix Thinlits Die Frame, Rectangle
657789 Sizzix Sizzlits Die Set Love Set
657007 Sizzix Movers & Shapers Accessory Base Tray, L


The Dogwood flowers were made of pattern paper. 
For the centres I mixed Transparent and Yellow liquid drops.
The leaves were die cut from white crepe paper. After that painted and 
shaped while they were still wet. Then I added transparent liquid drops.

I hope you enjoyed my projects today!
Have a creative day!
Gerry

Saturday, 28 September 2013

ATC Box and Cards


I have been working way too hard lately but sadly it has not been creative work- things like taxes, orders, planning and writing. Time to take a break and do something fun!


So tonight I sat down with some matboard, embossing folders, dies, scrap paper, buttons, trim and paint, turned on the TV and started playing. I used pages from a dictionary and cut out qualities that I admire and strive for. And they all start with A because those were the pages that I had already torn out!

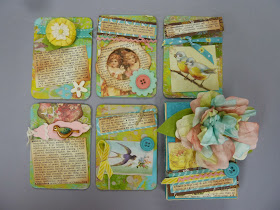
First, I die cut an ATC Card Box from turquoise matboard and some ATC cards from chipboard, then embossed the cards and box with a selection of Textured Impressions folders. The ATC cards were painted with the Gelli Plate in my favorite colors. I like the effect- not all of the ink comes through on each card so there is lots of variation and interest. And the embossing really stands out.

I like having a collection of little cards to tuck in a note to a friend or just pin up on my inspiration board as my thought for the day.


I started adding Prima papers scraps I had on hand, strips of paper and ribbon and some little die cut flower and label accents.


On the front of the box I added Trinity's Flower which I had made earlier by cutting from coffee filters and inking softly. Then I assembled the box with iCraft tape by ThermoWeb. Added to that was more text with the definition of "ablaze".


This was not a hard project at all to do and it was so relaxing... I will probably add more finishing touches as I go.

So glad I sat down and just had a fun craft session without deadlines or boring paperwork on my mind. For me crafting is therapy. How about you?

Christmas Home Decor: Glass jars with trees inside!

Well, we are just under three months till Christmas, so I think I can start thinking of my handmade Christmas home decorations.
I love glass jars so I thought I would try something using one of them that I got a at a Charity shop.

The dies I used are:


I die cut the tress using patterned papers from the Basic Grey 25Th & Pine collection. I die cut three of each size, then I scored them down the middle of each one.


I folded them by the scored line and glue the three of the same size together.


To make the tag, I used the Charm Stamp and Framelit set. First, I stamped the image using black ink, then I placed the Framelit and die cut using my Big Shot. 

Using Silver card, I then die cut the Embosslit Emerald Charm Tag - there are three Embosslit Charm Tags Oval, Circle and Emerald and all match with the Framelit and Stamp set. I place it on a clothes peg and glued the NOEL in the center and added some patterned paper to the peg.

To finish off the jar, I added border stickers to the lid and bottom and as snow I used cheap chunky glitter.


And here you have the finished project! I hope you like it.


Friday, 27 September 2013

Winter is Coming... - Winter Gift Bag - with Thinlits!


Hi, it's my turn to take over the blog again!
As people say, Winter is Coming...


Although I'm not a huge fan of preparing for Christmas so early or creating in "traditional Christmas colours" I'm ready to take a challenge and create something in a bit Winter mood... Ready?
So, having Winter on my mind - let me start with delicate, faded colours - cold greens, blues, snowflake cut-outs (great Sizzix Thinlits - Christmas (659010)), big Prima flower and metal embellishments (ok, I know I'm addicted!) to finish with a bit of veil, some crystals, vintage buttons and pins and a piece of natural canvas. I was really having great time constructing this multi-layered composition on the top of this little paper gift bag!


All the papers I've used are from my new A4 Vintage Vanity Journaling Pad from Prima and all the metal elements are "Mechanicals" - my trinkets and caps from Prima. To get extra dimension I used some 3D Foam Squares from Scrapbook Adhesives by 3L. 


And here are the links to the Sizzix Dies I used for this project - with white cardstock and Prima for cutting out the elements:
- Sizzix Thinlits Die Set 6PK - Christmas (659010)
- Sizzix Sizzlits Decorative Strip Die - Medallions (658339) 

I hope you are keeping yourself warm in this cold season - and find some time for creativity!
See you soon!
Finn

Layout "Beautiful Day"


Hi Everyone! This is Anna.

How are you today? Have you been busy scrapping this weekend?
Here I am with a new layout to inspire you to create with your favorite cutting machine! A new layout full of pastels colors - I've been inspired by these color combos lately! - made with simple dies that you can use in very different ways.


cafe creativo - sizzix big shot - Travel - Liguria (1)

The Sizzix die leaves are perfect for today’s creation.

Choose the paper you want as a background: I used a simple white cardstock! Add some mists here and there. Add some embellishments here and there, still sticking to the same color combo: cut out different banners, then cut a nice lace doily into a white paper and place it under your photo.

cafe creativo - sizzix big shot - Travel - Liguria (2)

cafe creativo - sizzix big shot - Travel - Liguria (3)

Hope you liked it! Have a great, creative weekend!

Items used:

Sizzix Thinlits Die Set 2PK - Doily & Doily Border #2 (659058)
Sizzix Framelits Die Set 5PK - Labels, Wavy (658363)
Sizzix Bigz Die - Tiny Tabs & Tags (657188)
Sizzix Framelits Die Set 6PK w/Stamps – Banners (658289)
Sizzix Sizzlits Decorative Strip Alphabet Die - Chip Block (656917)

1 photo
cardstock: white, twinkle pink, aqua, cream (Bazzill)
patterned papers: American Crafts, Basic Grey, Crate Paper, Ikea
reuse packaging of Prima Marketing
vellum paper
gold ribbon
tag (Kimberly Kalil)
alphabet
mist
sequins
sewing machine, yarn

**************************************
Flag_of_Italy Per le amiche italiane! :)

Ciao!
Ecco un nuovo appuntamento con Anna.

Questa settimana mi sono dedicata ai layout, altrimenti rimango sempre indietro con i miei album! Ecco un'altra paginetta di viaggio, un piccolo fine settimana in Liguria di qualche anno fa.
Sono partita da un candido foglio bianco sul quale ho spruzzato tre diversi colori pastellosi. La mia passione per i colori pastello viene fuori ogni tanto ;)
Ho cercato di dare importanza alla foto sovrapponendola a qualche ritaglio di carta, compreso un packaging recuperato, che mi piaceva per i colori.
Sono quindi passata agli abbellimenti ritagliati con la mia cara Big Shot: ho tagliato prima di tutto un bel centrino di carta che ho messo sotto agli strati di carta.
Poi ho tagliato anche quattro bandierine di dimensioni e materiali diversi e le ho disposte nella parte bassa degli strati di carta. Infine ho tagliato un paio di tag differenti e l'alfabeto che compone la scritta "beautiful".
Ho realizzato delle cuciture, come quella sopra la scritta del titolo ed ho terminato incollando qualche paillettes vicino. Voilà!
Spero che il mio layout vi sia piaciuto. Tornate a trovarmi venerdì prossimo! :)
 
Materiali:

Sizzix Thinlits Die Set 2PK - Doily & Doily Border #2 (659058)
Sizzix Framelits Die Set 5PK - Labels, Wavy (658363)
Sizzix Bigz Die - Tiny Tabs & Tags (657188)
Sizzix Framelits Die Set 6PK w/Stamps – Banners (658289)
Sizzix Sizzlits Decorative Strip Alphabet Die - Chip Block (656917)

1 foto
cartoncino: bianco, rosa antico, verde acqua, crema (Bazzill)
patterned papers: American Crafts, Basic Grey, Crate Paper, Ikea
packaging di Prima Marketing da riiciclare
carta da lucido 
ritaglio di stoffa o nastro color oro
tag (Kimberly Kalil)
alfabeto
colori a spruzzo
paillettes
macchina da cucire, filo


Thursday, 26 September 2013

Jingle bells stocking


Hello again, I love this time of year - I was returning home from work and as I reached the outskirts of Hereford I realised I could smell apples - harvested for cider making, one of the best smells.
So as the evenings draw in and the heating is turned on - we can enjoy making little gifts and presents in preparation for Christmas.
This week I've made a small stocking and decorated it with bells using a new  Bigz die 658765 - Christmas Bells by Tim Holtz ( it will be available from October).
My stocking is small - which I will fill with little treats for the grandchildren - but you could make it any size because the technique will be the same.
I cut 4 layers of medium weight white cotton fabric in the shape of a stocking ( you can find lots of images on line) 13" long by 10" at the toe.
For the Christmas fabrics I chose from the Yuletide range by Makower.
I cut 2 strips of Christmas fabric  2 1/2" wide to make a border for the top of the stocking.
I used 2 more different fabrics for the bells. I applied fusible web to the wrong side of the fabrics and placed them over the bells shapes on die and rolled them through the Big Shot.
Sew the border strips to the top of 2 of the stockings
 and press.
 Fuse the bells in place and stitch - I used a zig-zag stitch but you could use a straight stitch.
 
 Stitch the stockings, with the borders, right sides together, and stitch the plain pair together , but leave an opening along the straight side, so that you can turn the stocking right sides out.
Clip and snip the curves as pictured below. 
 
Turn stocking right side out.
Cut a strip of 'border' fabric - 1 1/2" x 5 1/2" to make a loop - press in half along length and then press edges to the middle and stitch in place. 
Pin loop to the top edge of the back of the stocking.
place one stocking inside the other, with right sides together, pin and stitch them together around the top edge.
Pull the stocking  so that it's right sides out - and looks like the picture below. Pin and slip stitch the opening and then push the lining inside.

 
Now you have the completed stocking. 
You could make one for  each member of your family, or as gifts for friends young and old.
I had hoped to have finished the quilt for Oona for this week - but it is in progress - I have stitched some of the animals in place and will keep you updated until I can actually show you the finished article.
Enjoy the week.
Angela

Easy does it!


I have just returned from Norway where I was demonstrating at one of the most magnificent stores I have ever been in namely, Bikuben in Lillestrom, The people who I met were all lovely and Egil and Ellen were fantastic hosts and great company too. Wherever I go in Europe with all it's cultural diversity I'm happy to report that crafters everywhere are all alike thanks to their shared passion.

I am stepping back from the brink this week. My last few posts have been really complex and grungy with tons of inks, powders and other fun mucky stuff thrown into the mix. It's time for a little detox so this week I've stripped things right back.

These cards were made for a couple of Create and Craft shows next Monday (30th September at 2pm and 7pm) and they feature one of my all time favourite Decorative Strip alphabets and a few Framelits for good measure.


The dies used are:

  • Sizzlits Decorative Strip - Alphabetical by Tim Holtz (657482)
  • Sizzix Framelits Set 6PK - Hearts (657561)
  • Sizzix Framelits Die Set 8PK - Circles#2 (658604)
  • Sizzix Framelits Set 5PK - Stars (657567)


First of all I chose my three main colours and white, having top quality cardstock makes all the difference, I always use Inspire Me Papers for this kind of thing. The main shapes I cut with my Framelits, the letters with the alphabet die. After die cutting the balloon shape, I would cut a triangle from the same card and attach at the base of the shape with PVA. 


Next I would cut a thin strip of yellow card and curl it around a pencil or paintbrush before attaching to the end of the balloon. Next I would measure the base card and its white background before rounding off some or all of the corners with a corner punch.


Finally, mount all the elements together using 3D foam pads and there you have it.