Friday, 31 October 2014

Hovering Birds Mini Quilt


If you follow my blog you'll know I go crazy for mini quilts! So I knew my first project for Sizzix had to be a mini ;-) They are so much fun to make, and you get instant gratification ... aaaand if you're anything like me, you get huge pleasure from having a collection of them slowly taking over the walls in your house! 

Finished Size: 15.5"
Block Size: 8"

Sizzix Dies Required;
Square 2" Finished
Half-Square Triangle 2.5" Finished Square
Half-Square Triangles 4.5" Finished Square


Cutting:
For each of the four 'Hovering Birds' blocks cut the following;

Background Fabric
(2) 4.5" HSTs
(6) 2.5" HSTs
(4) 2.5" Squares

Main Fabric
(10) 2.5" HSTs

Arrange pieces as follows:


Sew HST units together.


Sew the remaining units in rows.


Sew the rows together, and press seams open. Sew the two corner HST's to complete the block.


Repeat steps to complete the remaining 3 blocks. Sew the blocks together in rows, pressing seams out. Join the bottom row to finish quilt top. 


Cut a piece of batting and backing fabric 17" square, sandwich together and quilt as desired. I chose diagonal lines with 1/2" spacing. Cut (2) 2" strips from width of fabric, join together to form one long continuous strip and sew binding to quilt top. Fold over the opposite side and hand sew to the backing fabric. 


Voila! Now gaze at your beautiful new mini quilt. (apologies for the not so pretty pictures, the light was very dark and gloomy!). See you next month Sizzix friends! 

Autumn Leaves - Modern Maples


Hi everyone, Trudi here from Quilting Prolifically.   Now the clocks have gone back, it really does feel like autumn, with dark evenings and blustery days.  The trees are hanging on to the last of their leaves in defiance of the seasons.  This has inspired me, along with all the bloggers and IG quilters doing a Modern Maples quilt.

I got to thinking, as you do, I bet I can do most of the hard work with my Sizzix Big Shot.  So after a delve into my stash, I managed to pull a nice selection of autumnal feeling fabrics, and a white on cream to go nicely with them for the background.  This is a great project if you want to bust your scraps too!

Next up was to check for dies, for this project I used the following:

657609 4 1/2" Unfinished Square Bigz die
657613 4 1/2" finished Half Square Triangle Bigz die


For each block you need the following:

background fabrics  1 Square, 6 HSTs
Leaf Fabrics  3 Squares, 4 HSTs, 1 strip 1 1/2" x 7"


I cut 1 1/2" strips, but these could easily be cut with the Bigs XL 1 1/2" strip die (658327 ) and multiples cut from the width of fabric strips, or even scraps.

Once all the cutting was done, it didn't take long to sew all my stem blocks.  To ensure I had the half square triangles lined up centrally, I folded each in half along the long edge (be careful not to stretch as this is a bias edge), then finger pressed a small crease to indicate the center of the piece.  I repeated this with the stem pieces.  By matching the folds, the pieces can be joined and centered easily.

These stems are over sized, so rather than trimming each one with my rotary cutter and square ruler, I used the square die, centering the stem with the corners of the square on the die.  This saved loads of time, and also saved my wrists too!


The half square triangles are sewn together one background and one leaf fabric, with a 1/4" seam are perfectly sized with the other elements of the block.  I chain pieced mine, and the job was soon done and I was ready to assemble my blocks.  I pressed my seams to the darker fabric of the leaf fabrics so they wouldn't show through the lighter background fabric.

Piece the blocks as below into rows first


and then join the rows together to complete the block


If you are making multiple blocks I would work with one color at a time, unless you are going for the scrappy look.  These blocks are 12 1/2" unfinished.

When all your blocks are pieced, a good press and you are ready to plan your layout.  There are so many options, I have had fun playing around with mine, adding in some blanks as if they are blowing around on the wind.  I still have some playing to do with the final layout.


I am looking forward to quilting this one, with an organic swirl that will add more movement I hope. I'll let you know how I get on!  Hopefully very soon, as I would like this to be a tick off my Christmas present list!

This is such a versatile pattern, whilst I have chosen a pallet that speaks autumn colours to me, it lends itself to so much variety.  What colours would you use? Why not give the block a go and show us your results.  I'm considering giving them a try with 2 1/2" squares and half Square triangles for 6 1/2" unfinished blocks, what do you think?


Owl Card... Pirate!


Happy Friday and thanks so much for visiting me today!
A lot of my free time lately has been devoted to cardmaking, but I continue to enjoy it! Papercraft ideas seem to be endless! Today I wanted to share with you a fun adorable greeting card I made for a friend. She asked me to make a birthday card for a boy. I created a card, but also a frame, as gift!
I love Sizzix Bigz Die - Owl #4, so fun to use and so versatile. Today I dressed the owl as a pirate!
Here's what I came up with:

cafe creativo - big shot sizzix - card owl pirate (1)

This night is Halloween and my owl has found her Pirate Halloween Costume! :D

cafe creativo - big shot sizzix - card owl pirate (12)

To make the pirate bandana I used a circle that I embossed, I added a small heart (die from Starter kit).
In my card I added the twine rope and some flags.
 
Items used:
 
Sizzix Big Shot Starter Kit (Powder Blue & Teal) (658300)
Sizzix Bigz Die - Owl #4 (659911)
Sizzix Bigz Die - Thought Bubbles (659741)
Sizzix Framelits Die Set 8PK - Circles (657551)
Sizzix Textured Impressions Embossing Folders 2PK - Houndstooth & Dots Set (659745)
 
square frame
cardstock (white, black, red, green, kraft)
patterned papers
cardboard
alphabet stickers
button
strass
rustic twine
bakers twine
black marker
 
Hope you like it.
Thanks for stopping by!
Anna
 
**************************************
Flag_of_Italy
Buon Venerdì a tutti!
Ultimamente un bel po' del mio tempo libero è stato dedicato alle card. Ma non mi lamento di certo, perchè le idee da sviluppare e le tecniche da provare sembrano essere infinite!

Oggi volevo condividere con voi un divertente biglietto di auguri che ho fatto per un amica. Lei mi ha chiesto di fare un biglietto d'auguri per un bambino. Ho creato così una card, che è anche una cornice, un duplice regalo, che spero verà apprezzato!
Mi piace la nuova fustella Sizzix Bigz Die - Owl #4 è divertente da usare e così versatile. Per questo progetto ho pensato fosse simpatico vestire il mio gufetto da pirata!
Questa, per altro, è la notte di Halloween e il mio gufo ha trovato così il suo costume! :D

Ho fustellato quindi il gufo sia con cartoncino nero, sia con carta a righe. Per fare la bandana da pirata ho usato un cerchio che ho embossato a pois e completato con un cuoricino (fustelle dello Starter kit).
Per creare l'ambiente adatto ho aggiunto lo spago con appese alcune bandierine, quella col teschio l'ho presa sul web e stampata a misura per l'occasione. Il fumetto con l'augurio è un'altra bella fustella.
Sia gufo che fumetto sono stati tagliati anche in sagoma di cartone per dare più volume. Le fustelle Bigz lo permettono!

Se avete ulteriori domande, non esitate a chiedere :)

Questi i materiali usati:

Sizzix Big Shot Starter Kit (Powder Blue & Teal) (658300)
Sizzix Bigz Die - Owl #4 (659911)
Sizzix Bigz Die - Thought Bubbles (659741)
Sizzix Framelits Die Set 8PK - Circles (657551)
Sizzix Textured Impressions Embossing Folders 2PK - Houndstooth & Dots Set (659745)
 
cornice quadrata
cartoncini (bianco, nero, rosso, verde, kraft)
carte scrap
cartone
alfabeto adesivo
bottone rosso
strass
spago
spago bicolore
pennarello nero
 
Grazie della visita! Alla prossima!
Anna


Thursday, 30 October 2014

Downton continued


Hello again, are you enjoying the cosy autumn evenings now we have turned the clocks back?
I'm enjoying the autumn colours in the trees, and the fallen leaves - which I still enjoy kicking my way through ( even when I haven't got my grandchildren with me!!)
Talking about colours - I received a wonderful box of  'Art Gallery' fabrics last week -
 
sent to me by http://www.hantex.co.uk/ for a whole heap of projects - now this is a little unfair, as you won't get a glimpse of any of the projects until later in the year or even early next year - but these fabrics are so bright and beautiful to work with I just wanted to share the photo.
Before I show you the latest progress on 'Downton' I just show you a couple of photos from the workshop I taught  yesterday at The Sewing Room in Cinderford, Gloucestershire, the shop - for Anita - you can see her in the second photo below


 We had fun making quick and easy Christmas decorations, using hearts http://www.sizzix.co.uk/product/656334/sizzix-bigz-die-hearts , and stars http://www.sizzix.co.uk/product/656339/sizzix-bigz-die-stars
Christmas decorations will feature in my blogs next month - when I hope to have finished Downton.
So here is the next instalment -
I finished laying out the triangles and then joined them into strips - here you see all the strips joined together - to make a large central hexagon.
Now I really want this to be a quilt that I can snuggle up under while watching Downton Abbey - so I'm going to add a neutral fabric - maybe calico to make this into a rectangle, and then maybe add a border to create the size I want - so that will be the final instalment - and then I'll give you the fabric requirements as well.
Meanwhile enjoy the cosy evenings and keep sewing.
Angela
 

New Sizzix dies ! by Karine


I am back from my week’s off and I’ve just spent two days in Basque Country so I have tons of pictures for scrapbooking…and a good surprise in my mailbox: new Sizzix dies to test!

Supply list:

Paper: American Crafts, October Afternoon, 4heures37, Crate Paper
Labels, wood embies, button: Ephéméria
Stickers: Carta Bella
Gold leaves: Martha Stewart
Glitter adhesive: Pause Créative
Masking Tape
Enamel Dots: Studio Calico
Stamps: Craft Origine, Cat's life Press
Ink: Distress Vintage Photo
Spray ink: Mister Huey's Studio Calico
Others: tag, 3D foam adhesive

Dies:

658300 : Sizzix Big Shot Starter Kit
660060 : Sizzix Thinlits Die Set 17PK-Labels
659573 : Sizzix Sizzlits Decorative Strip Die-Spring Greenery
659957 : Sizzix Originals Die-Phrase-Love #3

Here I wanted to stick with my picture’s colours so I gathered elements to create a kit with the following colours: orange, red, yellow and pink with a hint of sea green here and there.

This is an easy lay-out built upon a 4heures37 pattern paper. My picture is glued on a mat and fixed. Now time for decoration with my new Sizzix dies.
I plan to use the foliage, hearts and labels dies!

The different elements are glued around my picture. Some are glued with 3D adhesive for more volume.
Add splashes with an orange spray ink and some colourful dots.


A nice seasonal page, isn’t it?

Have a lovely day,

Karine

Bonjour !

Après une semaine de vacances et deux jours dans le Pays Basque me voici de retour avec de nouvelles photos à scrapper....et dans ma boite aux lettres plein de nouveaux dies Sizzix à tester !

Matériel :

Papiers : American Crafts, October Afternoon, 4heures37, Crate Paper
Etiquettes, décoration bois, bouton : Ephéméria
Stickers : Carta Bella
Feuilles dorées : Martha Stewart
Adhésifs paillettes : Pause Créative
Masking Tape
Enabel Dots : Studio Calico
Tampons : Craft Origine, Cat's life Press
Encre : Distress Vintage Photo
Encre en spray : Mister Huey's Studio Calico
Divers : tag, mousse 3D

Dies utilisés :

658300 : Sizzix Big Shot Starter Kit
660060 : Sizzix Thinlits Die Set 17PK-Labels
659573 : Sizzix Sizzlits Decorative Strip Die-Spring Greenery
659957 : Sizzix Originals Die-Phrase-Love #3

J'avais envie ici de coller aux couleurs de ma photo je me suis donc confectionné un petit kit dans les orange, rouge, jaune et rose parsemé de quelques touches de vert d'eau.

Une mise en page simple sur un papier imprimé jaune 4heures37. Ma photo mattée et collée il ne me reste plus qu'à compléter ma page avec des décorations réalisées grâce à mes nouveaux dies Sizzix.
Au programme : découpe de formes feuillages, coeurs et étiquettes !

Les différents éléments sont collés autour de ma photo, certains sont montés en 3D pour plus de volume.
Complétez avec des éclaboussures réalisées à l'encre en spray orange et des pastilles colorées.

Une jolie page de saison, n'est ce pas ?

Très bonne journée à vous !

Karine

Wednesday, 29 October 2014

More Circles Fun!


Yes that's right, I am once again using my blog to broadcast my ongoing obsession with the humble circle, In truth, I've had a pretty good response from you all in the past so I hope you will indulge me just a little more?

I'm also bringing my old friend the Decorative Strip Paper Rosettes Die along for the ride together with the Bigz XL Alphabet Die, Block Talk Capital which is never far from my grasp.

I have used two sets of Framelits circles dies imaginatively titled Circles and Circles#2. I combined the two sets as between them they offer me every size I will ever need. Just click on the highlighted links above to see the dies in question.

Materials wise I just dragged out scraps of decorative paper from my ever growing stash so I'm afraid that I can't provide anyone with descriptions or codes, it will be fine as long as you have a few festive papers dotted about the place.

The first thing I did was to die-cut the larger paper rosette from the blue patterned paper before sanding the edge to expose the white core of the card beneath after which I assembled my rosette by concertina folding it along the perforations.

Next, I die-cut a circle and folded it in half before placing the die back onto the folded circle in such a way that it forms a moustache shape when cut in my Big Shot. I then sanded the edges of the paper moustache before gently curling the tips.


Next, I die-cut a circle of cream card and a slightly larger circle of blue patterned card together with a tiny cream circle to form the nose. I then applied ink to create rosy cheeks and add some colour to the nose, I'm sure that we would all have a bit of colour in our cheeks if we got through a couple of billion glasses of sherry on Christmas eve?
I mounted the circle together with the rosette to form the face,hood trim, nose, beard and moustache. 
Next I die-cut a circle from patterned red card and used the same die to cut the circle in half, I then used the half in the shape of a crescent moon as the hood before adding a small blue die-cut bobble on the end.


With Santa sorted, it's time to create my sentiment. I die-cut the letter 'M' from green tartan card and I used the negative rather than the die-cut letter itself. I trimmed it to shape using scissors and repeated the process using a variety of shades of paper to create the word 'MERRY'. Finally, I die-cut the word 'Christmas' from gold card using one of the 17 different dies from the Thinlits Holiday Words: Script set which is new from Tim Holtz.

And here its is , the finished card. The stamps I used come from a festive set by the clever people at Darkroom Door  entitled 'Christmas Reindeer'

I do hope you like it?

If you are anywhere near Birmingham between 9-12th of November why not pop-along the the Hobbycrafts show at the NEC where I will be teaching Christmas themed mini workshops all day, everyday!!! I look forward to seeing you!


Glittering ornaments


Wednesday again and time to post yet another Christmas card. This week I went with a cool colour scheme and three stylish ornaments from Triplits Die Set 9PK - Ornaments.


I used two of the ornaments to diecut directly into the white cardstock that will go on top of everything. The diecut that is complete, I used as the third ornament for the card.


I bought some cheap glitter wrapping paper after Christmas last year with the specific intention to use it when making cards. It works so well and it is much cheaper than buying regular glitter paper. Here I've simply added the wrapping paper behind the negative spaces formed by the ornament as well as on top of the third ornament.


The Triplits Die Set 9PK - Ornaments comes with a small die with which you can make the metallic hanger for the ornaments which I of course did. I also used thread to make the ornaments look like they hang from the top of the card. As decoration for the ornaments I used three different small diecuts from Triplits Die Set 9PK - Ornaments and Triplits Die Set 14PK - Christmas Trees.

Supply list:
Sizzix Big Shot Starter Kit (Powder Blue & Teal)
Sizzix Accessory - Magnetic Platform for Wafer-Thin Dies
Triplits Die Set 9PK - Ornaments
Triplits Die Set 14PK - Christmas Trees
Cardstock (Papertrey Ink)
Silver cardstock
Thread
Wrapping paper
Foam adhesive

---o---

Så er det onsdag igen, og jeg har i denne uge lavet endnu et julekort i kølige farver og med fancy julekugler fra Triplits Die Set 9PK - Ornaments.
 
Jeg brugte to af kuglerne til at udstanse direkte i det hvide karton, der skal blive til kortets øverste lag. Den ene af de to udstansede kugler blev så til den tredje, der sidder monteret på 3d-puder på kortet.
 
Sidste år efter jul købte jeg noget billigt glimmer-indpakningspapir med det formål, at jeg ville bruge det, når jeg laver kort. Det virker rigtig godt, og så var det en del billigere, end rigtigt glimmerpapir er. Her har jeg klistret noget af indpakningspapiret bag de negative udstansninger samt ovenpå den sidste af julekuglerne.
 
Triplits Die Set 14PK - Christmas Trees kommer med en lille die, som kan lave de små metaldimser, der sidder på toppen af julekugler, hvilket jeg naturligvis gjorde. Med lidt snor fik jeg det til at se ud som om kuglerne hænger fra toppen af kortet. Jeg dekorerede kuglerne med små udstansninger fra Triplits Die Set 9PK - Ornaments og Triplits Die Set 14PK - Christmas Trees.

Flowers


Other products:
Cardboard, Pion Design and Prima marketing papers, Distress Paint; Peeled Paint
gesso, Memory Box stencil, Bo Bunny stamp; Stitches, Kaiser Craft Stamps; Tiny Dot, black ink

Cut the cardboad to size 10 cm × 14 cm and apply gesso, allow to dry. Paint with Distress Paint and allow to dry. After that make the ornament using your stencil and gesso, when dried stamp the dots and edges.
Cut the wire, flowers and borders using Sizzix dies and place all together like picture above.

Happy crafting, Minna

*   *    *    *

Moi, tein tällaisen mixed media kukkakortin tällä kertaa:)

Sizzix tarvikkeet:
Sizzix Big Shot Machine 657900
Sizzix Textured Impressions Embossing Folders 2PK - Hexagons & Chevrons Set 659744
Sizzix Thinlits Die Set 9PK - Rondeaux 659706
Sizzix Thinlits Die Set 3PK - Overall Patterns 659758
Sizzix Bigz Die - Floressa 659708
Sizzix Thinlits Die Set 7PK - Borders 659200
Sizzix Thinlits Die Set 14PK - Flowers Intricate 659975
 
Muut tarvikkeet:
kartonkia, Pion Design ja Prima Marketing paperit, Distress Paint; Peeled Paint, gesso, Memory Boxin sabluuns, Bo Bunny leima "Stitches" ja Kaiser Craft leima "Tiny Dot", muste.
 
Leikkaa kartonki kokoon 10 cm × 14 cm ja levitä gessoa siihen, anna kuivua. Maalaa pohjaan Peeled Paintilä ja anna kuivua. Tee kuviot sabluunalla ja gessolla. Kun tämä on kuivunut leimaa pisteet ja ompeleet korttiin.Lopuksi leikkaa verkko, kukat ja reunat Sizzixin stansseilla ja asettele kuten kuvassa.
 
Mukavaa keskiviikkoa, Minna


Tuesday, 28 October 2014

Halloween in Tivoli


Hi everyone
Today i will show you a layout , Halloween in Tivoli Copenhagen i was there together with my grandchild and husbond, very nice visit
Items I have used:
Supply list:
Paper: BoBunny-Burnt Orange vintage-, Tim Holtz Collection -Menagerie 8x8-
Ink: distress ink- Peeled Paint-, Vintage Photo-
Spider and Spider webs, ribbon
 
Thanks for stopping by, wish you a great and creativ week
 Pia
Hej alle
I dag vil jeg vise et layout fra vores tur i Tivoli til Halloween en dejlig tur sammen med mit barnebarn og min mand, trods regnen som silede ned.
Sizzix dies jeg har brugt:
Andre materialer:
Papir: BoBunny-Burnt Orange vintage-, Tim Holtz Collection -Menagerie 8x8-
Ink: distress ink- Peeled Paint-, Vintage Photo-
edderkop og edderkoppespind og bånd
Tak fordi du kiggede forbi, ønsker dig en dejlig uge
Pia

A bit of Spring in Autumn with Lilith

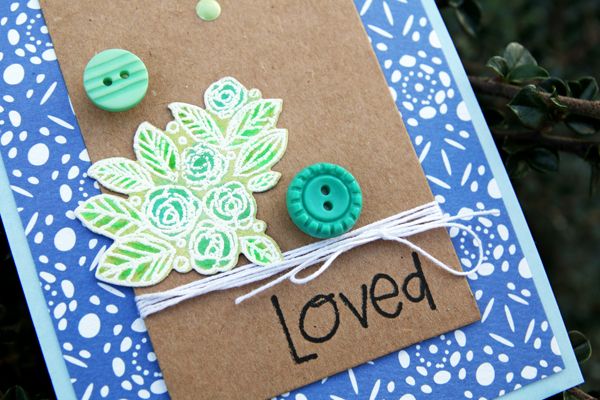
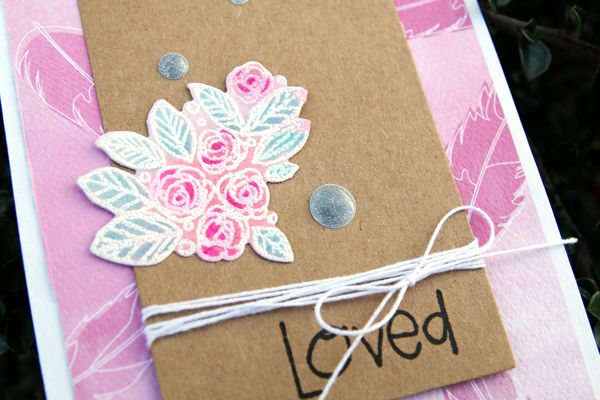
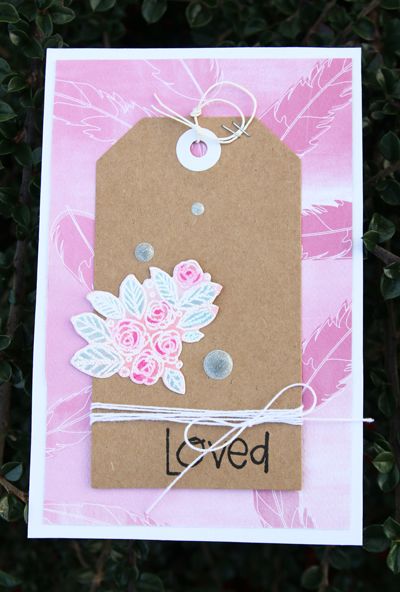
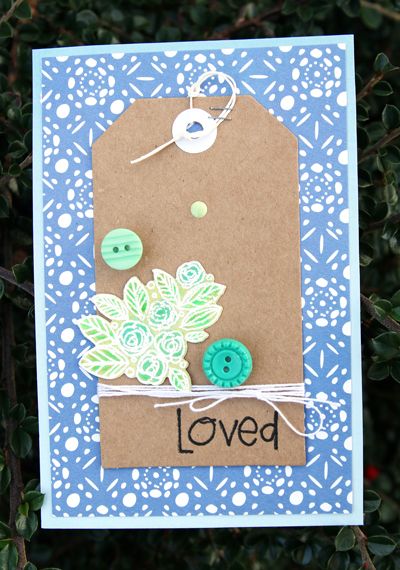
Autumn has settled in and the crisp air and warm colours have taken over the the country side. I love autumn but I still hunger for a tiny bit of spring. The Sizzix Framelits Die Set 8PK with Stamps Beautiful You, was just the product I needed for this easy card project that brings a bit of spring along with it.


I stamped one of the flower images onto some watercolour paper, using versamark. I then sprinkled some white embossing powder onto it which I then heat embossed with my heat gun. I then took out some Distress Inks, stabilo pens and coloured the flowers and leaves. 


The cards themselves were easy to put together. A 4" x 6" base with a 3.5"x5.5" piece of patterned paper. A kraft tag, a small white twine, some embellishments and a sentiment finish off the card. I love how easy the stamps are to use and that I can use any colour for any type of project. 

Supplies:
Sizzix Framelits Die Set 8PK with Stamps Beautiful You
Distress Inks, Stabilo 68 pens, 
Paper: Carta Bella,
Embellishments: Studio Calico Color Theory Buttons, Enamel dots, 
Ink: Versafin Black Onyx.
. Start text