I am really excited about my first collection of products for Sizzix, Everyday. It really is a dream come true. The collection is going to hit the crafts shops in the UK and the rest of Europe in the next few weeks!
So I will start by sharing this little project using the Old Labels dies and stamp set and one of the Notebook Covers texture impressions folder.
So I will start by sharing this little project using the Old Labels dies and stamp set and one of the Notebook Covers texture impressions folder.
One of the things it was essential for me when I was designing this collection was coordination, ie that as well as good stand alone products they would also work in combination with other products of the collection, specially coordinating with the embossing folders from the collection. Hopefully this project will show one of those coordinations.
For this project I am using a paper from the beautiful line, Sweet Afternoon by Teresa Collins (available in the UK by Personal Impressions stockists). I sue as the tin one of the ones I get from the coffee I drink.
To attach the paper to the tin can be tricky. For thinner papers I would use something like Ranger's Matte Medium, but since Teresa Collins' papers are thicker than regular paper I new it would be hard to attach the paper quickly. So I went for the red ultra tape from Stix2.
Put a strip of tape top, another, bottom and a couple in the middle. Then start to attach the paper use the bottom or top as guides.
And then attach the last flap.
To decorate the lid, I used the circle framelits. I first place them on the lid, so that I could be sure of the sizes, measuring is good for some, but I rather do it this way!
To die cut a frame with framelits there are two ways, one is to die cut with both framelits at the same time as I did in here, or the other alternative for slightly more accurate results for me is to die cut the inside first and then do the outer cut.
I stamp the smaller rectangle image on white smooth paper. Personally, I recommend using Memento or Versafine ink pads when stamping with clear stamps. Also I love to use the Tim Holtz acrylic blocks to stamp. Because they are thinner is easier to apply even pressure specially with solid or large stamps, and, as they come in a array of sizes, it means that you always have a block close to the stamp size.
Once stamped, you can place the matching framelit over the stamped image and securing it with low tack tape.
At the same time die cut a plain white label using the largest die.
Place the largest die cut label inside of the Notebook cover embossing folder and secure it with low tack tape.
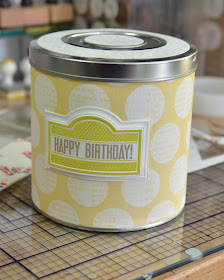
And this is what you get! I just love it!
Then emboss the stamped label.
As you can barely see in this photo, you can either emboss it or deboss it.
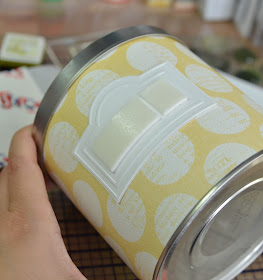
Then, I attached flat the larger label on the tin. I place some foam pads in the centre to attach the smaller label.
I used a rub ons to add the message, but you cut use one of your stamps for this. I like the simplicity of this tin, but I wanted to use the dots too.
I started by stamping loads of them on the white smooth card using different colours and the different circle stamps that come in the Old Labels die and stamps set.
And then I place them over the tin matching the dots of the papers.
And to finish it off I added a bow on top.


This tin is wonderful! Love how you altered it!
ReplyDelete