Thursday, 28 February 2013

Springlike origami box and card from Janna Werner.


Hello everyone, this is Janna. Today I am here to show you a card and Origami box that I decorated with some of my favorite Sizzix dies.


supply list:
paper: Stampin Up
cardstock: American Crafts, Stampin Up
stamps: Sizzix, Stampin Up
color/ink: Ranger Ink, Stampin Up
rhinestones: Kaisercraft
other: white and silver thread, glue


I am a huge fan of creating Origami boxes and I like to create matching cards as well - the perfect gift wrapping. I wanted this set to be in happy and vibrant colors - springlike, so I chose a white/yellow/green/blue/neutral color scheme.


I used the Sizzix Texture Fades Embossing Folders - Honey Comb (see supply list) to add more texture and depth to the card and the box as well. The chevron pattern on the heart is an embossing folder as well: Sizzix Textured Impressions Embossing Folders - Chevrons & Flourishes - I can never get enough of chevron ;) The banners come with matching stamps - you stamp the image onto a piece of paper and use the die to cut them out - easy, clean and beautiful.


Have a great and crafty day, everyone!
Janna

*****

Hallo ihr Lieben, hier ist Janna. Heute zeige ich euch eine Karte und Origami-Box, die ich mit einigen meiner liebsten Sizzix Dies hergestellt habe.

Materialliste:
Papier: Stampin Up
Cardstock: American Crafts, Stampin Up
Stamps: Sizzix, Stampin Up
Farbe/Tinte: Ranger Ink, Stampin Up
Glitzersteine: Kaisercraft
anderes: weißer und silberner Faden, Kleber
Ich bin ein großer Fan vom Herstellen von Origami-Boxen samt passender Karte - das ist einfach eine perfekete Geschenkverpackung. Dieses Set sollte frühlingshaft werden, in fröhlichen und vibrierenden Farben. Daher habe ich mich für ein Farbschema in weiß/gelb/grün/blau/neutral entschieden.
Um der Karte und Box mehr Struktur zu verleihen habe ich die Sizzix Texture Fades Embossing Folders - Honey Comb (siehe Material-Liste) verwendet. Das Chevron-Muster auf dem Herzen ist ebenfalls ein Embossing Folder: Sizzix Textured Impressions Embossing Folders - Chevrons & Flourishes - von Chevron kann ich nie genug bekommen ;) Die Banner kommen mit passenden Stempeln daher - einfach auf ein Stück Papier stempeln und mit der Die ausschneiden - einfach, sauber und wunderschön.

Habt einen schönen Tag!
Janna

3 Thank You Cards


Hello

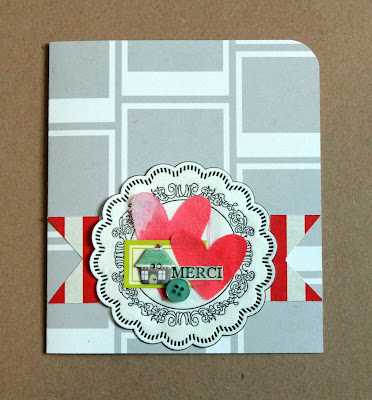
Today let me show you 3 "Thank You" cards made with paper scraps, cloth, spray inks and the two following Sizzix dies:

Big Shot 655268
Flower 3D-fringed 657115
Mini Hearts Set 657212
Base Tray 657007


Supply list:

Papers: Kési'art, Basic Grey, Studio Calico
Stickers: Kési'art
Brad & embellishments: My Mind's Eye
Washi Tape
Ribbon: American Crafts
Paper leaves: American Crafts
Stamp: Craft Origine
Ink: Black Versafine
Spray inks: Tattered Angels

Here are some easy-to-make cards. I’ve used patterned paper scraps folded in half. Only the front of the cards is decorated. We’ll keep the inside for writing our little note.

I sprayed pink Glimmer Mist on a white cloth piece. Don’t forget to shake your bottle before spraying for the glimmer to appear on your creation. It’s so much nicer that way!

Let it dry in the open or speed the drying time with the help of your heat gun.

Once the cloth is dry, create flowers and hearts with your dies and your Big Shot. Superimpose the flowers,add a brad and you’ll have fantastic handmade accents as a result!

Add a mini stamp and you’re done with your cards!


See you soon!

Have a nice day!

Karine


Bonjour

Aujourd'hui trois petites cartes de remerciement réalisées avec des chutes de papiers, du tissu, des encres en spray et deux dies Sizzix que voici :

Big Shot 655268
Flower 3D-fringed 657115
Mini Hearts Set 657212
Base Tray 657007

Matériel utilisé :

Papiers : Kési'art, Basic Grey, Studio Calico
Stickers : Kési'art
Brad et embellissements : My Mind's Eye
Washi Tape
Ruban : American Crafts
Feuilles en papier : American Crafts
Tampon : Craft Origine
Encre : Versafine noire
Encres en spray : Tattered Angels

Des cartes toutes simples réalisées avec des chutes de papiers imprimés que j'ai simplement plié en deux.
Seules les faces des cartes sont décorées, l'intérieur est dédié à l'écriture d'un petit mot.

J'ai utilisé un morceau de tissu blanc que j'ai vaporisé de Glimmer Mist rose. Bien penser à agiter les petites bouteilles afin que les paillettes apparaissent, c'est bien plus joli !

Laissez sécher ou activez le temps de séchage avec votre heat gun.

Une fois le tissu sec, passez les dies fleurs et coeurs à la Big Shot. Superposez ensuite les fleurs, ajoutez un brad pour obtenir de superbes embellissements faits-main !

Ajoutez un mini tampon et vos cartes sont terminées :)

A très vite

Bonne journée

Karine

Wednesday, 27 February 2013

Keep it Simple!


When people ask what I do, I sometimes half-jokingly reply 'I cut stuff out and stick it to other stuff'. I hope there is a bit more to it than that but the point is, I don't think about it to much. Different collections demand different approaches, techniques and materials. When I saw the new collection of dies designed by the good folks at Echo Park I knew instinctively how I wanted to use them.

Echo Park are based in California and they make some of my favourite paper collections, I particularly like their 6" x 6" paper pads and the colour pallets they chose are so inviting. I was really happy when I saw the new range of dies that they have designed together with Sizzix. They compliment their papers so well I couldn't wait to get started. If you want to know a bit more about the company follow this link

The dies are all Thinlits which means that they cut paper and card beautifully and offer exquisite detail to match. The dies come in a really cute plastic wallet which makes them easy to store away and keep tidy which is crucially important if your craft room is anything like mine!

Going back to the title of this blog, I wanted to use just the papers and dies, no fancy techniques or supplies with the exception of a few adhesive gems and a touch of Old Paper Distress Ink because that's how the collection spoke to me, basically, I just cut stuff out and stuck it to other stuff! easy when you have the right combination of dies and papers


For the card boat card I used:
  • Thinlits - Little Boy by Echo Park Paper Co. (659112)
  • Thinlits - For the Record by Echo Park Paper Co. (659108)
  • On the Edge Die - Scallops (656627)
  • 6" x 6" Paper Pad - Splash
  • 6" x 6" Paper Pad - Hello Summer


For the card star card I used:
  • Thinlits - Everyday Eclectic by Echo Park Paper Co. (659107)
  • 6" x 6" Paper Pad - Happy Days
  • 6" x 6" Paper Pad - Dots & Stripes (Metropolitan Collection)


For the card car card I used:
  • Thinlits - Little Boy by Echo Park Paper Co. (659112)
  • Thinlits - For the Record by Echo Park Paper Co. (659108)
  • 6" x 6" Paper Pad - Splash
  • 6" x 6" Paper Pad - Hello Summer


It seems like we're going back to winter at the moment - even though we are at the end of February, and because the month seems to have gone by so quickly I thought I'd make Churn Dash my block this week!
Before I get to the block I thought you might like a bit more information about the quilt I'm making - I have decided it will have 20 blocks and will have sashing between the blocks and one border.
I also decided that I would add some white fabric to the mix so that there is more variation.
I have started with about 1/2metre of most of the fabrics but more of the one that I will use for the sashing and border ( I hope this extra information is helpful), but of course you could always make each block with different colours.
For this block I used the Big Shot and the following dies - 657605 - 4" x 2" rectangle, 657609 - 4" square and, 657611 - 2" 1/2 square triangle.
I used yellow fabric for 1 square and 4 triangles, and pale jade for the central square and 4 triangles.
To start I joined the triangles to make the corners of the block


The corners are then added to two rectangles


and then add two rectangles to opposites sides of the square.
 
Join the 3 sets of pieces together.
 
And this completes the block.
 
Simple,
I'll be with you again in March, have a lovely week.
Angela


Happy Day Card


Hi everyone!


I love to color stamps, and then make cards with the resulting images. And I love when there are laced or scalloped edge around the picture. But sometimes, the picture does not fit in the selected die. And in the picture below I show what I do when I don’t want to cut anything from the picture.

Items used:
Stamp - Ktaftin' Kimmie
Cardstock - White 
Paper Glitz Design - Cashmere Dame
Different flowers
Crystals - Red
Twine
Liquide Pearls - White Opal

To create this card I also cut butterflies using Card Phrases Set #2, circle from white chipboard using Circles #4 die, little piece of lace using Vintage Lace die and banners using Tattered Banners die. 

Have a nice day!


Всем привет!


Я люблю раскрашивать штампы, а затем делать открытки с получившимися картинками. И я люблю, когда вокруг раскрашенной фигуры ажурные края. Но иногда, картинка не помещается в выбранную форму. И вот, что я делаю, когда не хочу ничего отрезать от картинки.

После вырезания я раскрасила картинку маркерами Copic.

Так же, для создания открытки я вырезала бабочек ножами из набора Card Phrases Set #2, круг из пивного картона (Circles #4 ), маленький кусочек кружева (Vintage Lace) и баннеры (Tattered Banners).

И вот такая открытка у меня получилась!

Материалы:
Big Shot Machine (655268)
Штамп - Ktaftin' Kimmie
Кардсток - белый
Бумага Glitz Design - Cashmere Dame
Различные цветы
Стразы - красные
Двуцветный шнур
Жидкий жемчуг - White Opal

Всем хорошего дня!


Tuesday, 26 February 2013

Notes Book


Hello everyone
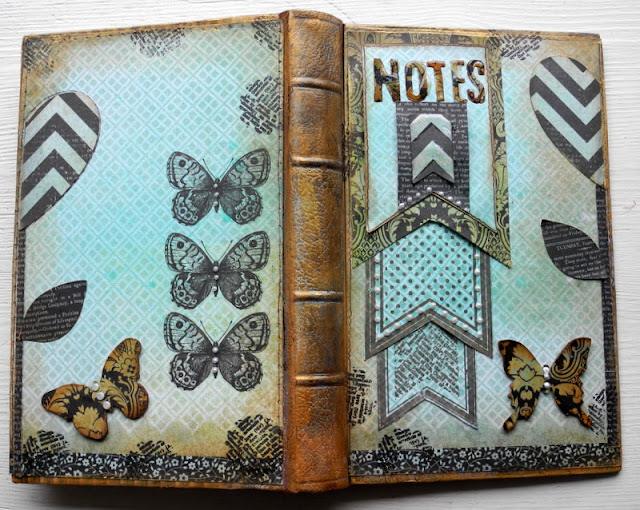
Today I will show you an altered book
 I have used  different sorts of Sizzix dies and a  cover from  a old book
Supply list:
Paper: Kaiser craft, 75 cent collection-Tuppence-
Cardstock
Ink: Distress ink, Vintage Photo, Hero Arts-soft Pool-
Viva: Inka Gold, pearl pen-Ice White-
Glossy accent
Glimmer Mist: Tattered Angels-Pearl and Turquise blue


How to make:
I have used a cover from an old book, decorated it with pattern paper. Cut out banners, letters and heart in patterned paper. Cut two butterflies in recycled cardboard and in patterned paper - glue it together. Ink around the edged with Inka Gold and spray glimmer mist over the cover and use glossy accent on the letters, banners and butterfly to give it a beautiful effect. Put the envelop inside the book and the first side in my notes book is decorated with stamps and glimmer mist.
Have a nice day. See you next Tuesday
Pia
Hej alle Sizzix fan
I dag vil jeg vise hvordan jeg har genbrugt omslaget på en gammel bog
Jeg har brugt forskellige Sizzix dies

Andre materialer:
Pair:KaiserCraft , 75 cent collection-Tuppence-
Karton, genbrugs
Ink: Distress ink, Vintage Photo, Hero Arts-soft Pool-
Viva: Inka Gold, pearl pen-Ice White-
Glossy accent
Glimmer Mist: Tattered Angels-Pearl and Turquise blue
Jeg ønsker dig en god dag. Vi ses næste tirsdag
Pia 

Saying THANK YOU!


Hello everyone!
Today is my last day of posting on this gorgeous blog, but you won't get rid of me that easily! :)
It's been an incredible year creating and blogging for Sizzix and I can't thank them enough for the trust and kindness - it's been fantastic working for them the last year!

But I won't stop using Sizzix products, of course, how can I?

You'll be able to find my layouts, mini albums and cards made with the latest Sizzix products on my blog : www.celinenavarro.com 

In the meantime, here are some cards I made during Stitches, where I was demoing for Sizzix  such a fun and great experience!

Here's a list of products I used for these cards : 


I hope you will like those! :)
Feel free to visit my blog for more Sizzix projects in the upcoming days, weeks and months :)

Thank you again for making this place such a happy and creative one :)

Yours,
Céline

Card with hidden tags...


Hi everybody...It's Tuesday again and today I have a card with hidden tags to show you.


Items used on this card:
Sizzix Big shot machine (655268) 
Sizzix Movers & Shapers Die - Styled Labels (656642) 
Sizzix Movers & Shapers Die - Ornamental (656641) 
Sizzix Bigz Die - Tiny Tabs & Tags(657188) 
Sizzix On the Edge Die - Brackets (656625) 
Sizzix Sizzlits Decorative Strip Die - Festive Greenery (657467)  
Sizzix Texture Fades Embossing Folders 2PK - Book Covers Set (657845)
Sizzix Movers & Shapers Die - Mini Silhouettes (658254) 
Sizzix Framelits Die Set 7PK w/Stamps - Flowers, Lovely (658291)

Pion Design -Alma's Sewing Room paper
Manila cardstock
Stamps - Stampers Anonymous Tim Holtz Collection
Buttons, Cheese Cloth, Seam Binding Ribbon
Inks - Distress ink Pads - Vintage Photo, Walnut Stain, Brushed Corduroy
Archival Ink - Jet Black

How to make this card:
1. Distress a piece of Manila cardstock with Distress ink Pads - Vintage Photo, Walnut Stain, Brushed Corduroy plus water.
2. Die cut Styled Labels, Mini Silhouettes and Tiny Tag.
3. Stamp image on the tiny tag....and stamp text on the other side of the tag. Distress the tag with Distress ink Pads - Vintage Photo, Walnut Stain.
4. Die cut Ornamental with some patterned paper, put the Styled Label on the top of Ornamental.
5. Die cut Bracket on the edge of the card.
6. Glue some cheese cloth on the card and glue the Ornamental with 3D foam to the card.
7. Decorate the card with flowers    

8. Distress Manila tag with Distress ink Pads - Vintage Photo, Walnut Stain, Brushed Corduroy plus water.
9. Emboss the tag with embossing folder. Stamp image and cut it out. Attach the image to tag with brads.


 Thanks for stopping by...see you next Tuesday :o))
Anne Kristine

Heisann. 
Det er allerede tirsdag og i dag har jeg et kort med skjulte tag å vise deg.

Produkter brukt på dette kortet:
    
Sizzix Big shot machine (655268) 
Sizzix Movers & Shapers Die - Styled Labels (656642) 
Sizzix Movers & Shapers Die - Ornamental (656641) 
Sizzix Bigz Die - Tiny Tabs & Tags(657188) 
Sizzix On the Edge Die - Brackets (656625) 
Sizzix Sizzlits Decorative Strip Die - Festive Greenery (657467)  
Sizzix Texture Fades Embossing Folders 2PK - Book Covers Set (657845)
Sizzix Movers & Shapers Die - Mini Silhouettes (658254) 
Sizzix Framelits Die Set 7PK w/Stamps - Flowers, Lovely (658291)

Mønsterark fra Pion Design -Alma's Sewing Room
Manila cardstock
Stempler - Stampers Anonymous Tim Holtz Collection
Knapper, osteklut, Seam Bindingbånd
Stempelputer - Distress ink Pads - Vintage Photo, Walnut Stain, Brushed Corduroy
Archival Ink - Jet Black

Beskrivelse:
1. Distress en bit Manila cardstock med Distress ink Pads - Vintage Photo, Walnut Stain, Brushed Corduroy pluss vann.
2. Stans ut Styled Labels, Mini Silhouettes og Tiny Tag.
3. Stemple motiv på den lille tag'en...og tekst på den andre siden.  Distress tag'en med Distress ink Pads - Vintage Photo, Walnut Stain.
4. Stans ut Ornamental med mønstret papir, fest Styled Label på toppen av Ornamental.
5. Stans ut Bracket på toppen av kortet.
6. Lim osteklut på selve kortet og lim Ornamental med 3D puter på kortet.
7. Dekorer kortet med blomster.     
8. Distress Manila tag med Distress ink Puter - Vintage Photo, Walnut Stain, Brushed Corduroy pluss vann
9. Emboss tag'en med embossing folder. Stemple hånden og klipp den ut.Sett hånden fast til tag'en med splittbinders.
Takk for at du stikker innom her og vi ses neste tirsdag.
Anne Kristine