Sunday, 30 September 2012

Everyday: masking stamping


Just because the Everyday sets come with stamps and dies doesn't mean that we always have to use them both for a project. However, the fact that they work together offers so many different possibilities like makes easy a good old stamping technique called masking.


Start by die cutting the Scalloped Flowers using sticky notes or Stix2 Masking sheet.

Stamp the first flower, this one will be in the forefront, so choose wisely! Then place cover the top the matching die cut sticky note.


Keep stamping and placing the right size die cut sticky note over, so that it looks something like on the right hand side. I recommend to lift the stickers to see where you are at, but dont forget to cover them up before doing a next lot of stampin.


Once a large area has been covered, I trimmed to fit in the front of card.


To add a focal point, I stamped the banner with the text on it twice, once with pink ink and the second with green. The thing with this stamps is that some of them work with two dies, so that you can layer as shown on the right.

I stamped the message which is from the Labels and Journalling clear stamps I designed for Personal Impressions. Then I die cut it using a circle framelit that is 1" (the one included on the Old Labels set is 1").
I used the smallest banner dies to create a kind of ribbon stripe under the circle.


And this is the finished card.

Friday, 28 September 2012

Sizzix Art Journey: Inspired by Klimt!

Hi friends!
Finding good inspiration is one of the most wonderful moments in my life: ideas start running through my head, new and new compositions are coming to my mind, my hands just can't wait to start! This happened when I was challenged to find "artistic inspiration" in paintings... and I decided to look through works of Gustav Klimt, one of my favorite artists!
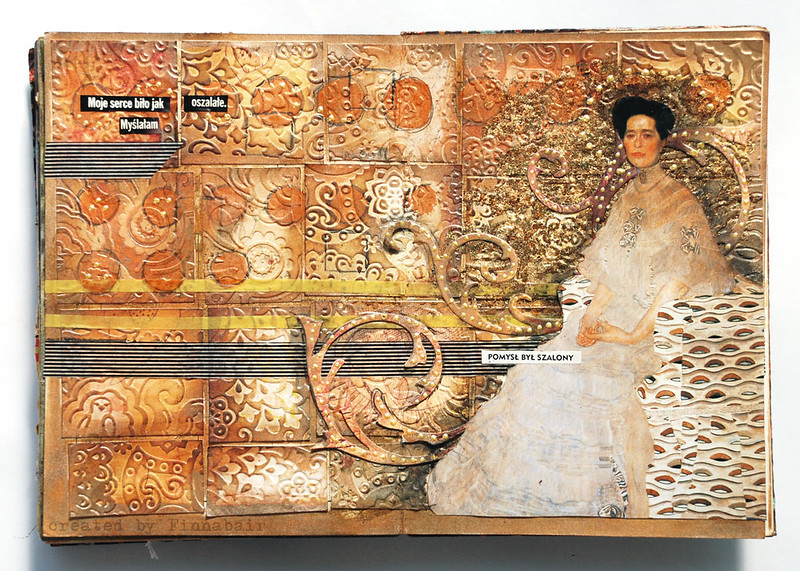
Inspired by Klimt - journal page


What I love the most about is art is focusing on details and texture - there is always a lot of amazing elements, focusing our attention. I tried to create a similar effect by myself using some mixed media techniques and I hope it got an interesting effect:)

I started my project with several pieces of patterned papers in shades of gold, dirty white and orange (7 Dots Studio - Domestic Goddess Collection) which were embossed with Sizzix Textured Impressions Embossing Folders - Bohemian Botanicals Set ( 657810) both including some Tim Holtz Metallic Distress Stain (Ranger) and without it - to get different embossed effects.


Then I glued all elements in the journal creating a background and I rubbed some more of Metallic Distress Stain (Tarnished Brass, Antiqued Bronze) in-between the papers to enhance the texture and 


My next step was Applying a bit of Tim Holtz Distress Ink (Vintage Photo) on the top of the paper - especially in the corners of it to make the embossed effect more visible and darken a bit the edges of the paper (ehm... yes, my ink pad  and tool are really, really dirty...)


Finally I used Tim Holtz Sizzix Bigz Die: Elegant Flourishes (656639) to cut out some extra elements for the composition. Looking through Klimt's paintings I found out not only he loved golden color, texture and detail but also floral swirls and flourishes... Just look at his "Tree of life"! My female character for this journal page was taken from Klimt's painting "Portrait of Fritza Reidler". 


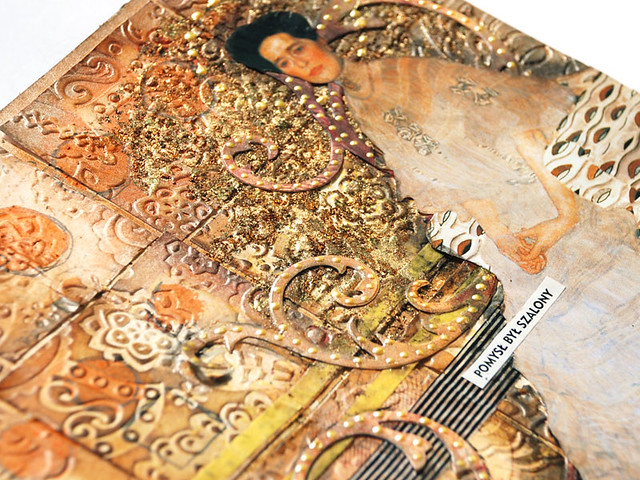
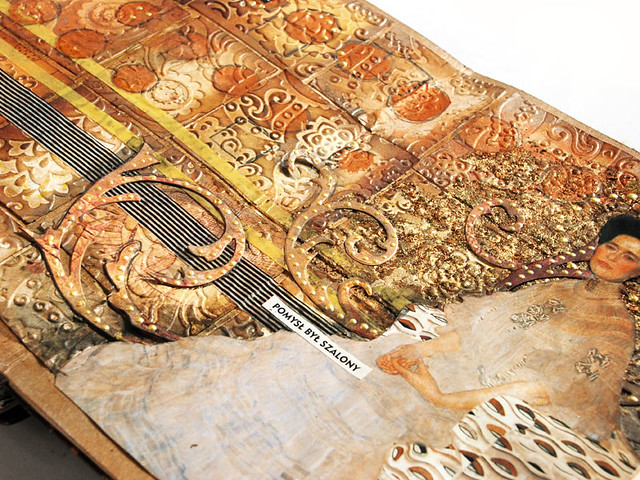
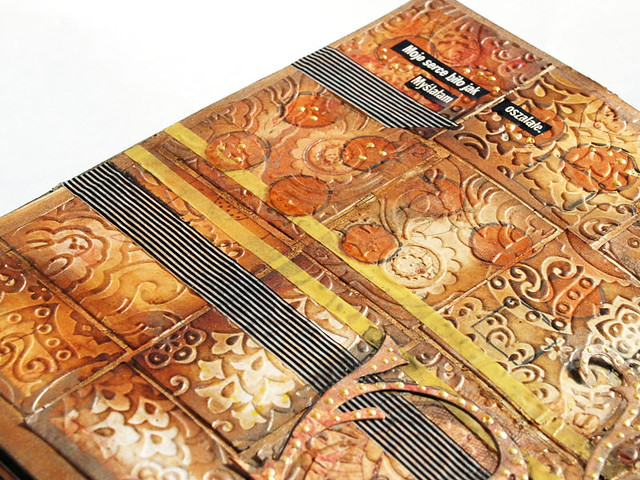
My last step was gluing everything together, adding some extra touches with Metallic Distress Stains and Liquid Pearls (Ranger), washi tapes and golden leaves. I wanted to be as close to Klimt's paintings as possible. Here are some details:
klimt det 1
klimt det 2
klimt det 3

I hope you enjoyed this little art journey today - I had loads of fun creating this project and I love the effect I got thanks to embossing folders, stain and ink!
I wish you all a wonderful, creative weekend - see you soon!
Finn


Oh Christmas Tree (Part 1)


The kids are back to school, there's a nip in the air, the trees are starting to put on there Autumn coat and the mince pies and big tins of Quality Street are stealthily creeping onto the supermarket shelves, all of which can only mean one thing...... Christmas is just around the corner.

I know from experience that many of you have already started your Christmas cards and some of you may have already finished so I thought I would start a little series of projects based around the theme of Christmas trees.

It would be so easy to pick a Christmas tree die off the shelf but I'm going to mix it up a bit and try to share a few techniques as I go along, all through the medium of Sizzix.

This week I am working with two dies from the Framelits Circles ,Scallop 8 die set (657552) and the Framelits Banners, Pennant 5 die set (657570) and a wonderful paper pack by My Mind's Eye called 12 Days of Christmas.

1. Choose your papers and dies, together with an A4 sheet of ivory cardstock. 2. Die cut a number of scallop circles using your Big Shot machine. 3. Take one of the die cut circles and place the Banner Framelits die onto it with the point toward the centre and cut a segment. you can cut at least 3 segments from each circle.


4. Ink around the edges of the segments to add a little definition using distress inks and an applicator. 5. Overlap the various segments to create trees of varying sizes. 6. Make the pop up centre, I cut mine by hand, but if you want instant results at the turn of a handle then the Bigz Die, Card, Scallop Circle 3-D (657130) by Karen Burniston is the one for you. It's so quick and easy to use and offers a multi platform base which can be adapted for any number of project ideas.


7. Once it is cut and creased use the On the Edge die Scallops (656627) to create a decorative edge. 8. Attach each of the assembled trees to the background. 9. Fold a blue base card and gently ink the edges before placing the pop up inside.

10. Use some of the decorative elements/phrases from the paper kit to add the finishing touches, throw in a few adhesive gems and there you have it...easy peasy!


Hexagons and Big Giveaway Day


Hi everyone!!!
Are you ready???? Today is a big big day, the day of the surprise I promised you!!!!

The Big Giveaway Day!!!!!

Some simple rules to play with us!!!!

  • Leave a comment here in this post telling me what is your favorite creation from mine and what you love about my creations. So take a look all around my creations on this blog (you can view them all here!) :)
  • The due date is 5th October 2012 midnight
  • We will have 5 lucky winners, chosen with the random number generation (random.org)
  • We'd love to achieve at least 100 comments... LOL soooooo help me!!!!!!

You can win:

  • 2 handmade kits made from me just for you from my creations, pillow or frame
  • a kit full of dies already cut from you
  • two sizzix dies (one for each winner)
This giveaway is a worldwide giveaway so tell about it to your friends, on Facebook, Instagram, Pinterest and Twitter!!!! 

Fot this big celebration I want to share with you two of my last creations just made for this huge occasion!!!!

Layout: I am a dreamer
Card : thank you card

Materials you need:


Simply play with the different sizes of the hexagons and mix them creating a lovely background for your picture! To give more attention to the photo I have used the 3d double side tape.


I made the same for the card, playing with different sizes of hexagons and having fun mixing them to create lovely embellishments! Adding some sequins, buttons and stamps. This is a thank you card that I want to dedicate to all of you follow me here on this blog! Thank you from the deep of my heart!!!!

Let's start to play right now! I want to send all my love with these prizes!!!!

Thursday, 27 September 2012

I love the Gingerbread man


I have to admit that I am becoming quite enthusiastic about Christmas, which is unusual this early in the year for me, but I blame it on having lots of Christmas fabrics all around me and maybe the drop in temperature.
Anyway the fact is that I have a new favourite die, which may change next week, but at the moment I'm thinking of how many different things I can make featuring this die. It's the Gingerbread man from the new Nordic Holidays range  (658178) - I think it's so cute!
 
Now as you can see I've just cut out a single man and he can be used to decorate a stocking, gift bag or a card.


But then you can also, with careful folding of the fabric, make a string of gingerbread men, which could be used to decorate a Santa sack, or a placemat.
I'm going to continue playing with this die so watch this space to see what else he becomes! Or of course I could get distracted and have a new favourite die by next week!!!!


“My Brother inspires me!" layout

Hi everyone!

Today I’ll show you a masculine layout starring my brother. The colours I used are green and blue and I introduced a touch of softness and femininity!

Here are the dies I used:

-Sizzix Textured Impressions Embossing Folders 2PK - Circle Frame & Sparkling Set 657715 
-Lace Scallop 657104 
-Sizzix Sizzlits Decorative Strip Die - Card Edges #2  657526 
-Sizzix Textured Impressions Embossing Folders 4PK - Free Fall Florals Set 657813 


1-                 I chose a contrasted background so that the pastel pattern papers I selected will stand out.

2-                 Cut a fancy border in a white cardstock and add some strips of pattern papers.


3-                 Then I used the die 657526 to cut some tabs that will be inserted around the main paper strip and on the upper side of my lay-out.
Add washi tape strips here and there.

4-                 The die 657813 is used as a rosette on the upper part of my lay-out. I created shades on it with chalks, for more contrast.

5-                 Use the die 657715 with a beige cardstock, and cut some little stars with a punch.
Add some turquoise shades on each star and glue them with 3D adhesive.
Add some wooden embellishments and you’re done!


See you next Thursday!


Karine


Supply list:

Papers: Crate Paper, Studio Calico
Alphabets & stickers: Echo Park
Cardstock: American Crafts
Brad: October Afternoon
Embellishments: Studio Calico
Stamps: Craft Origine, Studio Calico
Ink: Prima, black Versafine


Page " My Brother inspire me !"

Bonjour !

Aujourd'hui une page masculine sur mon frère avec des couleurs vert et bleu tout en gardant un soupçon de douceur et de féminité !

Voici la liste des dies utilisés :

-Sizzix Textured Impressions Embossing Folders 2PK - Circle Frame & Sparkling Set 657715 
-Lace Scallop 657104
-Sizzix Sizzlits Decorative Strip Die - Card Edges #2 657526 
-Sizzix Textured Impressions Embossing Folders 4PK - Free Fall Florals Set 657813 

1-J'ai choisi un fond de page suffisamment contrasté pour faire ressortir ma sélection d'imprimés pastels.

2-Commencez par découper dans du cardstock blanc une bordure fantaisie et rajoutez des bandes de  papiers imprimés.
  
3-J'ai ensuite utilisé le die 657526 pour découper des onglets que j'ai insuite inséré autour de ma bande de papier principale et mon haut de page.
Complétez avec des morceaux de Washi tape ici et là.

4-Le die 657813 est utilisé en haut de page comme une cocarde. Il est ombré avec des chalks pour plus de contrastes.

5-Utilisez le die 657715 sur un cardstock beige et découpez des petites étoiles à l'aide d'une perforatrice.
Ombrez en turquoise chacune d'entre elle et montez-les en 3D.
Rajoutez quelques embellissements en bois et votre page est terminée !

A jeudi prochain !

Karine


Matériel :

Papiers : Crate Paper, Studio Calico
Alphabets et autocollants : Echo Park
Cardstock : American Crafts
Brad : October Afternoon
Embellissements : Studio Calico
Tampons : Craft Origine, Studio Calico
Encre : Prima, Versafine noire

Wednesday, 26 September 2012

Simple 'Thanks' cards


Happy Wednesday everyone,

I really love making cards. Sometimes creating just one card takes me the whole evening: I spend hours on picking up matching patterned papers, colouring the stamped image, positioning and balancing the key elements on the card, and finishing the project with carefully selected embellishments. However, it may also happen that time is really running short and I need to create something in just a few minutes. Luckily making something ‘quick-and-easy’ can be just as much fun :).

For this card you can use basically any patterned paper you have in your stash. Just match the paper to the colours of your card base and die-cut letters. And I can assure you that this project is finished in less than half an hour!

Here’s a list of materials I used:
Start with making the window front panel: Cut a 14cm x 14cm square of patterned paper. Place the largest rectangle die on the patterned paper and trace the outline with a pen. Using a craft knife and a ruler follow the drawn line and cut a window on the patterned paper.


Take a piece of red cardstock, place the same rectangle die on the cardstock and run through BigShot. Adhere patterned paper on the red cardstock and trim the edges leaving a thin border around the edges.
 
Put a piece of red cardstock on ‘Thanks’ sentiment die and die-cut. The fun thing about this die is that you can use both the die-cut letters and the image negative. I decided to create two cards on the same go and used them both!


Attach window panel on the card front with 3D foam stickers. Glue die-cut sentiment in the middle and finish with a few dew drops on the upper and lower corners. Done!


Have an inspiring week!