Tuesday, 30 June 2015

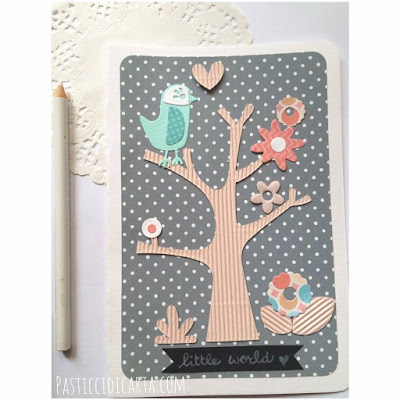
tree little card


Hi crafter!

Today I want to create a special tree, greetings card for a child that's in my heart, because the tree is a lot of us, of our life, of our roots.


And so among flowers, butterflies, clouds and animals, this little card has grown more and more.

And you ??
What are you waiting to create your favorite tree ??

NECESSARY:
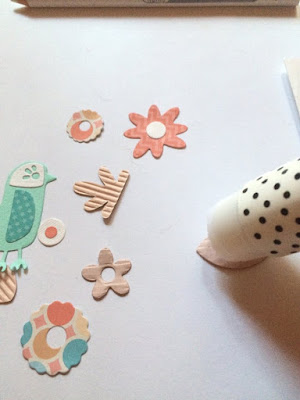
cardstock or paper scrap
scissors
stick glue
white pencil

See you next project!
Manuela
Pasticci di carta


*per i lettori italiani*


Ciao crafter!


Oggi ho voglia di creare un albero un po' speciale, un biglietto d'auguri per una bimba che ho nel cuore, perché l'albero rappresenta molto di noi, della nostra vita, delle nostre radici.

E così tra fiori, farfalle, nuvole e animali, questo biglietto è cresciuto piano piano.

E voi??
Che aspettate a creare il vostro albero preferito??

OCCORRENTE:
Cartoncini colorati o carta scrap
forbici
colla stick
matita bianca


arrivederci al prossimo progetto!
Manuela
Pasticci di carta

Tags on a Card

Hi Sizzix fans! 

Today I would like to show you a new card that I made using several beautiful Sizzix dies. I love creating both cards and tags and decided to use a combination of these two on today's card. 


Sizzix supplies:
Tim Holtz Postage Stamp Frame

The basis of my card was cut out with the beautiful Tim Holtz Postage Stamp Frame die. After that, I cut out two tags with the Framelits Tag Collection dies. I cut out one large tag from a pink sheet of paper. In the middle of this tag I added the word 'Hello', which was cut outwith the Thinlits Die Set Happiness Phrases . I put this tag inside a semi-transparent envelope, which I attached in the middle of my card. I also cut out a smaller tag from a purple sheet of paper and added that on top of the envelope. As you can see on the photo below, you can pull the tag out of the envelope as well.


On the left and right side of the card I added several diamonds, which I cut out with the Tim Holtz Thinlits Mixed Media Dies and slightly accentuated with brown ink. The pretty heart with branches on the bottom of my card was cut out with the Thinlits Die Set Phrase Thank You with Hearts dies.


I cut out one scalloped circle with  one of the dies from the Big Shot Plus Starter Kit and added that on top of a chipboard piece. I attached a regular circle on top of it, which I cut out with the Framelits Die Set Circles. I finally added a cherub on top of it.  


Thank you for stopping by!
Have a wonderful day!

In Dutch:
Hoi Sizzix fans! 

Vandaag wil ik graag een nieuwe kaart laten zien die ik met een paar mooie Sizzix stansen heb gemaakt. Ik vind het leuk om zowel kaarten als tags te maken en besloot dit keer een combinatie van beide te maken.

Sizzix benodigdheden:
Tim Holtz Postage Stamp Frame

De basis van mijn kaart heb ik uitgesneden met de mooie Tim Holtz Postage Stamp Frame stans. Daarna heb ik twee tags uitgestanst met de Framelits Tag Collection stansen. Ik heb een grote tag uitgestanst uit roze papier. In het midden van die tag heb ik het woord 'Hello' geplakt, dat ik heb uitgestanst met de Thinlits Die Set Happiness Phrases . Ik heb de tag in een semi-transparant envelopje gedaan, dat ik in het midden van mijn kaart heb geplakt. Ook heb ik een kleinere tag uitgestanst uit paars papier en deze heb ik op de envelop geplakt. Zoals je hieronder kunt zien, kun je de tag uit de envelop schuiven. 

Links en rechts op de kaart heb ik een aantal ruitjes geplakt, die ik heb uitgestanst met de Tim Holtz Thinlits Mixed Media Dies en heb geaccentueerd met bruine inkt. Het mooie hart met takjes onderaan op mijn kaart is gemaakt met de Thinlits Die Set Phrase Thank You with Hearts stansen.

Ik heb een cirkel met geschulpte randjes uitgestanst met de Big Shot Plus Starter Kit en heb dit op een chipboard figuur geplakt. Daarop heb ik een gewone cirkel geplakt, die is uitgestanst met de Framelits Die Set Circles. Tenslotte heb ik daarop een engel bevestigd. 

Dankjewel voor het langskomen!
Fijne dag!

Headband


Hi everybody!
Life isn’t just about scrap… So today I suggest to create your own headband thanks to Sizzix and the Big shot!

I cut the rosette die of Tim hotlz into a fabric to create a pretty pattern that will be paste on a simple headband.

Once the rose window was made, I pasted it on a round of felt to stiffen it a little, then I decorated its center with a brad covered of fabric.


I put all in place where I wanted it then I pasted another round of felt underneath, to maintain the rose window in position on the headband.


And here is a lovely present to customize as you wish! 


Have a good day and see you soon 


*************

Serre-tête de Cléo

Comme il n'y pas que le scrap dans la vie… je vous propose un petit serre-tête à créer vous même grâce à Sizzix et la Big shot!

J'ai utilisé le die Rosace de Tim hotlz dans du tissu pour créer un joli motif à coller sur un serre-tête tout simple

Un fois, la rosace découpée, je l'ai collé sur un rond de feutrine pour la rigidifier un peu, puis j'ai décoré son centre avec un brad recouvert de tissu.

J'ai positionné le tout à l'endroit souhaité sur le serre-tête puis j'ai recollé un rond de feutrine en dessous pour bien maintenir la rosace en place sur le serre-tête…

et voilà un joli à cadeau personnalisante à souhait!


Monday, 29 June 2015

Star Quilt: Part 4


Dies used: Half-Square Triangles, 4 1/2in Finished Square
                Square, 4in Finished (4 1/2in Unfinished)
                Star, Nested

There are 2 lessons that I really should have learnt from making my last quilt:

1. Multiply the amount of time expected to complete the quilting by 4

2. Buy 1 more reel of thread than required

Oh and maybe a third lesson should be added on:

3. Never say 'X should be finished in time for my next post'.

Sure enough the quilting has taken an enormous amount of time, largely because it's so dense to make sure the die-cut applique stars are well secured (I love those little stars so much alongside the big, pieced ones). I'm in complete awe of people who can quilt a substantial item in a day or so.


And of course my thread ran out within a whisker of the end, again. Ho hum.


Before basting and quilting a border was added all around the edge to increase the overall size to just larger than that of a single duvet so that when on the bed there won't be any duvet sticking out from underneath. The backing fabric is from Ikea, it was half price in the sale and although it is a heavier weight than is ideal, the larger apple print was too good to resist.


This quilt is for my son, Aidan he turned 8 last week and his birthday made a natural target deadline. Unfortunately it wasn't possible to meet that deadline but as things worked out his birthday became a bit of a non-event as he became ill with a throat infection the day before. As a result his trip to Legoland had to be cancelled and replaced with 2 visits to the doctor and he didn't manage a single mouthful of his own birthday cake. A re-run of his birthday once he's fully recovered is set to take place. In the meantime he can snuggle next to me under this quilt and watch films as I hand sew the binding down.

See you next time when this quilt should be...no, lesson 3, I won't say it.

Happy sewing!

Sunday, 28 June 2015

Summer gift box


Hello Sizzix friends!
If you've always dreamed of a summer party with a huge jar of lemonade, some blankets on the lawn, the sun and lots of good healthy food this gift box maybe is perfect for you.
I realized it dreaming of my ideal summer party and it would be a pretty favor for friends and family.


You need:
Cardstock gift box
Summer cardstock
Light blue cardstock
Glitter cardstock
Scissors
Adhesive dots
Ribbon
 
Arrange a gift box and fill it with a present.
Die cut the cardstocks (light blue and that with strawberries) using a die from the Sizzix Thinlits Die Set 9PK - Layering Frames.
Die cut the smallest star from the Sizzix Framelits Die Set 5PK - Stars using a silver glitter cardstock.
Paste the paper decorations on the gift box using adhesive dots.
Add a stripped ribbon on the box and make a knot.
Cut the ribbon.
 
The summer gift box is done, so easy and lovely!
Happy sunday


* Per i lettori italiani *
 
Buongiorno a tutti!
Se avete sempre sognato una festa estiva con una grande quantità di limonata, coperte sul prato, il sole e tanto buon cibo questa idea di pacchetto regalo può fare al caso vostro.
L'ho realizzata proprio pensato al mio party ideale ed è perfetta come piccola confezione da regalare ad amici e parenti.
 
Ho usato:
Scatola di cartoncino già pronta
Cartoncino estivo con fragole
Cartoncino azzurro
Cartoncino glitterato
Forbici
Punti adesivi
Nastro a righe
 
Comporre la scatola regalo e riempirla con un piccolo dono.
Fustellare i cartoncini (quello azzurro e quello con le fragole) usando una delle fustelle contenute nel Sizzix Thinlits Die Set 9PK - Layering Frames.
Fustellare il cartoncino glitterato argento usando la più piccola fustella presente nel Sizzix Framelits Die Set 5PK - Stars.
Attaccare le decorazioni di carta sulla scatola usando i punti biadesivi.
Aggiungere un nastro a righe, fare un nodo e tagliarlo in modo preciso.
 
La scatola regalo è fatta, pronta per essere regalata!
Buona domenica.

Upcycled Flower Lampshade


Today I thought I would share a lampshade upcycle using some pretty flower dies and fabric. This project involves no sewing and it's a super simple make! I started off with this basic plastic white lampshade.


Supplies:
·         Sizzix Big Shot Plus
·         Fabric
·         Lampshade
·         Mod Podge / Fabric Glue
·         Paintbrush


Step 1) Iron the fabric. Cut out a selection of fabric flowers using the botanical dies and the Sizzix Big Shot Plus machine. The amount you need will depend on the size of your lampshade, so cut and check as you go along.


Step 2)  Test out an arrangement of fabric flowers on the lampshade. Mine was plastic, so I painted the wrong side of the fabric with Mod Podge and adhered to the lampshade. If you
are using a fabric lampshade, you can use fabric glue.


Step 3) Continue to glue your fabric flowers around the lampshade. I arranged mine so they overlapped at some points. Smooth any creases in the fabric with your fingers before the glue dries.


Step 4) Leave your lampshade to dry and then attach to the lamp base.


You could try this with different fabrics and dies – it’s so simple that you can be super  
creative with the design!

Claire


"Hello" Cards by Gerry van Gent

Happy Sunday Sizzix friends!
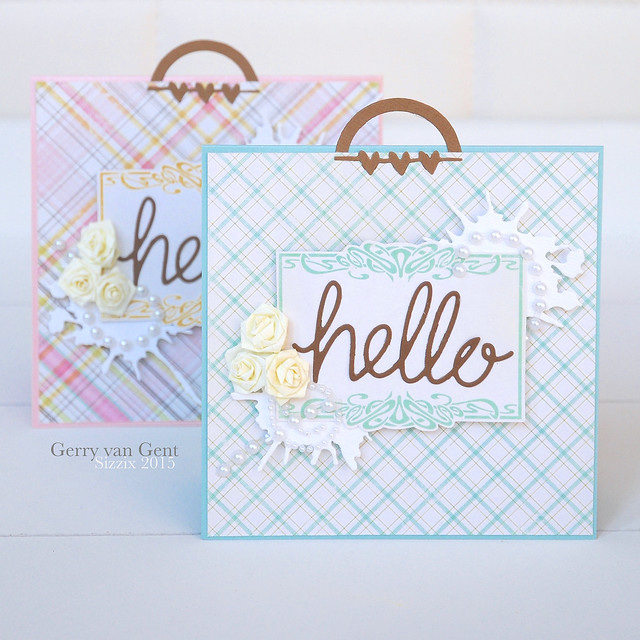
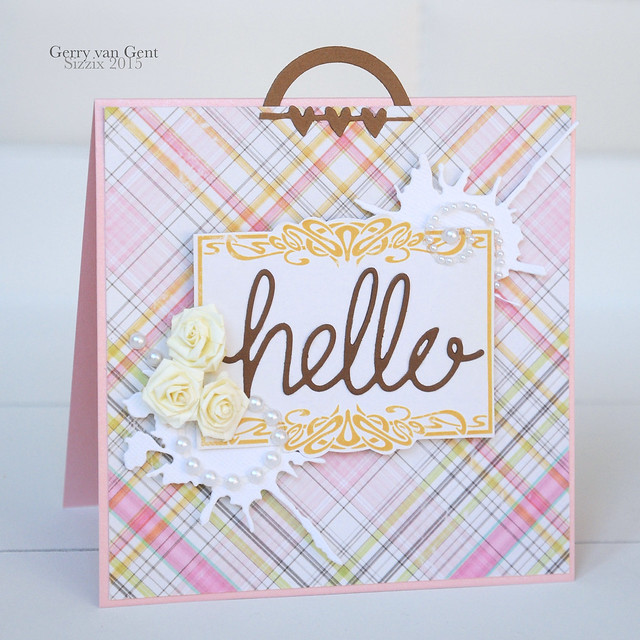
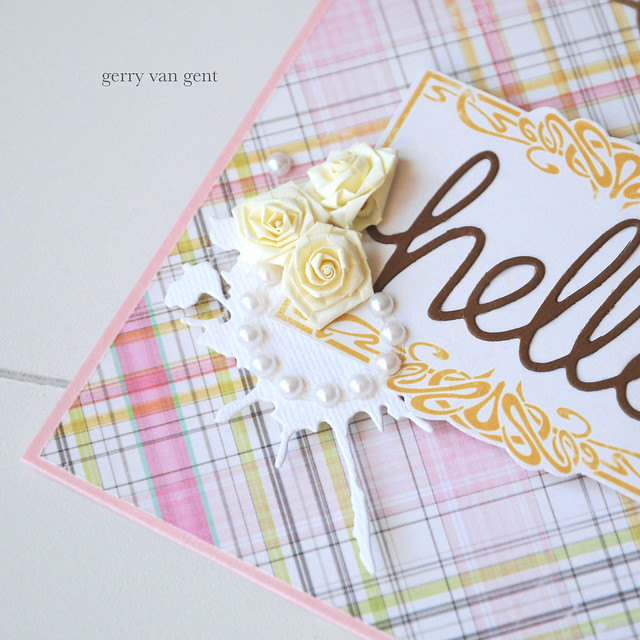
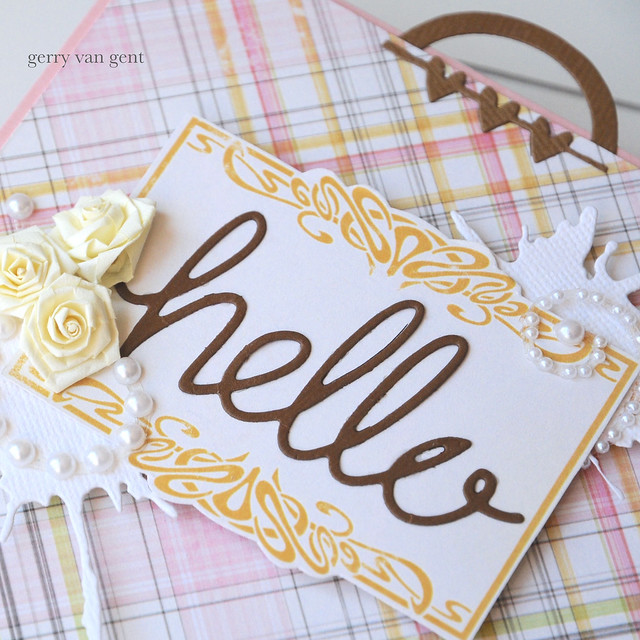
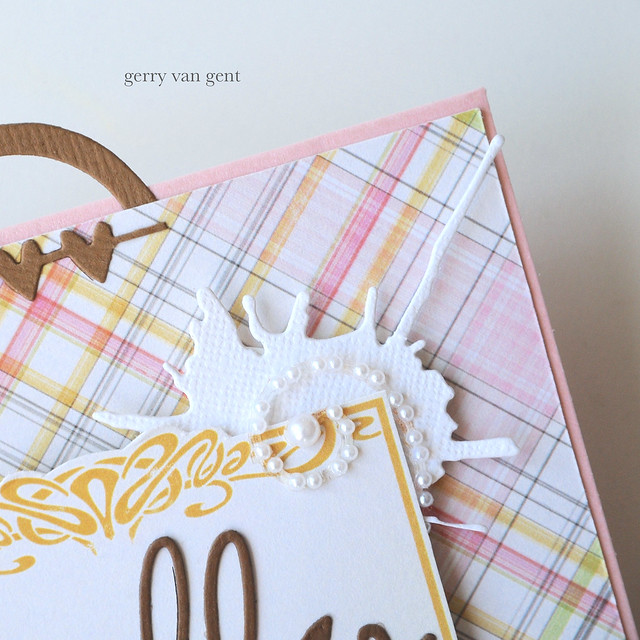
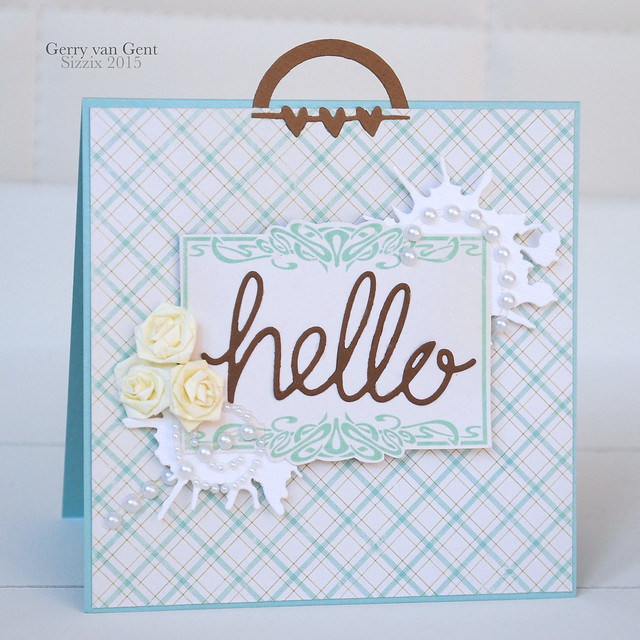
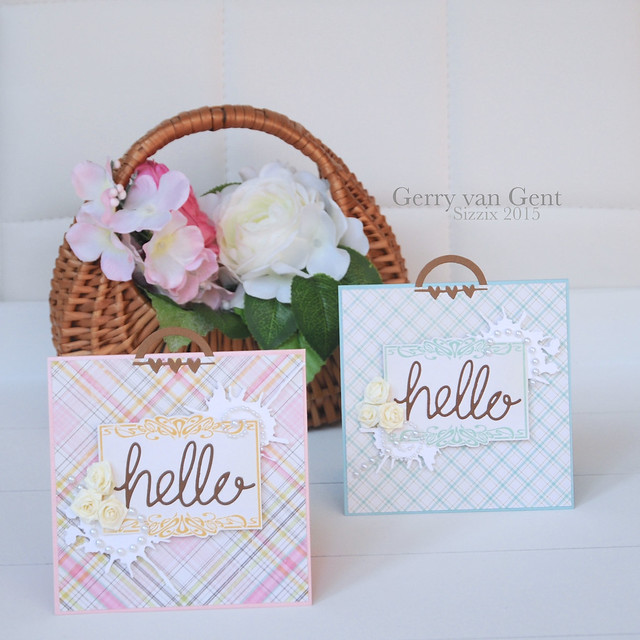
For my post today I created two cards which 
are perfect for a new-born baby boy/girl.
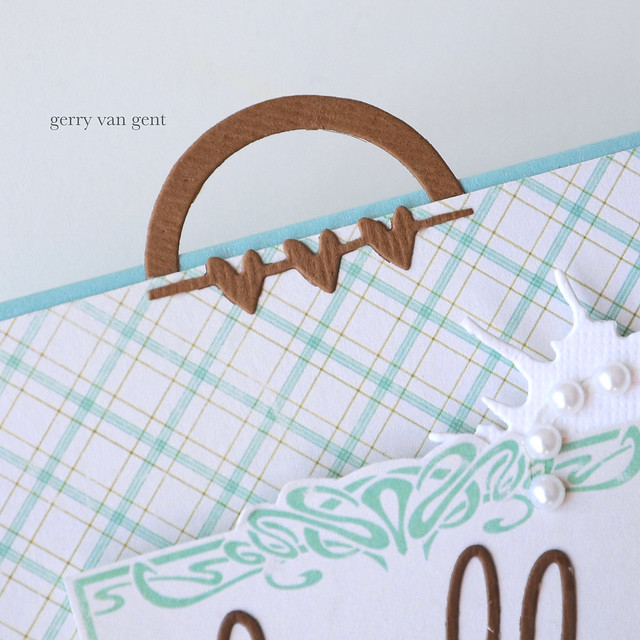
I called my cards -  "delivery bag cards"
because of the small "handle" I added on top :-)
3
Sizzix-rebrand-logo-low-res
660515 Sizzix Big Shot Plus Starter Kit
660804 Sizzix Thinlits Die Set Happiness Phrases
660222 Sizzix Thinlits Die Set Scribble & Splat
660474 Sizzix Thinlits Die Set Decorative Bubbles 
*         *        *
1

I decorated the Splat with pearls and mini paper roses.
1a

I adhered the Happiness Phrase "Hello" on top of a decorative label.
1c

1b

2

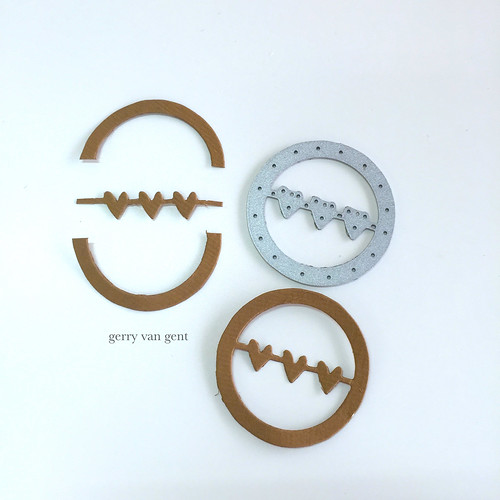
For the bag handle I use one of the Decorative Bubbles .
Firstly, I die cut the bubble with the hearts. 
After that I separated the circle into two parts.
how

 I used the trim of hearts to decorate the handle.
2a

I hope you enjoyed my cards today!
cards
OTHER PRODUCTS I USED:
The Scrap Cake Pattern papers
Prima Marketing Say it in Crystals
*          *          *

Have a creative Sunday!

Saturday, 27 June 2015

Thank You


Hello there,
sometimes I would like to say 'thank you' and I think a wonderful way to do this, is to sending a card.


The word 'Thanks' I've done with the watercolor technique.
Various stamp pads pressed on an acrylic block, sprayed with water and pressed the acrylic block on Watercolorpaper. Beautiful gradients arising therefrom and then I have punched he word 'Thanks'.


Inside the card I used colorful pink vellum.
The Backround ist made with my Big Shot and the Embossingfolder - Botany Decoration.
The wonderful butterflies are from Tim Holtz, SIZZIX BigZ Die - Butterfly Duo.

I hope you enjoy and wish you a lovely weekend!