Showing posts with label Birdhouse Ornament. Show all posts

Friday, 23 October 2015

Christmas Birdhouse


Happy Friday everyone, It's Anna with a new Sizzix project.
Today I wanted to show you a quick and easy Christmas ornament!
I've been wanting to try to make this cute birdhouse and yesterday I finally set down to just do that. I wanted something simple enough, but cute.
I made the ornament using the Sizzix Thinlits Plus Die Set 5PK - Box, Birdhouse (660872) and some dies for decoration.
Have you seen the Love Birds collection? The dies are a great size for Papercraft, also A4 size for Big Shot Plus.
 
christmas-birdhouse-sizzix-plus-ornament-by cafecreativo (1)
 
christmas-birdhouse-sizzix-plus-ornament-by cafecreativo (2)
 
Begin by cut out the birdhouse from gitter cardstock and patterned paper using the Big Shot Plus machine and the die Box, Birdhouse. This die set includes a birdhouse box with roof, a small heart and a sweet bird.
 
christmas-birdhouse-sizzix-plus-ornament-tutorial-by cafecreativo
 
In the front cut out the small heart to make the opening. Insert the twine in the middle of roof.
Fold along score lines to assemble.
Create a small hole below the opening in the front of the Birdhouse and adhere a small stick in the hole as a perch.
Embellish with a small red bird, twigs, “love” banner, small bell and ribbon bow.
 
christmas-birdhouse-sizzix-plus-ornament-by cafecreativo (3)
 
I hope you enjoyed this tutorial and are inspired to make some little houses of your own.
Happy crafting!
 
Items used:
Sizzix Big Shot Plus Machine Only (White & Gray) (660020)
Sizzix Thinlits Plus Die Set 5PK - Box, Birdhouse (660872)
Sizzix Thinlits Plus Die Set 6PK - Timeless Love Gift Box (660833)
Sizzix Thinlits Die Set 2PK - Love & Wishes #2 (660826)
patterned paper
gold glitter cardstock
cardstocks
small stick
twine
ribbon
harness bell
rhinestone
 

christmas-birdhouse-sizzix-plus-ornament-by cafecreativo (4)
 
**************************************
Flag_of_Italy
Buon Venerdì a tutti, Sono Anna con un nuovo progetto Sizzix per voi.

Oggi volevo mostrarvi una veloce e facile decorazione per Natale!
Da quando ho ricevuto la fustella, avevo voglia di provare a fare questa dolcissima Birdhouse e ieri finalmente mi sono messa all'opera, pensando già al Natale. Volevo qualcosa di abbastanza semplice, ma carino e con questa casetta è possibile ottenere tutto!
Ho creato dunque la struttura con la fustella Sizzix Thinlits Plus Die Set 5PK - Box, Birdhouse (660872) e altre fustelle per gli abbellimenti.
La fustella fa parte della collezione Love Birds. Le fustelle sono di grandi dimensioni, anche in formato A4 per la Big Shot Plus.

Creare la casetta è davvero semplice...
Iniziare tagliando la birdhouse dalla carta effetto legno e dal cartoncino glitter, utilizzando la Big Shot Plus e la fustella Thinlits Plus. Questo set di fustelle comprende una scatolina casetta con tetto, un cuoricino e un dolce uccellino.
Sul fronte della casa, fustellare il cuoricino per fare l'apertura. Inserire il cordoncino nel mezzo del tetto.
Piegare lungo le linee di cordonatura e assemblare il tutto.
Creare un forellino sotto il cuore, sul fronte della Birdhouse e incollare un pezzetto di stecchino nel foro.
Abbellire la casetta con un un uccellino rosso, ramoscelli, banner con la scritta “love”, campanellino e fiocco rosso. Finito!
 
Spero vi sia piaciuto questo tutorial e spero possa ispiravi a creare tante belle casette.
Buon lavoro!
 
Items used:
Sizzix Big Shot Plus Machine Only (White & Gray) (660020)
Sizzix Thinlits Plus Die Set 5PK - Box, Birdhouse (660872)
Sizzix Thinlits Plus Die Set 6PK - Timeless Love Gift Box (660833)
Sizzix Thinlits Die Set 2PK - Love & Wishes #2 (660826)
carta scrap effetto legno
cartoncino glitter oro
cartoncini vari
stecchino
twine
nastrino rosso
campanellino oro
strass

Friday, 18 April 2014

Easter Egg Birdhouse


Happy Friday everyone, It's Anna with a new Sizzix project.
Today I wanted to show you a quick and easy gift for Easter!
I'm making a few of these birdhouses. They're filled with little easter eggs: a nice gift for kids to make for Easter.

cafe creativo - big shot - easter box birdhouse - pasqua (1)

These colorful houses would be so fun also to hang on branches in a vase for an Easter or Spring Decoration.

cafe creativo - big shot - easter box birdhouse - pasqua (2)

Begin by cut out the birdhouses from cardstock and patterned paper using the Big Shot machine and the ScoreBoards XL Die - Birdhouse, 3-D. Assemble any house according to directions with glue.
I embellished the houses with some item to finish my birdhouses: for any house I used a branch cut out with Bigz Die - Garden Greens and a birdie, that I have stamp and cut out with Framelits Die Set 20PK w/Stamps - Birds & Tree.

cafe creativo - big shot - easter box birdhouse - pasqua (3)

I hope you enjoyed this projects. Thank you for the visit.
Happy Easter!!!
 
Items used:
cardstock
patterned papers
ink pad
glue

cafe creativo - big shot - easter box birdhouse - pasqua (4)

**************************************
Flag_of_Italy Per le amiche italiane! :)

Buongiorno a tutti, sono Anna con un nuovo progetto Sizzix.
Oggi volevo mostrarvi un regalo semplice e veloce per Pasqua!
Sto facendo alcune di queste casette per uccellini che riempirò di ovetti di cioccolato, come regalino per i bambini nel giorno Pasqua.
Queste casette colorate possono essere usate anche come decorazione primaverile, ad esempio appese su di un ramo in un vaso oppure potrebbero essere usate come segnaposti per il pranzo di Pasqua. Naturalmente possono diventare anche delle bomboniere, visto che questa stagione è piena di cerimonie!
Ho creato queste casette con la mia Big Shot, utilizzando la fustella XL Birdhouse 3D e altre fustelle per la decorazione.
Come fare: Iniziare tagliando le birdhouse dal cartoncino e dalla carta fantasia utilizzando appunto la ScoreBoards XL Die - Birdhouse, 3-D. Assemblare le casette secondo le istruzioni e incollare.
Io ho deciso di abbellire le casette con un rametto tagliato con la bellissima Bigz Die - Garden Greens e un tenero uccellino, che ho timbro e tagliato grazie al set di timbri e fustelle coordinate Framelits Die Set 20PK w/Stamps - Birds & Tree. Anche il "sentiment" che ho incollato sul tetto è stato tagliato con una delle numerose fustelle del set. Ecco fatto!

Spero vi sia piaciuto questo progetto. Grazie per il sostegno e per la visita :)
Buona Pasqua!!!
 
Materiali:
cartoncini tinta unita colori pastello
carte scrapbooking fantasia, colori pastello
inchiostro nero per timbri
colla

Saturday, 9 November 2013

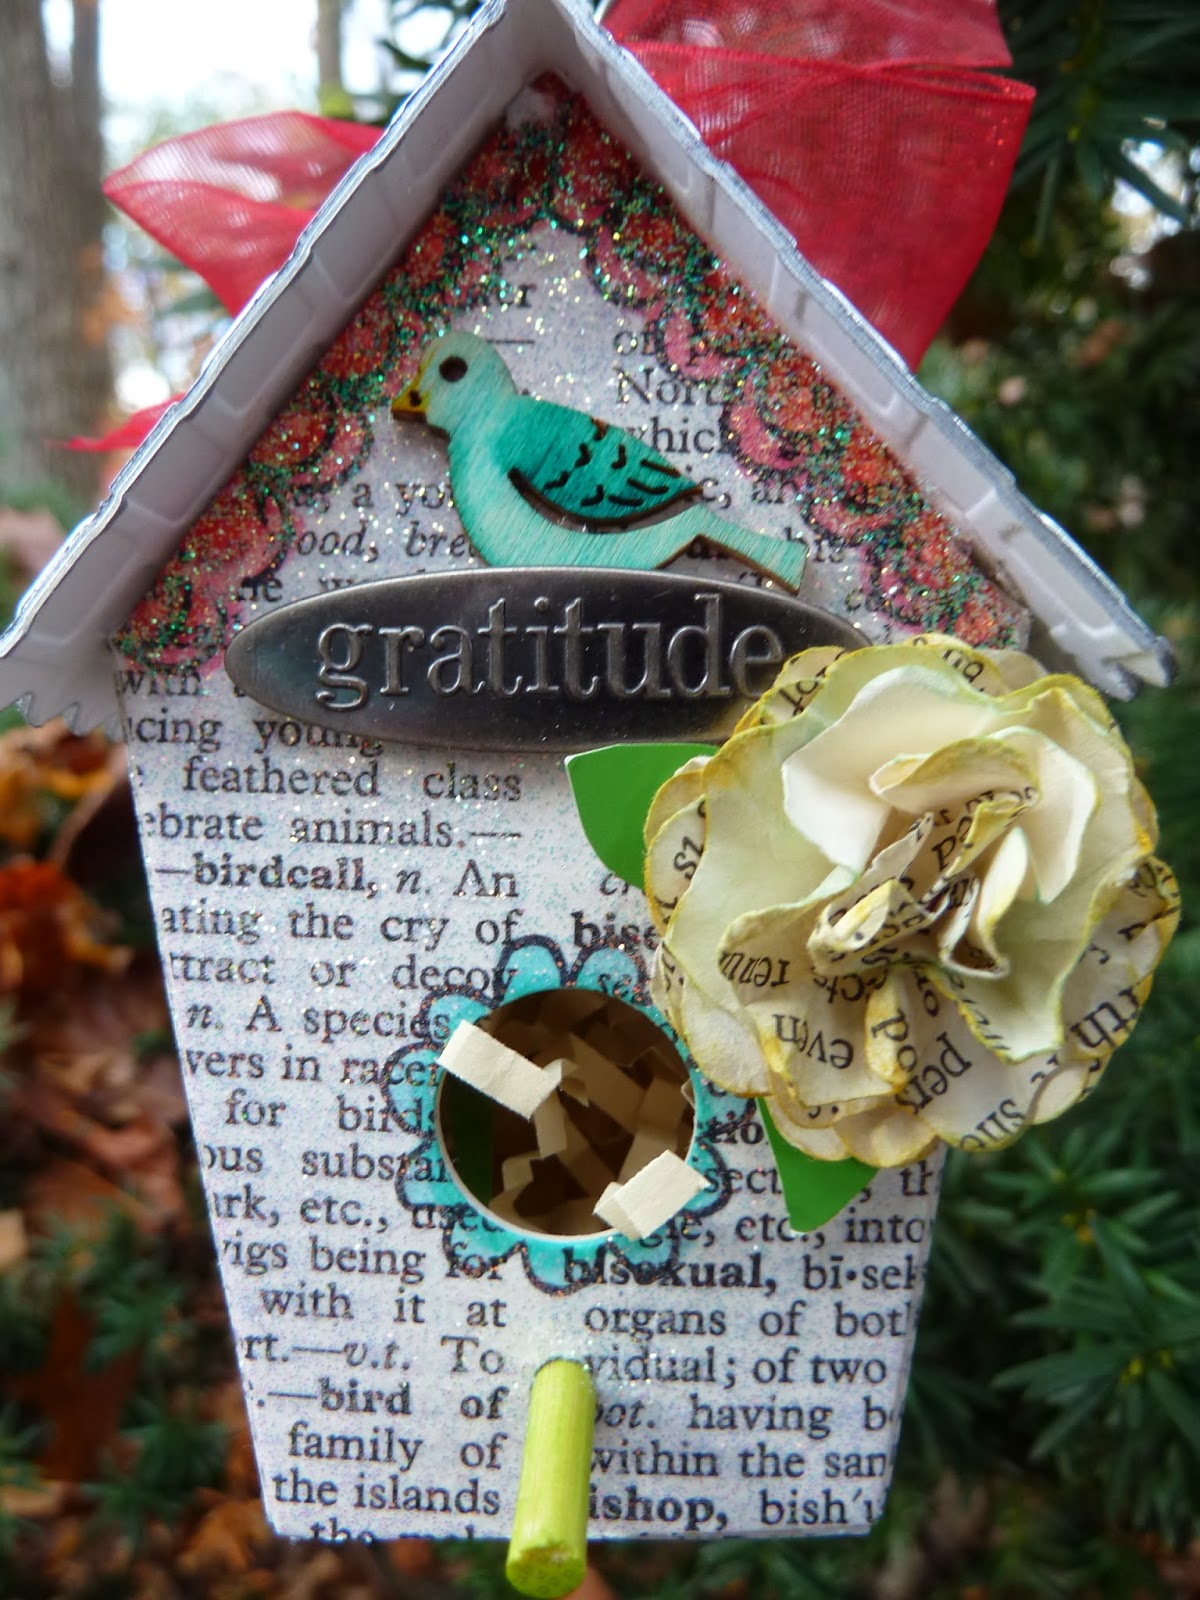
Birdhouse Ornament


Brrr....the weather is finally getting chilly. Before you know it, Christmas will be here!  I like to make a few handcrafted ornaments every year for my tree. Here's one for this season.

I used my ScoreBoard Birdhouse die to make this project from matboard. Crafting with thick material like this (up to 1/16") makes the projects you make so sturdy and able to hold up for years. I figure if I am going to the trouble of making something, I want it to last a while. Sizzix is the only company that makes dies specially designed to cut and score thick board like this. Have you tried a ScoreBoard die yet? Did you know you can also emboss matboard? Check out the fabulous metal roof!


Sizzix Supplies:
658451  Birdhouse, 3D
657114  Flower, Layers #9
658455  Basketweave and Honeycomb set
656491  Matboard pack- cream

Other Supplies:
Adhesive backed metal tape (I found this in a home improvement store in the US), text paper, bamboo skewer, metal embellishment, wooden bird from Prima, black permanent marker, Copic markers, crystal glitter, spray adhesive, glitter
  1. Coat a piece of matboard with spray adhesive and cover with dictionary paper. Lay the paper on the matboard so the direction of the text matches up with the front of the birdhouse.
  2. Remove adhesive backing from tape and place over matboard where the roof will be cut (rectangle with scalloped edges). TIP- Here's how I lay this out: place my paper and tape right side down on the die and lay the matboard piece on top, then cut) Check die for reference.
  3. Die cut birdhouse, bottom and roof. Add text and doodles with markers and color in.
  4. Coat Birdhouse and bottom with spray adhesive, then sprinkle on a layer of glitter, smoothing over with your fingers to make sure all areas are covered.
  5. Emboss roof with Basketweave embossing folder. Isn't this cool?


  6. Use markers to color wooden bird. 
  7. Cut a piece of bamboo skewer to 1 1/2" and color with ink. Punch a hole below the open circle on the birdhouse and insert the skewer.

     
  8. Die cut 6-8 layers of the smallest flower on the die. Punch a hole in the center and secure all layers with a brad. Scrunch and ink petals. Cut leaves and glue under flower.
  9. Place embellishments on birdhouse and secure with glue.
  10. Punch a hole in the middle of the birdhouse roof and insert a wire hanger. Twist the wire around a pencil for a fun effect, then bend into a hanger shape.


  11. Add glue or strong double stick tape to the two tabs on top of the birdhouse and press roof into place.
  12. Hang on your Christmas tree!

Thanks for stopping by- see you next time...