Sunday, 5 July 2015

Happy Summer Pillow Box


Good afternoon Sizzix Friends!
Today I'd like to share with you a new pretty gift package idea.
I decided to use two colours perfect for summer: neon yellow and light teal.
They are so wonderful mixing together!

Let's start!


You need:
Sizzix Accessory - Premium Crease Pad, Extended (656159) (I've the Extended size but Stardard size is okay too!)
Neon yellow cardstock
Teal glitter cardstock
Double-sided tape
Scissors
Stripped ribbon
Alphabet stickers
Multi-sized hole punch
 
Die cut a start  from Sizzix Framelits Die Set 5PK - Stars using a neon yellow cardstock.
Die cut the pillow box using Sizzix Movers & Shapers L Die - Pillow Box w/LabelsSizzix Accessory - Premium Crease Pad, Extended and the same cardstock used before paying attention to the start position.
Cut a piece of teal glitter cardstock and fix it behind the star with some pieces of double-sided tape.
Arrenge the pillow box using double-sided tape.
Realize two hole on the box using the multi-sized hole punch and then close the box.
Take a white card and die cut the word Hello from Sizzix Thinlits Die Set 3PK - Happiness Phrases.
Add some stickers in order to compose the word Summer.
Cut a piece of neon yellow cardstock and fix it behind the card using the double-sided tape.
Realize a hole on the card with the multi-sized hole punch.
Add a stripped ribbon in the three hole (two on the box and one on the card).
Make a knot and a box.
Cut the excess of ribbon.
That's it!
Hope you enjoy it!
Happy Sunday!

Silvia


*Per i lettori italiani*
 
Buon pomeriggio!
Oggi vorrei condividere con voi una nuova idea di confezionamento.
Ho deciso di utilizzare due colori perfetti per l'estate: giallo fluo e ottanio chiaro.
Li trovo bellissimi abbinati tra loro.
 
Iniziamo subito!
 
Ho usato:
Sizzix Accessory - Premium Crease Pad, Extended (656159) (io ho la versione estesa ma quella di dimensioni Stardard va ugualmente bene!)
Cartoncino giallo neon
Cartoncino ottanio glitterato
Nastro biadesivo
Forbici
Nastro a righe ottanio e bianco
Perforatrice
Adesivi alfabeto
 
Fustellare una stella del Sizzix Framelits Die Set 5PK - Stars usando un cartoncino giallo neon.
Fustellare la scatola a busta usando Sizzix Movers & Shapers L Die - Pillow Box w/Labels , Sizzix Accessory - Premium Crease Pad, Extended e usando lo stesso cartoncino usato in precedenza facendo attenzione alla posizione della stella.
Tagliare un pezzo di cartoncino glitterato ottanio e fissarlo sul retro del ritaglio stella usando del nastro biadesivo.
Componete la scatola usando del nastro biadesivo.
Realizzare due buchi sulla scatola usando la perforatrice posizionata sul foto più grande e infine chiudere la scatola.
Prendere un biglietto di cartoncino e fustellare la scritta Hello presente nel Sizzix Thinlits Die Set 3PK - Happiness Phrases.
Aggiungere alcuni adesivi fino a comporre la parola Summer.
Tagliare un pezzo di cartoncino giallo neon nella stessa dimensione del biglietto bianco e posizionarlo sul retro fissandolo con il nastro biadesivo.
Realizzare un foto sul biglietto con la perforatrice.
Aggiungere alla scatola un nastro a righe inserendolo nei 3 buchi (due sulla scatola e uno sul biglietto).
Fare un nodo e infine un fiocco.
Tagliare l'eccesso di nastro.
Cosa ne pensate?
Semplice ma carino, no?!
Buona domenica!


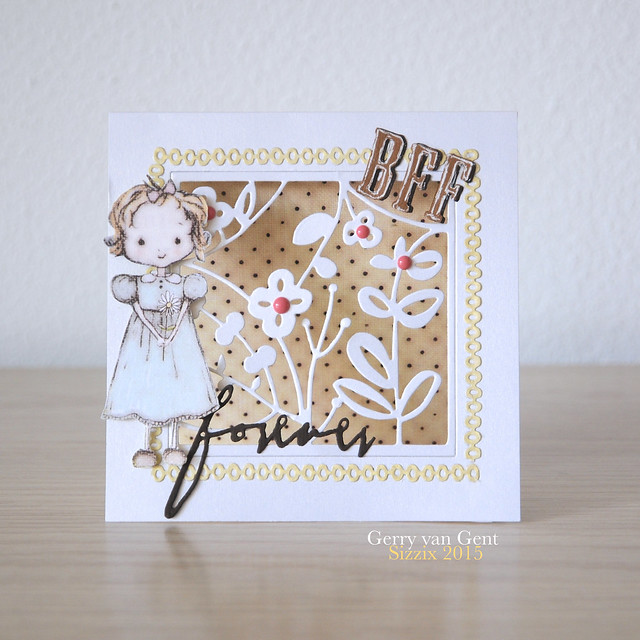
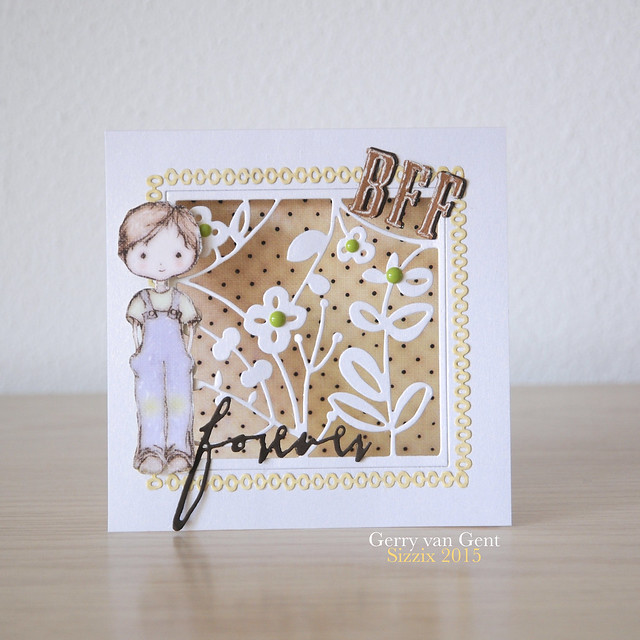
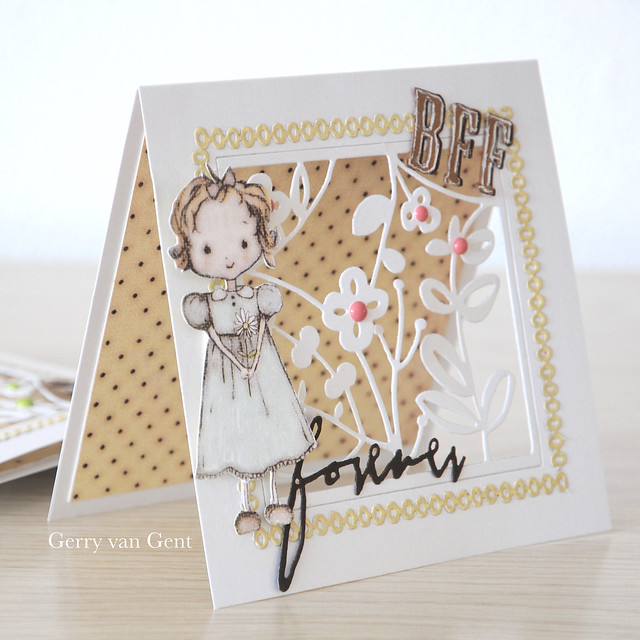
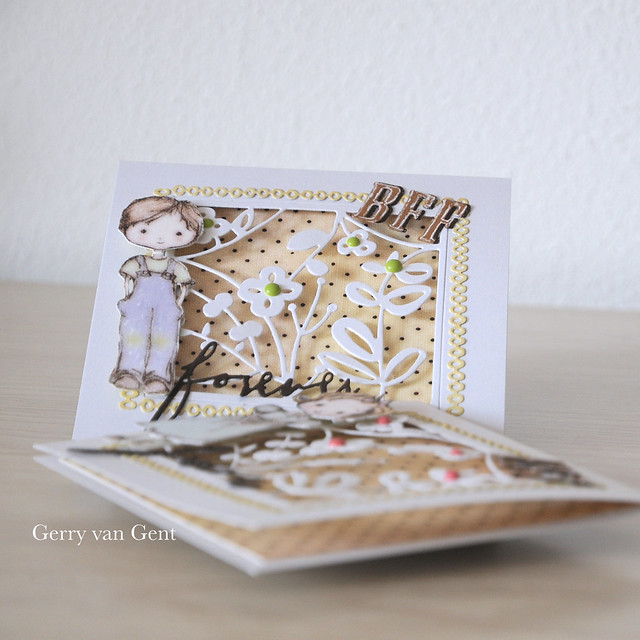
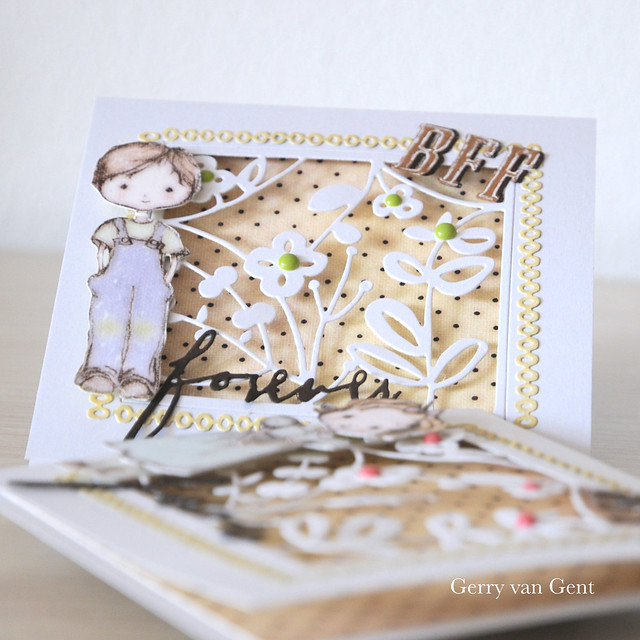
"BFF" Cards by Gerry van Gent

Hello Sizzix Friends

I hope you all enjoy a sunny and relaxing Sunday!
Here, in the Netherlands, we are so lucky to have a good start
to the season - the sun is shining and it feels like a real Summer :-)

For my post today I would like to share two cards I created for my
daughter's best friends. On the last school day she wanted to give
them a small present with a card... and this is where I got involved ;-)

Sizzix-rebrand-logo-low-res
660515 Sizzix Big Shot Plus Starter Kit
NEW 660434 Sizzix Thinlits Die Spring Garden #3 by Craft Asylum
660473 Sizzix Thinlits Die Set Decorative Trim #2 by Craft Asylum
660218 Sizzix Thinlits Die Set Handwritten Love by Tim Holtz 
658554 Sizzix Sizzlits Dec. Strip Alphabet Die Wanted  by Tim Holtz
*         *        *

Cards Size: 12cm x 12cm

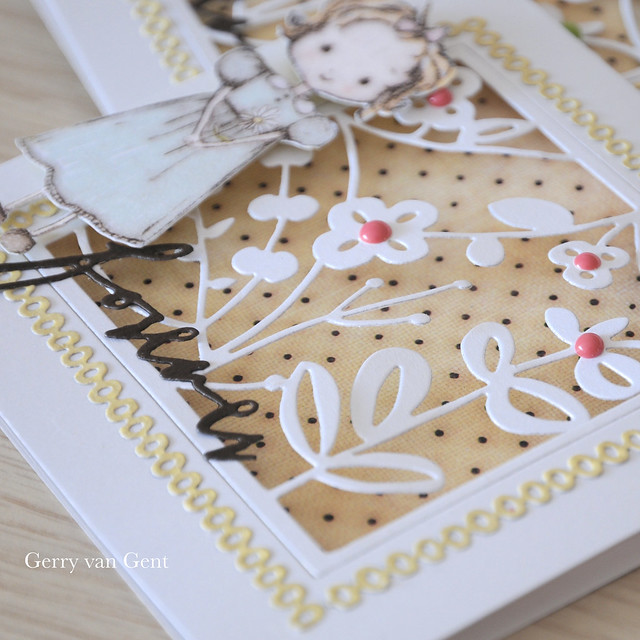
I placed the Spring Garden #3 die in the middle of the front
of the card and die cut it. After that I removed the excess leftover
cuts and attached back the Spring Garden #3 die to the window card.
Girl Bff

Boy Bff

I adhered a square pattern paper inside the card.
1

I decorated the die-cut flowers with sugar dots.
2

I used one of the Decorative Trim #2 dies by Craft Asylum 
to make a frame round the square.
3

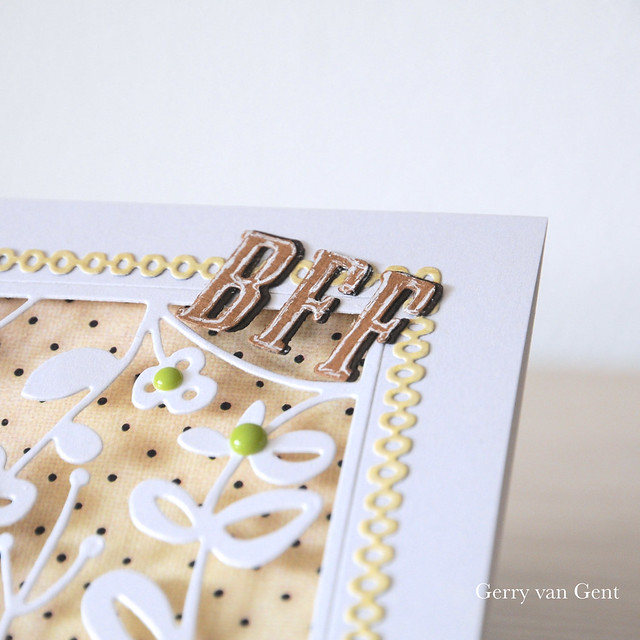
For the letters I used one of the alphabet dies from our Essentials Range -
The  Wanted   alphabet by Tim Holtz.
Each letter was die cut twice -  from light/dark brown cardstock.
The dark die-cut letter I used as shadow.
I gave a "painted" look by using a white pen.
5

4
OTHER PRODUCTS I USED:
Prima Marketing pattern paper; sugar dots
Gray cardstock - cards
Light/Dark brown cardstock - letters
*         *         *

Have a creative Sunday!

Chalkboard Flower Pots


I adore having fresh flowers in my home. Here in my home city of Cambridge, we have a wonderful flower market where I buy tulips in the Spring and peonies in the Summer. I think Peonies look so delicate and the petals almost paper like.


Today I want to share with you a simple DIY for some chalkboard flower pots - perfect for displaying blooms in your home. I started with my Big Shot Plus machine and the Bigz dies which are my favourite to use.

You will need:

  • Sizzix Big Shot Plus Starter Kit (includes Bigz flower die)
  • Flower pots or jars (I spray painted mine white)
  • Chalkboard paint
  • Heavy white card stock
  • Paintbrushes
  • Mod Podge
  • Chalk or chalkboard pen
  • Flowers!


I cut out flower shapes from the card stock using the Bigz die.


I then painted each flower shape with one coat of the chalkboard paint. Before painting, I like to tape the shapes to something so they don't move around.


Once the shapes were dry, I used the Mod Podge to adhere them to each flower pot. 


You can use chalk or chalkboard pens to write the name of the flowers or maybe even a message if you want to give the flower pot as a gift. You could even use this idea for herb pots as well. 


I love how simple these pots are and chalkboard paint is definitely one of my favourite craft supplies. 


What do you think? The roses are fake, so if you never remember to water flowers they are a great option and look realistic. 

I hope you have a wonderful Sunday full of flowery happiness!

Saturday, 4 July 2015

Summer Birds


Hi there,
today I made a summer decoration for the garden. I like it when something nice is blowing and waving in the trees. This summer I have chosen cute, little summer birds.

All you need is your favourite paper, strong cardboard, matching feathers, sequins and beads, a small branch, yarn and cord.
Of course, the most important thing is your Big Shot Plus and from the ...


The cardboard is glued on both sides with the birds, so the Mobile can rotate in all directions.


The birds are so lovely, that I decided to put also one of them onto my pencilbox.


Do you like it?

Have a nice weekend!

Birthday Set with new printable from Sizzix


Hey crafty people out there,
I hope you had a beautiful week? It´s reeeeeaaaally hot here in Germany the last days and it will be for the next week. But I can´t stop crafting? Are you with me? ;) 

On the Sizzix Facebook Site you can find a link to a new awesome set of free pattern to print at home. I printed them on Vellum and I loooooove how it turned out. All the little cute hearts, it´s so lovely. :) And be sure to follow Sizzix on Facebook to get the newest infos and a loooot of crafty inspirations. But ok, you wanna see what I made with this printable? Scroll down. ;)


We are invited to a birthday party tonight and I can´t wait to give this cute birthday set to the birthdaygirl. A card is an absolutely MUST for birthdays and because she will get a voucher, I made a fitting box with the Big Shot Plus Starter Kit.

The list of supplies:

Cardstock, sentiment stamps, needle and some twine, felt, vellum to print the pattern on


I love that the butterfly on the card could sit on the flower on the box. ;) I used felt for the flower and the butterfly to create a little more depth and structure on this birthday set.


I thought it´s a little bit boring just to glue the die cuted circles on the card, so I took some twine and a needle to add a cute element.


Do you like this set? And what about the Sizzix pattern? I think it´s perfect for so many reasons. I think I will make some wedding cards with it in the future.

Have a nice weekend everybody, xo Julia

-------------------------------------------------------

Hallo ihr Lieben,
mir ist so warm. Ich hoffe ihr verzeiht mir das ich heute keinen deutschen Text schreibe. *puh* Aber vielleicht reiche ich ihn nach. ;) Habt ein wundervolles Wochenende, xo Julia

Friday, 3 July 2015

Floral card 2


Hi readers!!!
Today post on Friday, sorry!!
I love flowers and today I propose you another version to make a floral card.
I used:
Sizzix Big Shot Plus Starter Kit 660515
Sizzix Framelits Die Set 8PK - Circles, Scallop
Sizzix Bigz Die-Flower Layers & Leaf #2
Cardstocks
Glue and hot glue
Scissors
Golden cardstock
Find the center and create some petals, curl outwards.
Die cut many petals using bigz included in Sizzix Big Shot Plus Starter Kit 660515.
Create roses pasting petals with hot glue.
Die cut three corners.
Assemble all. 

Have a nice weekend!!!!
-PER LETTORI ITALIANI-
Ciao a tutti! Oggi post di venerdƬ!
Sono stata poco bene e non ho potuto lavorare, mi scuso con tutti voi!!!
Come ben sapete amo i fiori e oggi vi propongo una nuova versione per una card floreale.
Per questo progetto ho usato:
Sizzix Big Shot Plus Starter Kit 660515
Sizzix Framelits Die Set 8PK - Circles, Scallop
Sizzix Bigz Die-Flower Layers & Leaf #2
Cartoncini
Colla e colla a caldo
Forbici
Fustellate un cerchio merlettato usando la fustella più grande fra quelle presenti in Sizzix Framelits Die Set 8PK - Circles, Scallop. Trovate il centro e tagliate dei petali, poi arricciateli verso l'esterno.
Fustellate dei petali rosa usando la Bigz presente nello Starter Kit. Realizzate le rose tridimensionali.
Fustellate le foglie usando Sizzix Bigz Die-Flower Layers & Leaf #2. Fustellate gli angolini con le fustelle adatte giĆ  presenti nel Kit della Big Shot Plus.
Assemblate il tutto come ho fatto io!!
Alla prossima!!!

Giovanna

3D-Dahlia on top of a Box....


Hi there,

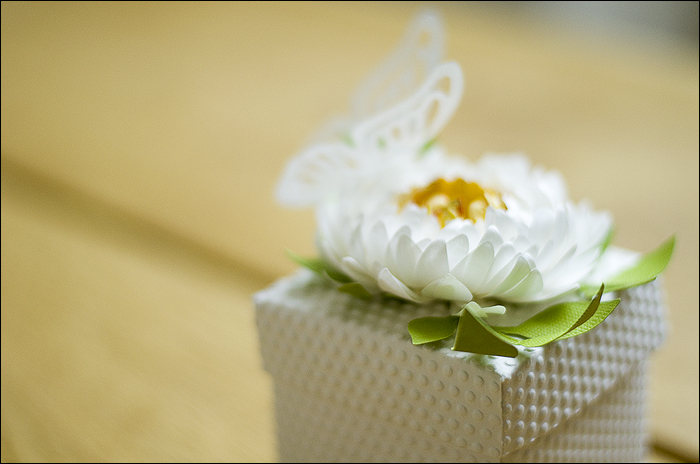
Today i want to show you how to make this 3-D- Dahlia... It is so easy.
But it looks so beautiful....and its made out of  a Daisy Die

All you for the Dahlia-Box is:
Sizzix Big Shot Plus Starter Kit (White & Gray)
(out of it the Box Thinlit and the Textured Impressions Plus Embossing Folder (Dots))
Sizzix Bigz Die - Flower, Daisies
Sizzix Bigz Die - Garden Greens


You need a lot of Daisy of each size....
and you need to roll up each petal - i took my fingernail for this.


I took yellow paper for the ovary...


And then i put them all on a brad....


Together with a green leave (Sizzix Bigz Die - Garden Greens)
i put it onto the box (I embossed the box with the Textured Impressions Plus Embossing Folder (Dots) out of the Big Shot Plus Starter Kit)...

finished.


have a great weekend, Stephanie

*************

Hallo Ihr Lieben,

heute möchte ich euch die Dahlienblüte zeigen, die ich aus lauter Gänseblümchen-Dies
gemacht habe...

Was ihr dafür braucht:
Sizzix Big Shot Plus Starter Kit (White & Gray)
(daraus das Box Thinlit und den Textured Impressions Plus Embossing Folder (Dots))
Sizzix Bigz Die - Flower, Daisies
Sizzix Bigz Die - Garden Greens


Ihr braucht jede Menge der Gänseblümchen von jeder Größe.
Die einzelnen Blütenblätter rollt ihr au - ich hab das gleich mit dem Fingernagel gemacht.
Für den Blütenstempel habe ich gelbes Papier benutzt.

Und dann alle auf ein  Brad gesteckt - zusammen mit etwas Grünzeug
Auf die Box geklebt (die habe ich vorher mit dem Embossing-Folder aus dem 
Big Shot Plus Starter Kit embossed) und fertig ist die Box.

Ich wünsch euch ein hübsches Wochenende, Steffi