Saturday, 10 January 2015

Blue and Red quilt in progress


Hi everyone! Here I go again with this quilt in progress. During this week I got to sew nine more blocks and just two more to finish.


I played with different combinations and it´s incredible how a block can change when little blocks are  sewn together. Some of them you can see the star clearly and in other it looks like to do a new block where the star disappear.
As you remember I just only used a die :


658322


Now it´s time to  cut out some vertical and horizontal sashing to the sides of the blocks.
Finally it will be a 3 x 4 quilt block.


I hope enjoy the beginning of the year with a nice and colorful quilt.
See  you next Saturday.
Love
Mercedes


.............................................................************************......................................................


¡Hola de nuevo a todo el mundo ! Aquí estoy de nuevo con este quilt en progreso. Durante esta semana conseguí hacer nueve bloques más y ya sólo me queda montar  un par de ellos para acabar.

La verdad es que disfruté jugando con las diferentes telas y combinándolas para diseñar los bloques. Es increíble cómo puede cambiar según dispongas los estampados. En algunos se aprecia claramente las estrellas y en otros se pierde pareciendo hacer otro bloque distinto.
Como recordarás de mi artículo anterior sólo he usado un único troquel para hacerlo:

Ahora ya me toca ponerme a colserlos con un borde alrededor de cada uno de los cuadrados. Al final será un quilt formado por 3x4 bloques.
Espero disfrutar este comienzo de año con un nuevo y alegre quilt.
Os veo el próximo sábado.
Cariños
Mercedes

Friday, 9 January 2015

How to decorate your Planner


Hello! It's Anna here to share some ideas using Sizzix products.

Over the years, I have had tons of questions relating to how I keep myself, my blog, my business organized. And the truth is, with lots of organizing! I am one of those old fashioned types. I am still using a “paper” planner.
So, if you are a fans of paper planner like me, here are a little tutorial to make your planner looks more attractive and fun to use.
I recently created a planner using scrapbooking supplies and my new fabulous Sizzix dies. This is a mini planner to carry in my purse. Then I would make one for my desk.

cafe creativo - Anna Drai - sizzix big shot - Mini album - mini day planner (1)

I “recycled” corrugated cardboard to create the cover. A rectangle of white paper is embossed with the help of the Big Shot machine then glued above the cover. If you want let a few drops of color.

cafe creativo - Anna Drai - sizzix big shot - Mini album - mini day planner - tutorial

I cut out my elements for the composition: a yellow stripe banner, a vellum tag, woman symbol, heart, word “life”... et voilà!

cafe creativo - Anna Drai - sizzix big shot - Mini album - mini day planner (2)

Are you planning to plan in 2015?
Happy New Year! And happy documenting!

Thanks so much for visiting me today
 
Items used:
corrugated cardboard
patterned papers
cardstocks
hinged rings
planner
  cafe creativo - Anna Drai - sizzix big shot - Mini album - mini day planner (3)

**************************************
Flag_of_Italy
Per le amiche italiane! :)

Ciao, sono Anna e sono qui per condividere alcune idee utilizzando i prodotti Sizzix.

Sapete bene che per coltivare gli hobby creativi, al di fuori del proprio lavoro, ed aggiornare costantemente un blog, ci vuole un sacco di organizzazione! Per quanto mi aiutano molto computer e smartphone, io sono ancora legata alle agende di “carta”.
Quindi, se siete anche voi fan di agende e taccuini “in vecchio stile”, come me, ecco un piccolo tutorial per personalizzare la vostra agendina, renderla più simpatica e divertente da usare.
Recentemente, infatti, ho creato un planner utilizzando materiali scrap ed alcune nuove bellissime fustelle Sizzix. Si tratta di un mini planner da tenere nella mia borsetta, ma poi mi piacerebbe farne uno anche per la mia scrivania... staremo a vedere.
Intanto vi spiego come ho personalizzato questo, che vedete nelle foto sopra.
Ho "riciclato" del cartone ondulato (da una scatola di bottiglie di vino!) per creare la copertina, facendo due fori per inserire gli anelli apribili. Con l'aiuto della Big Shot ho “embossato” un rettangolo di cartoncino bianco, che ho poi incollato sulla la copertina.
Se volete, a questo punto, potete lasciare cadere qualche goccia di colore.
Ho quindi fustellato i miei elementi per la composizione: un banner giallo, una tag in carta da lucido, una “donnina”, un cerchio con un cuore, la parola "life"... et voilà! La copertina è terminata in un batter d'occhio.
Ho realizzato anche alcuni divisori, sempre aiutandomi con le fustelle.
Ora non mi rimane che iniziare a scrivere gli appunti giorno per giorno...

E voi, avete in programma di organizzarvi meglio nel 2015?

Buon Anno! E felice organizzazione! ;)
Grazie per la visita
 
Materiali:
cartone ondulato
carte scrap fantasia
cartoncini vari
anelli apribili
ricarica agenda

Thursday, 8 January 2015

Very quick flower quilt


I know this will look like a cheat - it's quick because it is only 50cm square - it's a quilt for my grand daughter Abi, it's her 4th birthday next week and I've bought her a dolls bed - so I had to make a little quilt -
As you can guess she likes pink and purple.
 As I mentioned last week I really like this die http://www.sizzix.co.uk/product/659960/sizzix-bigz-die-flower-4 - so it was an easy choice. the fabrics are all from my stash/scraps - I fused adhesive web to the back of the fabrics and cut 2 sets of flower, centre and leaves from each fabric.
I cut 2 pieces of white fabric and 1 piece of wadding - 52cms square - and stitched them all together - leaving a portion of one side open - so that the quilt could be turned right side out. I slip stitched the open edges together.
I then randomly arranged the flowers, centres and leaves, and fused them in place.
All that remained was to machine stitch the flowers, centres and leaves in place using a straight stitch.
All that remains is to make a little pillow - and it's complete.
So how have I got on with sorting the sewing room? Well it's not completely sorted - but I can see a lot of the carpet now, and the piles of things to be sorted are diminishing - so I hope it will be one last push this weekend.
One problem that has emerged from all this sorting and tidying is that I have found quite a few unfinished projects, and lots more that haven't yet been started yet - so I need to exercise some discipline and get these stitched before starting lots of lovely new things! I'll keep you updated with progress.
Angela

Project Life cards


For a few years I've jumped on (and eventually fallen off) the Project Life wagon and yet I am giving the concept another go this year. Hopefully I've simplified my approach enough to make an entire album worth of pocket pages.
 
I wanted to create some personal and unique cards for my album and to that end Sizzix products are just the thing you need. My album will be held in black, white, grey, kraft and gold colours so those are the colours I used for my various journaling and filler cards.
 
 
This first card is meant to be used for journaling. I diecut two rectangles using dies from Sizzix Thinlits Die Set 10PK - Phrase Cards and Thinlits Die Set 6PK - Butterfly Cards and layered them on top of each other before stitching along the top. At the bottom I stamped and arrow using Framelits Die Set 12PK w/Stamps - Here & There.


This set is made using dies from Sizzix Thinlits Die Set 10PK - Phrase Cards and I simply diecut the frames and then added some patterned vellum on the backsides.


For the third set I wanted to use the speech bubbles from Thinlits Die Set 6PK - I Heart This and combine them with words from Sizzix Thinlits Die Set 10PK - Phrase Cards . I embellished each word with a golden heart diecut with dies from the same sets.
 
 
The last set sports more love. I've used dies from Sizzix Thinlits Die Set 10PK - Phrase Cards to create both cards.
 
 
Supply list:
Sizzix Big Shot Starter Kit (Powder Blue & Teal)
Sizzix Accessory - Magnetic Platform for Wafer-Thin Dies
---o---

Igennem nogle år har jeg forsøgt at hoppe med på Project Life-bølgen, men jeg er faldet af hvert år. Alligevel forsøger jeg igen i år, og jeg håber, at jeg har valgt en så simpel tilgangsvinkel, at jeg kan holde ud hele året.

Jeg havde lyst til at lave nogle personlige og unikke kort til mit album, og til det formål er Sizzix-produkter lige i øjet. Mit album bliver holdt i sort, hvid, grå, kraft og guld, og derfor har jeg lavet mine journaling- og fillerkort i de farver.

Det første kort er tænkt til journaling. Jeg udstansede to rektangler med dies fra Sizzix Thinlits Die Set 10PK - Phrase Cards og Thinlits Die Set 6PK - Butterfly Cards, hvorefter jeg lagde dem ovenpå hinanden og syede henover toppen. I bunden stemplede jeg en pil med et stempel fra Framelits Die Set 12PK w/Stamps - Here & There.

Dette sæt er lavet med dies fra Sizzix Thinlits Die Set 10PK - Phrase Cards , som jeg udstansede og derefter limede mønstret vellum bagpå.

Til det tredje sæt ville jeg bruge taleboblerne fra Thinlits Die Set 6PK - I Heart This, og jeg kombinerede dem med ord fra Sizzix Thinlits Die Set 10PK - Phrase Cards. Jeg dekorerede hvert ord med hjerter fra de samme sæt.

Det sidste sæt byder på mere kærlighed, og jeg brugte dies fra Sizzix Thinlits Die Set 10PK - Phrase Cards til begge kort.
 
Ingredienser:
Sizzix Big Shot Starter Kit (Powder Blue & Teal)
Sizzix Accessory - Magnetic Platform for Wafer-Thin Dies

A very Bright & Festive layout by Karine


Hello,

Today let me show you a page with two little good sprites…good, or not! I dare you to mix colours and textures for a very bright & festive page!

Supply list:

Cardstock: American Crafts
Printed Papers & alphabets: Elle's Studio
Turquoise glitter paper: American Crafts
Enamel Dots: Studio Calico7
Embellishments: Very Merry Kit EntreARTistes
Stabilo Pen68
Masking Tape: Very Merry Kit EntreARTistes
Others: cloth

Dies:

658300 :  Sizzix Big Shot Starter Kit
659963 :  Sizzix Bigz Alphabet Set 4 Dies-fresh-blossoms-alphabet

Today’s page will focus on embellishments and colour! On this “Lutins de Noel” page, I had fun cutting free-hand strips of Elle’s Studio pattern paper. They will be glued to my white background paper then sewed with white thread in the sewing machine. The sewing part is here for decoration purposes and adds some texture.

Let’s rework our background in a softer way with the Stabilo68 felt-tip pens. Some splashes are added for a more freestyle note!

Once again I used my favourite alphabet letters which are the Fresh Blossoms! The N is cut out of glitter paper and I retrieved the negative. The O is a gold sticker decorated with a pretty pink heart. The E is cut out of pattern paper scraps and the L is cut out of dyed cloth!
The 4 letters are sewed in the machine as will be the rest of the page.

Add some masking tape strips here and there, and turquoise blue dots, and your page is done!

I want to thank today’s supermodels


Karine

Bonjour,

Une petite page aujourd'hui avec deux petits lutins bien sages ou pas ? On ose le mélange de couleurs et de textures pour une page O combien festive et acidulée !

Matériel :

Cardstock : American Crafts
Papiers imprimés et alphabets : Elle's Studio
Papier pailleté turquoise : American Crafts
Enabel Dots : Studio Calico7
Embellissements : Very Merry Kit EntreARTistes
Stabilo Pen68
Masking Tape : Very Merry Kit EntreARTistes
Divers : tissu

Dies utilisés :

658300 :  Sizzix Big Shot Starter Kit
659963 :  Sizzix Bigz Alphabet Set 4 Dies-fresh-blossoms-alphabet

Une page axée sur les embellissements aujourd'hui et la couleur ! Je me suis amusée sur la page “ Lutins de Noel” à découper à main levée des bandes de papiers imprimés Elle's Studio. Ceux-ci sont collés à mon fond de page blanc puis cousus à la machine avec du fil blanc ! La couture se veut décorative et elle est simplement là pour rajouter un peu de texture !

Le fond de page est retravaillé tout en douceur avec les feutres Stabilo Pen68, quelques éclaboussures au passage pour un côté freestyle !

J'ai utilisé une fois de plus mes alphabets préférés à savoir les Fresh Blossoms ! Le N est découpé dans du papier pailleté et j'ai simplement récupéré le négatif. Le O est un sticker doré réhaussé d'un joli coeur rose, le E est découpé dans une chute de papier imprimé et le L est découpé dans du tissu teinté !
Les 4 lettres sont ensuite cousues à la machine comme le reste de la page.

Rajoutez simplement un peu de masking tape ici et là et des pastilles turquoise et votre page est terminée !

Merci à mes deux beaux modèles du jour :)

Karine

Wednesday, 7 January 2015

Ring in the New Year


The title is a popular idiom in the English language, the meaning of which is lost to me, however when a good friend becomes engaged at this time then it forms the basis for a blog.

Before we spend the year showcasing  our new die collections which are many and varied, I want to go right back to basics and visit some old friends. Anyone who regularly reads this blog will know that I am rather fond of my Framelits circles, in fact I have placed every circle from every die set I own in one place so that I have just about every size imaginable at my fingertips.

I wanted to create a very simple card using very few elements so I started with the ring. I die-cut an aperture in a piece of gold card before placing a slightly larger circle die over the aperture so that it fits perfectly as in the third picture.


I know what you are thinking..... ' by the time I put this onto my cutting plate and then on my platform and then place my other cutting plate over the top and then run it through my machine, the die will have shifted and I wont get an accurate cut!'

This is a problem that we have all encountered at some point when we need to produce a really accurate cut. It could be that we want to crop a photograph or a stamped image or maybe we only have one small scrap of card over which the die only just fits only to find that either die or paper have shifted going through the machine.

Fear not my friends, help is on the way in the shape of the Sizzix magnetic platform for wafer thin dies which keeps the die/card exactly where you want it. I use it all the time and it never lets me down. Once my ring is die-cut I printed the sentiment onto kraft card and trimmed it to size before attaching the die-cut ring, a bow made from thin satin ribbon and a large adhesive gemstone.

I attached the assembled ring over a piece of patterned pink card onto a simple ivory base card using a stapler. It's quite simple and understated which is what I like especially as I am creating a series of over-the-top show stopping projects for our upcoming trade fairs.

Hope you like it?


Happy Birthday


Today I show you this birthday card I made. This is part of a series quick and easy to make;)


Sizzix products:
Sizzix Big Shot Machine 657900
Sizzix Thinlits Die Set 14PK - Flowers Intricate 659975
Sizzix Thinlits Die Set 5PK - Estelle 659703

Other products:
Pion Design papers; Flower Frames, My beloved Son

Cut the backgroundpapers, other paper smaller and place them like above. Cut the flowers ( Sizzix Thinlits Die Set 14PK - Flowers Intricate 659975) and leaves ( Sizzix Thinlits Die Set 5PK - Estelle 659703 ) using SIZZIX dies. Make the flowers finished and glue them all together on to the card. Finally place the borger and sentiment.

Happy crafting, Minna

*    *    *    *

Moi, tässä uusi kortti joka kuuluu sarjaan helppo ja nopea tehdä:)

Sizzix tarvikkeet:
Sizzix Big Shot Machine 657900
Sizzix Thinlits Die Set 14PK - Flowers Intricate 659975
Sizzix Thinlits Die Set 5PK - Estelle 659703

Muut tarvikkeet:
Pion Design paperit;  Flower Frames, My beloved Son

Leikkaa taustapaperit, toinen pienemmäksi ja asettele ne kuten kuvassa. Leikkaa kukat ( Sizzix Thinlits Die Set 14PK - Flowers Intricate 659975) ja lehdet ( Sizzix Thinlits Die Set 5PK - Estelle 659703)  SIZZIXIN stansseilla ja tee ne valmiiksi. Liimaa kukat ja lehdet korttiin. Lopuksi teksti.

Mukavaa keskiviikkoa, Minna


Tuesday, 6 January 2015

Project Life album

First I wish you a Happy New Year.
Today I  will show you a Little album 4x4 inch which I will use as a project life. The delicius Sizzix dies are perfect for creating project life or  fine for making your own calendar. today i will show you the first two months of the year.
Items I have used:
Sizzix Thinlits calendar Months 660104
Supply list:
Paper: Frozen Paper , Tea Time / Craft & You design
Deep empression embossing /Stampendous( Snow)


Thanks for stopping by, wish you a great week
Pia
Tak fordi du kiggede forbi, ønsker dig en dejlig uge
Pia

Always by Lilith

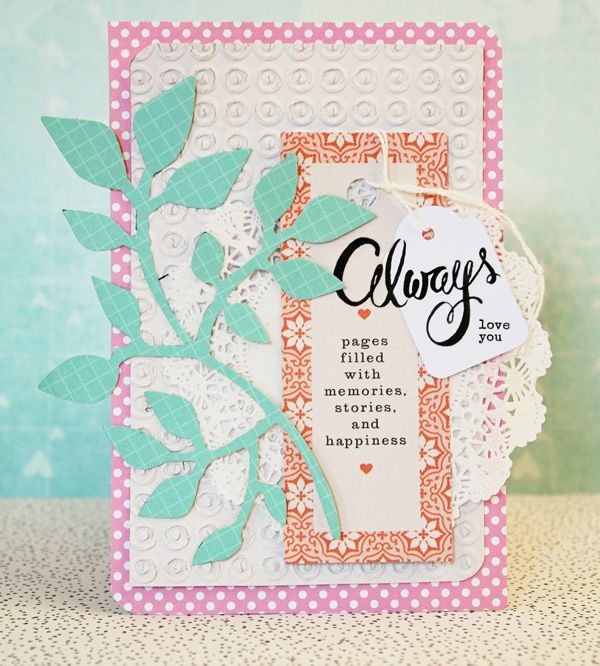
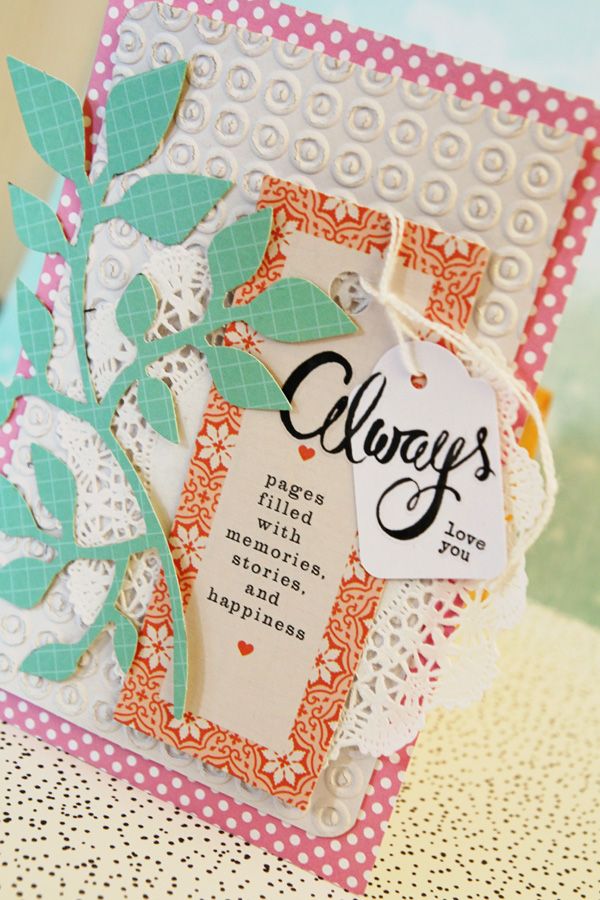
I have the sweetest husband ever. He helps with the ironing and drives the kids around to their activities at the weekend which means I have more time to prepare my lessons and to get creative. He is a gem. I love making him a card to tell him how grateful I am and how much I love him. This is one of the first cards for 2015.

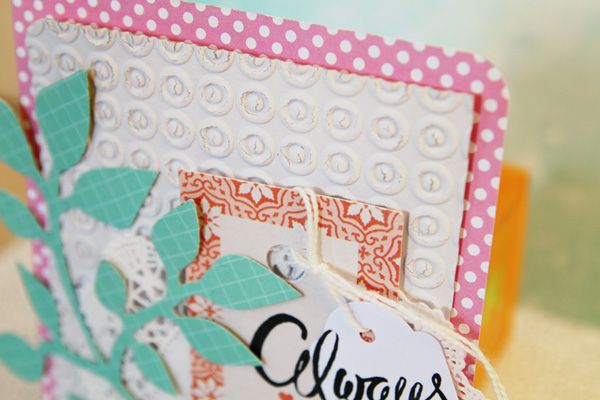
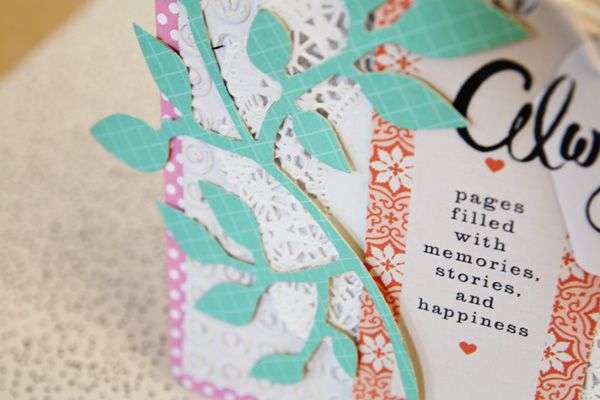
I used my favourite LEAVES die and an embossing folder for some texture. I love how easy it is to put together a card with a few basic supplies, a die and an embossing folder.


SUPPLIES:
Sizzix Big Shot Starter Kit (Powder Blue & Teal),   Sizzix Bigz Die - Garden Greens, Sizzix Textured Impressions Embossing Folders 2PK - Sweet Dots & Florals Set, 

Monday, 5 January 2015

Flying Butterflies Home Decor


Happy New Year!

Very exciting things ahead in 2015.

I will start with a project I have been wanting to do for a while.
I love glass jars, domes and bell jars. I also love butterflies so it was a given that I would combine this two loves to create a project to display in my living room.


I used: Sizzix® Thinlits™ Die Set 14PK - Flowers, Intricate by Paula Pascual 659975,
the Big Shot with its magnetic platform; a small glass dome, some  small dry branches from my garden, a glue gun, green and yellow faux moss.


I started by die cutting the butterflies. I die cut the black card with the intricate die, and with the solid butterfly matching die I die cut white card that I sprayed with different colored misters. (Use plain colored card if you wish, it works almost as well.)

Then, I glue them together by just applying glue on the body of the butterfly.


To glue the branches in a vertical position, I used the hot glue gun, making sure that they didn't stick out too much so that they fit inside the glass dome.


To disquise the obvious glue, I place some more glue and sprinkled artificial moss.


Then I placed the butterflies. Again, glued with hot glue gun. Finally I added a sentiment from Basic Grey Fresh Cut collection stickers that I had in my stash.


And there it is...


It didnt take long at all to make and the result it is quite pleasing!


Have a very Happy Crafting New Year!