Sunday, 7 June 2015

Happy Summertime Card


Hello Sizzix friends!
In Italy is almost summer, the weather changed so quickly!
Just because summer is around the corner I decided to realize a card to wish Happy Summertime.
I took the opportunity to use the new decorative strip die Sizzix made in collaboration with Doodlebug Design inc, it is amazing!


You need:
Sizzix Big Shot Plus Starter Kit (White & Gray) (660515)
Sizzix Sizzlits Decorative Strip Die - Eyelet Lace & Scallops
Sizzix Thinlits Die Set 23PK - Floral Wreath
Cardstocks (summer pattern, kraft and white)
Scissors
Double-sided tape
Washitape (red and white, yellow)
Card + Envelope
Label maker


Die cut a white cardstock using Sizzlits Decorative Strip Die - Eyelet Lace & Scallops.
Die cut some paper decorations using some dies conteined in the Sizzix Thinlits Die Set 23PK - Floral Wreath and different cardstocks.
Paste the red-white washitape on a white cardstock and die cut a leaf.
Take a white card and paste the washitape on it (in the upper part).
Paste the double-sided tape on the back of the decorative strip and then paste it over the washitape.
Paste the yellow washitape just below the other washitape.
Stick the double-sided tape on the back of the paper decorations and paste them on the white card.
Realize a trasparent label with the label maker and paste it on the yellow washitape.
Our card is done!


I love mixing and matching cardstocks and these colors are so estival, aren't they?
I hope you like it!
Happy Sunday!
Silvia


*Per i lettori italiani*
 
Buongiorno amici!
In Italia è quasi estate, il clima è cambiato così rapidamente!
Proprio per questo motivo ho deciso di realizzare un biglietto per augurare Buona Estate.
Ho approfittato della nuova fustella per realizzare una striscia decorativa che Sizzix ha creato in collaborazione con Doodlebug Design inc, è bellissima!


Ho usato:
Sizzix Big Shot Plus Starter Kit (White & Gray) (660515)
Sizzix Sizzlits Decorative Strip Die - Eyelet Lace & Scallops
Sizzix Thinlits Die Set 23PK - Floral Wreath
Cartoncini (uno a fantasia estiva, uno in carta kraft, uno bianco)
Forbici
Nastro biadesivo
Washitape (rosso e bianco, giallo)
Biglietto con busta
Macchinetta per etichette

Fustellare un cartoncino bianco usando Sizzlits Decorative Strip Die - Eyelet Lace & Scallops.
Fustellare alcune decorazioni di carta usando le fustelle contenute nel Sizzix Thinlits Die Set 23PK - Floral Wreath e differenti cartoncini.
Incollare il washitape bianco e rosso su un cartoncino bianco e fustellarlo con la fustella foglia contenuta nel Sizzix Thinlits Die Set 23PK - Floral Wreath.
Prendere un biglietto bianco e incollare nella parte alta il washitape bianco e rosso.
Incollare il nastro biadesivo sul retro della striscia decorativa realizzata precedentemente e incollarla sopra al washitape.
Attaccare il washitape giallo subito sotto l'altro washitape.
Posizionare il nastro biadesivo sul retro delle decorazioni di carta e poi incollarle sul biglietto bianco.
Realizzare un'etichetta con la macchinetta apposita e incollarla sopra al washitape giallo.
Il nostro biglietto è fatto!

Adoro mixare cartoncini e queste tonalità fanno subito estate, vero?
Spero vi sia piaciuto!
Buona domenica!
Silvia


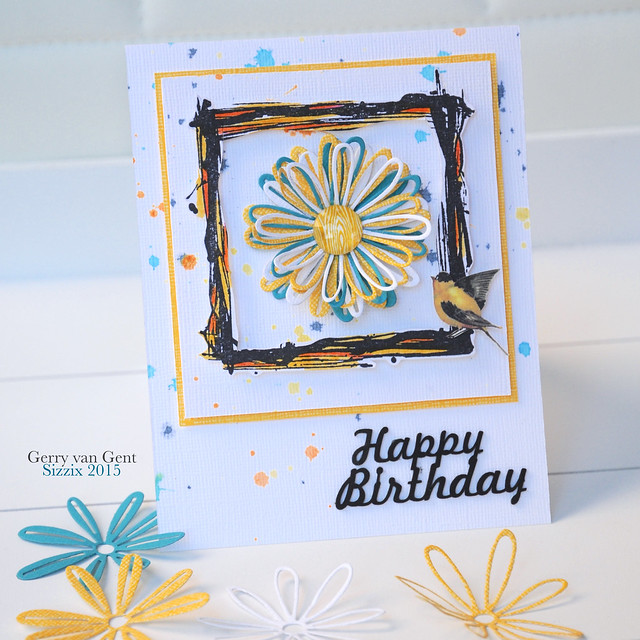


A "Happy Birthday" Card by Gerry van Gent

Hallo Sizzix peeps!

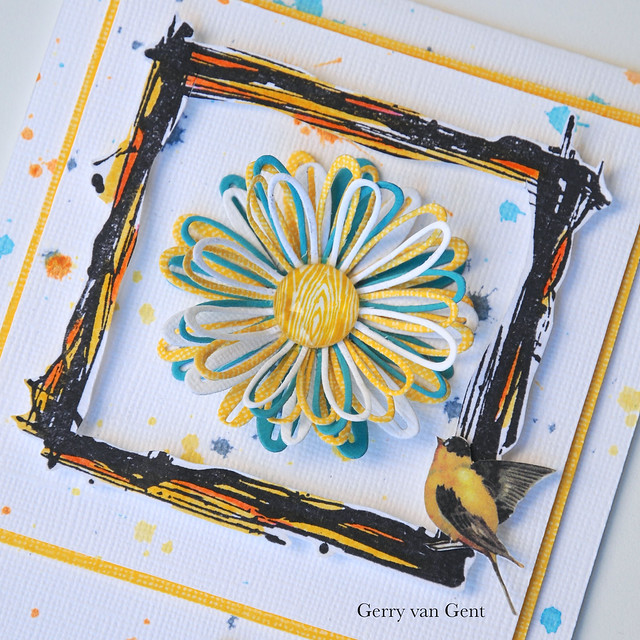
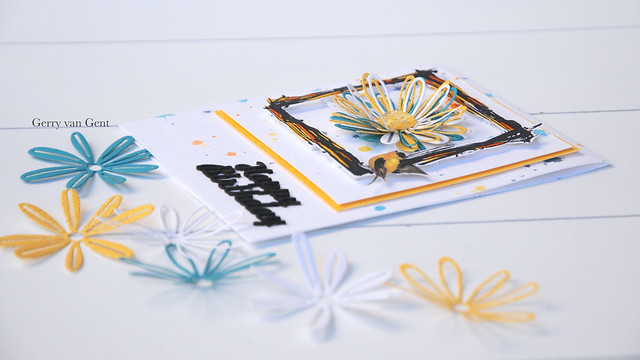
I am sharing today a Birthday card I created for a friend of mine.
We have finally some sun in The Netherlands and it finally feels like 
summer... and yes, this card is totally inspired by pretty summer colours.
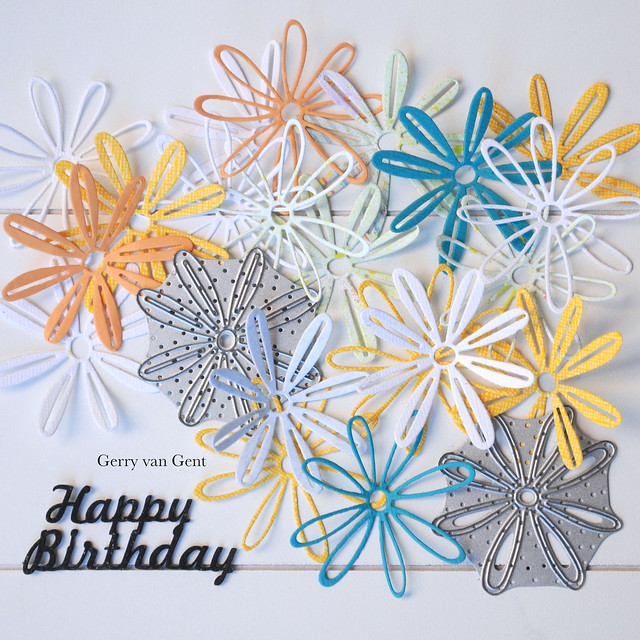
I used the brand new dies by Craft Asylum "Layering Daisy".
Happy Birthday
Sizzix-rebrand-logo-low-res
660515 Sizzix Big Shot Plus Starter Kit
660485 Sizzix Thinlits Die Set Layering Daisy #2
*        *        *
Hmmm, I got a bit addicted in die cutting all those beauties!
I wanted more and more...
Eventually I used only 6 daisies: 2 white, 2 yellow and 2 turquoise!
flowers

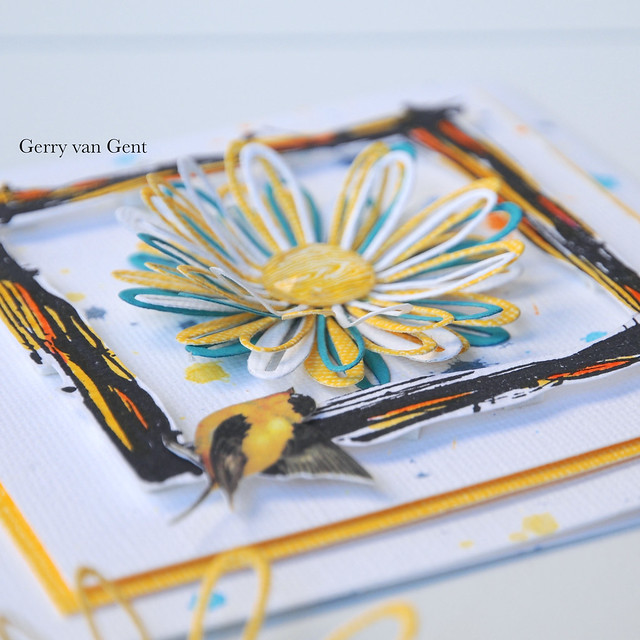
Once I adhered all 6 daisies on top of one another 
I added my final touch to the flower - a big rhinestone.
2

I "lifted up" each daisy so it will look more dimensional.
Card size: 12 cm x 15 cm1
16_9
OTHER PRODUCTS I USED:
The Scrapbook Diaries "Butterfly Stamp Set" by Gerry van Gent
Imaginarium Designs Chipboard "Happy Birthday"
Glitz Design "Color Me Happy" Giant Rhinestone 
Lindy's Stamp Gang Sprays
*         *         *
Have a great Sunday!

3D Flower Boxes


Yesterday I had an awesome day as we held a craft party in my city. The day consisted of lots of different paper crafts including paper bead making, bookbinding, tissue paper flowers, origami and of course box making with the Sizzix Plus!

I had such a good time showing people the joys of the Sizzix Plus starter kit. We firstly made boxes using the box die from the starter kit, then people assembled flowers and used hot glue to fix everything together.

Here are the boxes everyone made! I love all the bright colours and we even used wallpaper as well as card stock to create the flowers.


Some people also used butterflies for their boxes and it was great to see all the colour combinations. Everyone agreed that the Sizzix Plus machine was really easy to use. Some people had never used a die cutting machine before so it was great to see them amazed by the whole concept.

We used the following dies to make our Flower Boxes:

I hope you enjoyed seeing our craft party creations today!

Claire

Saturday, 6 June 2015

Desk Organizer


Hello there,
today I am very excited, because I can present you one of the brand new Thinlits, made by Sizzix:


When Natalie's Parcel arrived, I was very curious and I really looked forward, because these beautiful flowers are exactly my taste. Immediately I had to try out and today I can show you my first results.

Maybe you already know, I have a passion for bookbindings and building boxes.  I built a new Organizer for my desk and that decorated it with the layering Daisy.
Incidentally, I have allowed myself the practical SIZZIX Accessory - Plastic Envelopes of Sizzix.
Maybe I will show you self-made storage for it soon ;)


I hope you like these Organizer & the Flower-decoration.
I wish you a  lovely weekend!

Summer Card with Watercolors - Hello Sunshine


Hey everybody,
hope you had a lovely week? It was so hot here in Germany the last days. So I decided to make a summer card in blue and yellow to get the feeling of a swimming pool, sunshine and beach. :)

List of supplies:
Cardstock and a blank card, sequins and watercolor


I really like the contrast between the blue watercolored background and the light yellow phrases. Hope you got inspired to take out your watercolors and make some pretty things! :) Wish you a nice weekend, xo Julia

-----------------------------------------------

Hallo ihr Lieben,
ich hoffe ihr hattet bisher eine tolle Woche? Die letzten Tage (insbesondere gestern) war es ja extrem heiß hier in Deutschland und ich hatte richtig Lust auf eine sommerliche Karte. Sie erinnert mich ein wenig an Sonne, Strand und Meer. :) 

Materialliste:
Weißer Cardstock und einen Kartenrohling, Aquarellfarben und Pailletten

Ich mag den Kontrast zwischen dem Blau und Gelb auf dieser Karte total gern. So kommen die Schriftzüge gut zur Geltung. :) Ich hoffe ich konnte euch ein bisschen inspirieren eure Wasserfarben auszukramen! Habt noch ein tolles Wochenende, xo Julia 

Friday, 5 June 2015

hearted card with a view...


Hi crafters out there,

it is time for another quick and easy greeting card idea - a hearted card with a view...

All you need is:
Sizzix Big Shot Plus Starter Kit (White & Gray)
(out of this you need the  Bigz L Die (Everyday Essentials)
and the Thinlits Plus Die Set (Basic Shapes)
Sizzix Thinlits Die Set 2PK - Decorative Trim #2
white cardstock,
ombre-colored Paper (or cardstock in different colors of the same color family)
patterned paper
golden enamel pen


First i made the background card with a hole or Window at the front.


and than i cut a lot of the heart-shaped decorative trim out of the ombre-colored paper.


Than i fixed them a the back.

Some decorating with patterned Paper, butterflies, stamps and some golden dabs (I you want to know how i made them with the golden enamel pen >>klick here<< i made a video about the technique)

Finished....

have a great and sunny weekend, Stephanie


**********************

Hallo Ihr da draussen,

es ist mal wieder Zeit für eine schnelle und einfache Karte - eine herzige Karte mich Durchblick.

Was ihr dafür braucht:

Sizzix Big Shot Plus Starter Kit (White & Gray)
(daraus die  Bigz L Die (Everyday Essentials)
und die Thinlits Plus Die Set (Basic Shapes)
Sizzix Thinlits Die Set 2PK - Decorative Trim #2
weißen Cardstock
ombre-farbenes Paper (oder Cardstock in verschiedenen Farben der gleichen Farbfamilie)
Patterned Paper
einen goldenen Lackstift (Edding)

Zuerst habe ich mir die Grundkarte mit einem Fenster gebastelt
und dann jede Menge der Herzbordüren aus dem Ombre-farbenen Cardstock ausgestanzt.

Die habe ich auf der Rückseite des Fensters befestigt.

Das Ganze mit patterned Paper, Schmetterlingen, Stempel und goldenen Klecksen (wie das mit den
Klecksen erkläre ich in einem kurzen Video hier >>Klick<<) verziert....

fertig...

Viel Spaß damit und ein schönes
Wochenende, Steffi

A quick and easy Birthday Card


Hi Sizzix friends!

Today I show a quick and easy card I’ve prepared for my mother for her birthday this weekend. I have used only the scallop squares Framelits, the Floral Wreath Thinlits designed by Brenda Walton and an embossing folder. 

Let me show you the card:


To make this card I have used my Big Shot Plus, the scallop squares dies, the butterflies dies, the embossing folder, a white cardstock, scrapbook paper, sparkly paper and a stamp.


I’ve made an embossment on a piece of white cardstock which was 5 mm smaller than the card. Then I’ve chosen springy and colourful paper, which I’ve die-cut using the scallop squares Framelits in two different sizes.


It’s time to die-cut some butterflies in two different kinds of paper: one in sparkly white and the other in green scrapbooking paper. Then I’ve placed the butterflies on the scallops paper to see where I wanted the message.   


After stamping the message, it’s time to glue all the pieces together. For the scallops squares I’ve used the 3D foam pads, then the green butterflies are glued completely and the sparkly butterflies only in the middle as if they were flying.


I have used the following Sizzix products:


I hope you have enjoyed this quick and easy birthday card. Thanks for your visit!


Have a creative and happy Friday!


------------------------♥------------------------♥--------------------------♥------------------------

¡Hola a todos!

Hoy os quería enseñar una tarjeta rápida y sencilla que preparé para mi el cumpleaños de mi madre. Tan solo he utilizado scallop squares Framelits, Floral Wreath Thinlits y una carpetilla de embossing. Mejor os la enseño ¿verdad?

Para realizar esta tarjeta he utilizado mi  Big Shot Plus, los scallop squares dies, los troqueles de mariposas, la carpetilla de embossing, cartulina blanca, papel para scrapbooking, papel purpurina blanco y un sello para el mensaje.

Primero he realizado el embossing en una cartulina blanca 5 mm más pequeña que la tarjeta, entonces escogí unos papeles muy primaverales y los troquelé con los Framelits utilizando dos medidas diferentes.

Llega el momento de troquelar dos mariposas en papel purpurina blanco y dos en papel verde, Entonces las he presentado sobre los cuadrados con festón para ver dónde estampar el sello.

Después de estampar el mensaje, toca enganchar todos los elementos, en el caso de los cuadros con festón he utilizado almohadillas 3D, las mariposas verdes están fijadas completamente y las de purpurina solo las he fijado por el cuerpo así tienen el efecto como si volaran.


Espero que os haya gustado esta rápida y sencilla tarjeta de cumpleaños. ¡Gracias por la visita!

¡Feliz y creativo viernes!

Scrapbooking Layout: Nice Memories


Hi everyone, it’s Anna here today, sharing a layout with Sizzix item.
I love the new Sizzix Big Shot Plus starter Kit! Not only can you use these for box, tag, cards, but I’m going to show you how to use this kit into a dimensional embellishment for your layouts. In particular the big Textured impressions folder is ideal to create yourself your background pages!
 
cafe creativo - craft asylum - sizzix big shot plus starter kit - scrapbooking (1)
 
I chose my favourite "scrap" canvas which is A4 size and perfectly matching the Sizzix Big Shot Plus machine.
 
cafe creativo - craft asylum - sizzix big shot plus starter kit - scrapbooking (2)
 
I didn't use a patterned paper for the background, but I chose a white paper and I added a touch of yellow color thanks to a stamp.
My very first step was to emboss the stripe paper. I used the A4 Embossing Folder. I used also a strip of Craft Asylum patterned paper included in the Starter Kit.
With my Big Shot Plus I cut some nice shapes with dies: sprig and decorative strip scallop.
I added other small embellishments and title.
A simple and fast way to realize a pretty page of scrapbooking.

Hope you like it and I inspired you to create something pretty with your Big Shot Plus Starter Kit! Believe me, you won´t regret buying it! ;)

Thanks so much for visiting me today
 
Items used:
1 photo (cm 10x15)
cardstock: white, vanilla, glitter paper
patterned papers: Craft Asylum included in the Sizzix Big Shot Plus Starter Kit
embellishments: Prima
title: Prima
ink pad: Ranger
stamps
paper bag
thread
 
**************************************
Flag_of_Italy
Per le amiche italiane! :)

Ciao a tutti, sono Anna e sono qui oggi per condividere un layout creato con i prodotti Sizzix.

Il nuovo Sizzix Big Shot Plus Starter Kit mi piace tantissimo! La macchina e le fustelle incluse, non sono solo utili per creare scatoline, tag, biglietti, ma vi mostrerò come utilizzare questo kit anche per creare un abbellimento per le pagine scrap. In particolare la grande la mascherina per embossing è ciò che ci vuole per creare lo sfondo per le proprie pagine!
Ho scelto il mio formato "scrap" preferito del momento, che è l'A4 e manco a farlo apposta, corrisponde perfettamente alla nuova macchina Big Shot Plus.
Non ho usato una carta fantasia per lo sfondo, ma ho scelto un cartoncino bianco a cui ho aggiunto solo un tocco di colore giallo grazie ad un timbro, dove ho deciso di posizionare la foto.
Il primo passo è stato quello di embossare una striscia di carta bianca e per fare questo ho usato la mascherina formato A4. Ho anche usato una striscia di carta fantasia Craft Asylum, sempre inclusa nello Starter Kit.
Con la mia Big Shot Plus ho tagliato poi alcune forme con le fustelle: rametto, etichetta e striscia decorativa scallop.
Ho aggiunto poi sotto alla foto una bustina di carta dove ho inserito una tag per il journaling. Ho posizionato altri piccoli abbellimenti e tag qua e là. Per finire ho composto il titolo con gli adesivi.
 
Ecco dunque un modo semplice e veloce per realizzare una graziosa pagina scrap.
Spero che vi piaccia e che vi abbia ispirato a creare qualcosa di bello con il nuovo Big Shot Plus Starter Kit! Credetemi, non vi pentirete di acquistarlo! ;)

Grazie per la visita
 
Materiali:
Sizzix Big Shot Plus Starter Kit (White & Gray) (660515) (macchina formato A4+fustelle+carte)
1 foto (cm 10x15)
cartoncini: bianco, panna, glitter oro
carta fantasia: Craft Asylum inclusa nel Sizzix Big Shot Plus Starter Kit
abbellimenti: Prima
titolo: Prima
inchiostro tampone: Ranger
timbri
bustina di carta
filo

Thursday, 4 June 2015

Floral card


Hi Sizzix Friends!!
Today I want to share with you a Floral card created using many Sizzix dies.
I like to use a lot of dies and overlapping each other!! 
I used:
Sizzix Big Shot Plus Starter Kit 660515

Sizzix Framelits Die Set 7PK - Flowers

Glue
Paper craft
green and pink cardstocks
Gilding paste
Gold flakes
Die cut flowers using paper craft and Sizzix Bigz Die - Flowers, 3-D #2.
Die cut another flower with Sizzix Framelits Die Set 7PK - Flowers.
Die cut the branch using Sizzix Bigz Die-Flower Layers & Leaf #2.
Die cut the butterfly and the frame. Now assemble togheter as I did.
Decorate butterfly wings with gold flakes.

Now your floral card is ready!!!
Thanks!!!
See you next week!!

Giovanna