

One thing I always have a need for is birthday cards, even though I have numerous ways to be reminded of birthdays, I always forget to make and send them in time. Like many other years before, I am trying to be better this year and what better way to start than with a few Sizzix simple but effective birthday cards.

My love affair with the intricate butterflies continues this cold and wet January.
For this card I used the Sizzix Thinlits Intricate Butterflies 659971 and the Tim Holtz Block Talk lowercase alphabet die (659442) as well as Basic Grey Kissing Booth papers, white card, gold flakes, foam pads and Scrapbook Adhesives 3L adhesive sheets.

I placed the patterned paper on the the front of my card. Then I trimmed a piece of white card to size. I place the intricate butterflies dies over as well as die cut letters to see their visual weight. Once I was happy with their placement, I die cut them using my magnetic platform to secure them in place. I used the intricate butterflies instead of the Framelits included in the same set because I did not want any residual embossing on the outside. Then I glued the white card with foam pads.
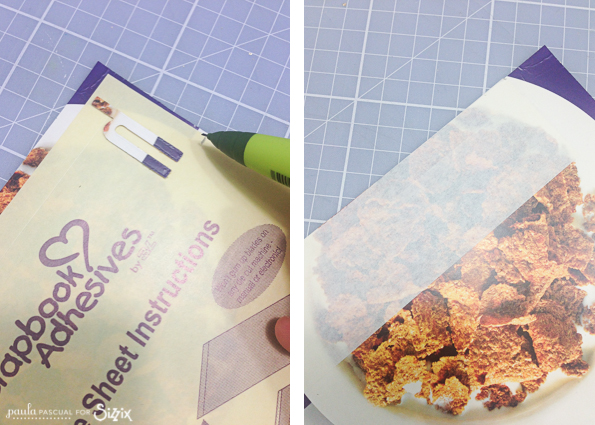
To create the gold effect letters I used adhesives sheets by 3L. They are a super fine double sided film that is much more delicate and thin than the one I usually use from Stix2. I am a fanatic o adhesives so I find different thicknesses have different uses. I apply the adhesive to both front and back of a cereal cardboard.

I die cut each letter and then position them on the card. Once I am happy with the position, I use low tack tape to secure them in place (relative to each other).

I lifted the backing of the adhseive sheet, and glue them in to position. rub down the letteres well and then I removed the low tack tape.

I removed the protective sheet from the adhesive sheet and place the card in my golden flake tub. I brushed the letters with a sponge to make sure all the adhesive is covered in gold flakes.


Finally I added more die cut butterflies (from the same set), ribbon and golden adhesive beads.

Not many people can use such a bold, bonkers pattern with delicate die-cuts and get away with it....respect!
ReplyDelete