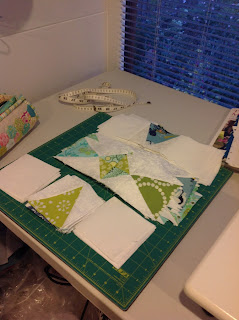
Hi, Trudi here from Quilting Prolifically. So last month I made a great start on my curves, not curves quilt.
18 of these Shoo Fly blocks done, and I was well on my way to getting the other 18 alternate blocks done too!
This second block is made up of nine patch of 4 1/2" squares. Plain squares in the corners, and squares made with the Isosceles Triangle die, and 2 1/2" Half Square Triangles to make the center square in square block.
another set of 18 blocks are done.
Alternate the blocks in the lay out and hey presto ... its starting to take shape!
I barely had enough space on my living room floor to lay this out, So to piece it, I gathered up the rows, stacking the blocks in order and taking them out to my sewing machine in my studio in the garden.
(one sure way to get your daily step quota up!)
As I pieced the rows, I laid them over the long arm, then pieced the rows together.
I've added a plain border, and this is now ready to quilt.
The curves are already visible in the pattern, and not one curve has been sewn.
I'm hoping that a little (ok, maybe a lot) of custom quilting in those areas will really enhance the curved effect.
Remember, this whole quilt, that is now 82" square, is made from scraps. I did cut some yardage for the outer border and some of the white areas, but it is all a mish mash of white on whites and very low volume fabrics.
So if you have a large pile of scraps, and fancy making your own version of this quilt, these are the dies I used along with my Big Shot Plus:
659832 Bigz Half Square Triangle 4 1/2" pieced
659853 Bigz L Isosceles & Right 4 1/2" H
657611 Bigz Half Square Triangle 2 1/2" pieced
So, I'll be back next month with the full reveal of how the quilting can really make a difference to enhance those curves. If your have a go at making thee blocks for your own Curves, Not Curves quilt, please tag me on social media, I'd love to see!


No comments:
Post a Comment