Hello!
How are you doing?
Do you enjoy your holidays?
I am not in holidays
yet but I still take the opportunity to take many pictures. Here is a
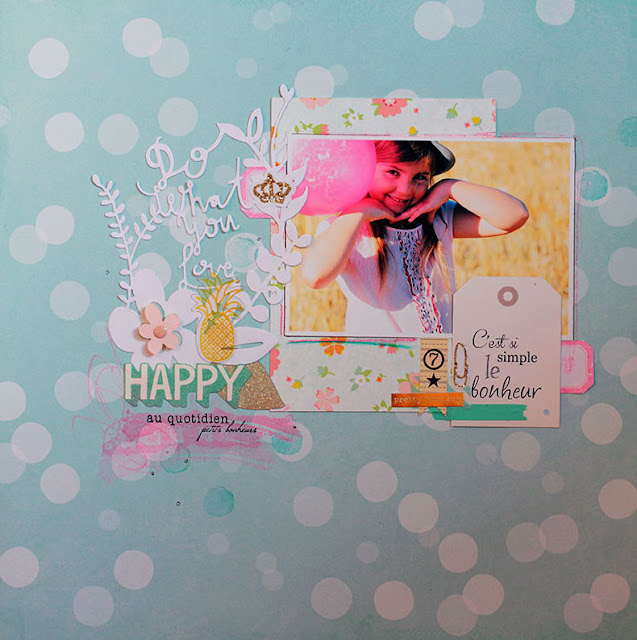
new page, really girly, starring my niece.
Supply list:
Papers: American
Crafts, Swirlcards
Cardstock: American
Crafts
Die-cut: Crate Paper
Stickers: American
Crafts, Hema
Tag: Swirlcards
Color dots:
Ephéméria
Stamps: Stampin'up,
Swirlcards, Stampers Anonymous
Ink: Studio Calico,
black Versafine
Dies
650515 : Sizzix Big Shot Plus Starter Kit
660481 : Sizzix Thinlits Die-Do what you love
This is an easy
lay-out built around the Do what you love die! It is a
self-sufficient die, don’t you think?
I started by
creating a frame for my picture with a flowery paper. The die is cut
out of white paper. Choose your background paper so that it will make
the die stands out more. I chose blue here.
The die will act as
a title for my page.
Cut your die again,
out of pink paper this time, to put the emphasis on the heart of the
flower. Glue with 3D foam for more volume. Add a tone-on-tone color
dot in the center.
Finish by adding
little strips of masking tape here & there, stamp prints and
stickers.
Have a lovely day!
Bonjour !
J'espère que vous
allez bien et que vos vacances se passent pour le mieux !
Ici ce n'est pas
encore les vacances mais je profite pour faire le stock de photos.
Une nouvelle page très girly avec en vedette ma petite nièce.
Matériel :
Papiers : American
Crafts, Swirlcards
Cardstock : American
Crafts
Die-cut : Crate
Paper
Stickers : American
Crafts, Hema
Tag : Swirlcards
Pastilles couleur :
Ephéméria
Tampon : Stampin'up,
Swirlcards, Stampers Anonymous
Encre : Studio
Calico, Versafine noire
Dies
650515 : Sizzix Big Shot Plus Starter Kit
660481 :
Sizzix Thinlits Die-Do what you love
Une mise en page
toute simple à partir du die-Do what you love ! Une découpe qui se
suffit à elle-même vous ne trouvez pas ?
J'ai dans un premier
temps matté ma photo sur une chute de papier floral. Le die est
quant à lui découpé dans du papier blanc, choisissez un papier de
fond qui le fera bien ressortir, comme ici mon imprimé bleu.
Celui-ci fera office
de titre.
Découpez de nouveau
votre die dans un papier rose pour simplement mettre en valeur le
centre de la fleur. Collez avec des mousses 3D pour pour de relief,
complétez le centre avec une petite pastille colorée ton sur ton.
Terminez votre page
en ajoutant des petits morceaux de masking tape, des tampons et des
autocollants.
Très bonne journée
à vous
Karine


No comments:
Post a Comment