Showing posts with label Fancy Lid Box. Show all posts

Monday, 14 September 2015

A pretty card made with a box die!


Last time I was here with an showing how the  the Sizzix Thinlits Plus Die Set 13PK - Box w/Fancy Lid 660841 makes lovely bows. Today, I will show you that you can use the decorative panels as well for cardmaking. 


For this card, even though this is a Plus die, all the elements will fit through the regular Big Shot.


I place the die on the front of the card and secure it in place with low tack tape. Then I run it through the Big Shot and made sure from the back that all those lines were cut. Because it is such a detailed die, you may need to run it through a couple more times.


I cut a square piece of paper and layered in the inside. I then added a die cut bow from the same set.


I stamped the message using a sharp black in on a die cut banner (from the 660836
Sizzix Framelits Plus Die Set 16PK - Banners #2 ) and attach it so it overlaps.
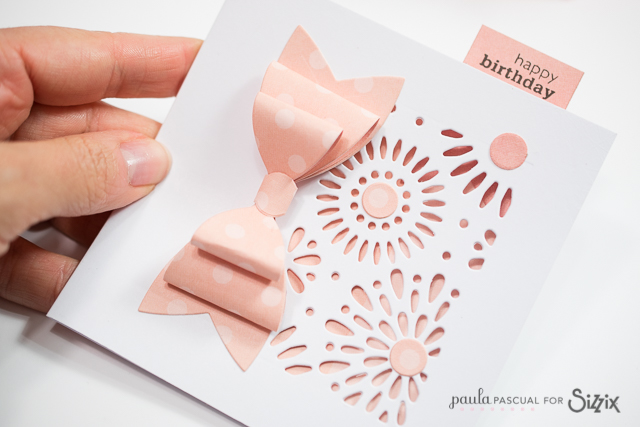


I used the circles from the Bow set to add interest to the centres of the flowers.
And it was done. Very quickly but with quite a lot of detail!

Monday, 31 August 2015

Bows and boxes


I love bows for cards and gift giving! That is why I thought it would be great to have a set that had a both a box and a bow, the Fancy Lid!

I have used only a set of dies for this the Sizzix Thinlits Plus Die Set 13PK - Box w/Fancy Lid 660841. And the good news is that even though is a Plus die, all the elements will fit through the regular Big Shot.


This is the assembled box with the quadruple bow on top!
To make the box couldn't be simpler, die cut, fold the scored lines and glue the bottom tabs. For the cover, simply die cut, fold and attach the taps.

The bow has a few options:


And probably more!


To assemble the bows, simply die cut, fold to create two loops and glue them to the centre.


Then glue them to the die cut base. 


Finally add one of the centres, either the dot or the band.


To create the quadruple bow, die cut all the elements. Assemble the loops, and then layer them one at at time.


Finally, simply attach to the assemble box.

I hope you like this project!