Showing posts with label Lori Whitlock. Show all posts

Wednesday, 10 December 2014

Christmas with a twist!


At this time of year everyone is in full-on festive mode, myself included. Most craft company's release their Christmas products around September/October time and we here at Sizzix are no exception. I will be blogging Christmas ideas right up until the day itself but there are some great dies being released right now which it would be a crime not to feature so I decided to set myself a little challenge.

I wanted to create Christmas cards with a contemporary feel using non-traditional colour palettes alongside non-traditional dies. Only you can judge if I managed to pull it off.... No pressure then?

 The dies I used come from a great collection by the designer Lori Whitlock and I should point out that I've cheated already by adding some of the Tim Holtz festive word dies, I knew it wouldn't last long!


I took the various colours from bits and pieces in my stash and I couldn't resist reaching for my good old Dymo label maker, remember when they were cutting edge tech in the 70's and kids of all ages plastered the house with sticky labels?

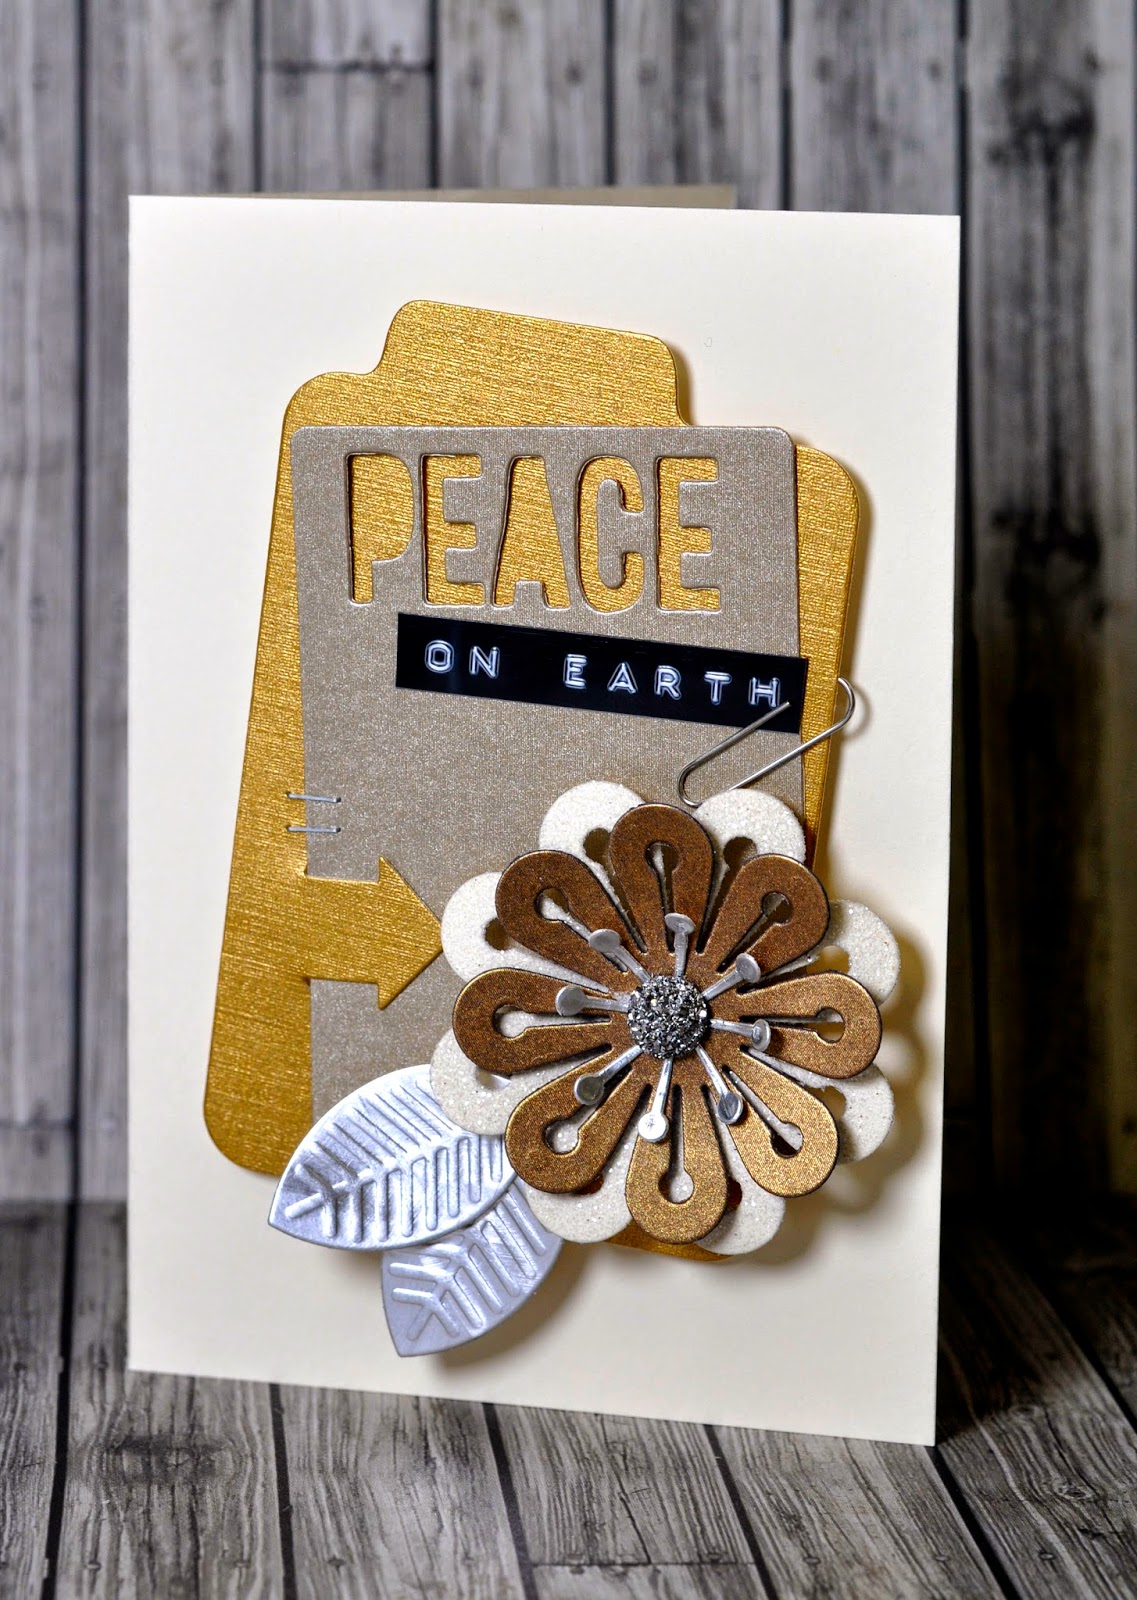
I started by die-cutting one silver, one gold and one ivory flower. I used a ball end stylus tool and foam mat from the Susan's Garden tool kit to form the flowers and add dimension, I took the eight pieces from the flower detail of the silver die-cut and gently curled each one with my stylus


I attached each curled piece to the centre of the gold flower at the narrow end using PVA glue, tweezers and a steady hand! Next, I took my ivory flower and giving it a light coating of spray adhesive, I then sprinkled the flower with Distress Glitter and shook off the excess before mounting the two flowers together.

I die-cut two leaves from silver card before adding the embossed detail with my Impressions Pad and Silicone Mat I next die cut the rounded corner rectangle before adding the 'PEACE' aperture with one of the holiday words dies. Next I die- cut the tabbed rectangle from gold card adding the arrow aperture. It is gold honestly, I know it looks mustard yellow! you just can't get the photographers these days!!!


All that remains is to mount all the bits together adding the Dymo part of the phrase held on by a paper clip and a sparkly gem to the centre of the flower before attaching it to the face of an A6 ivory card blank. I love mixing different metallics and I really like the effect. I liked it so much I couldn't stop at one card so there are a few more below for good measure, I hope you like them?


This card also has a very minimalistic modern vibe and I have taken Scandinavian winter interiors as my influence on the colour palette.


I do love these aqua blues with white and silver but I think it is the black strip which sets it off.


I know what I said at the start of this blog but I couldn't resist a bit of red either!!!


Wednesday, 30 July 2014

Dearly Beloved


Whenever I have been naughty, my wife always starts by saying "You know what you've done don't you?" to which I almost always reply " What now my beloved?" in the vain hope that one little endearment will help to calm the waters.

I'm not that naughty really, just minor day-to-day irritants like forgetting to fill the water filter jug or forgetting to pick up milk or..... it's usually forgetting something or other!..... MEN!!!

 This week I'm going to make her birthday card (21 again!) and I thought I would use some of the new dies/folders from Lori Whitlock and Prima listed below.

I started by cutting a 10 x 12 cm rectangle of ivory card and die-cutting a flourish from the same card. I used the flourish as a template and traced around the edge on the base of the rectangle with a pencil before trimming around the pencil line and rounding off the upper corners with a suitable punch.

I embossed the floral pattern onto the card and gently inked over the embossed image using the Weathered Wood Distress Ink pad applied with a blending tool followed by the Shabby Shutters ink pad. I also applied a little Mustard Seed ink which is a very strong yellow so use with caution, it adds a little freshness where needed. I used the same colours on the flourish.
 Remember the beginning of the blog? well this is where the 'Beloved' part comes in. I measured the tab die from the Ornate Labels set and created the word 'Beloved' on my PC before printing onto ivory card. Next I cropped the word with the die and die-cut the ornate label from gold card which I then distressed with a sanding pad. I also cut the label background onto which I matted the ornate label followed by the die-cut phrase. This is a seriously useful set of dies and I urge you to check them out. 
For the finishing touch I wanted to add a pretty little flower and who better to design such a set of dies but Prima. This is one of five different flowers in the same set and they are a die-cut essential in my opinion. I inked the edges of the petals using the same inks as before and set about applying a little texture and dimension to the petals using my trusty tool kit by Susan Tierney-Cockburn. I added a Crystal to the centre as the finishing touch and......

.....Here's the finished card.


I had so much fun I decided to make another one using the same elements but changing the colours slightly. I also used a different ornate label and flower, both from the same sets though.


And here they are together, now all I've got to do is choose which one I think she will like..... and then give her the other one as I'm bound to get it wrong!!!


Wednesday, 23 July 2014

No Rust for the wicked!


If I am wicked then my worst crime is the use of terrible puns in the title of my blogs as I'm sure you will all agree?

A little while back I gave a beautiful die cut 1950's car the 'rusty' treatment and I said at the time that I will use it at some point in the future. I have scrapped the car idea but I want to use the rust technique which was featured in Tim Holtz' Creative Chemistry 102 online classes...Hey! if your gonna steal, steal from the best I say!!! 

Seriously though, follow the link and sign up, it's jam packed with inspirational ideas showing how to get the best out of all your favourite inks, stains and acrylics and there's plenty of Sizzix inspiration to feast your eyes on too.

The dies I'm using this week are:

As last week, it's another mash-up of designs from different collections which work particularly well together. This week I am again using dies from Prima and Lori Whitlock with one of my old favourites namely the big ol' tag die from Tim Holtz.

I started by die-cutting four cogs two heart locks (for layering), a key (which didn't make the final project) and a delicious butterfly from ivory card. Next I lightly applied some embossing ink before sprinkling with Vintage Photo Distress Embossing Powder which is great for adding a gritty texture and works in a different way to conventional embossing powders in that it gives random coverage, ideal for distress applications.


I fixed the powder with a heat tool and inked the die-cuts with a combination of Distress inks to achieve the rusty iron look. Next I die-cut the beautiful flourish from ivory card and gave it the same rusty treatment.
I applied a rectangle of patterned paper (My Mind's Eye Nostalgia Collection) to a piece of mount board before die-cutting the tag before selectively inking around the perimeter. Next I stamped onto the top right-hand edge using various Distress inks and my trusty Dear Lizzy Lucky Charm rotary phrase stamp before stamping onto ivory card, trimming to size and distressing the edges. Finally, I attached the phrase to the tag using tiny staples.


Now all I need to do is attach the cogs and flourish to the tag, I have used screw head brads in the centre of some of the cogs. I attached the layered padlock using a couple of tiny jump rings and then I lightly inked the butterfly before curling back the wings and dousing with Clear Rock Candy Distress Glitter followed by a little strategically placed crushed glass glitter around the edges, I had to add a bit of bling with all that rust, and I love the contrast it gives.

And that, as they say....is that! except for a bit of Crinkle Ribbon dyed to match the rust colours for a finishing touch. I love the flourish so next week I'm going to put it to good use on my wife's birthday card. 


Wednesday, 16 July 2014

Owl Mash Up!!


A'mash up' started as a musical term which describes the blending of two songs very often in very different styles/genres, think ABBA and Black Sabbath...... you get the idea!

This month we are releasing three new collections from Tim Holtz, Prima and Lori Whitlock. I love them all and I want to share as much as I can but time is against us my friends, so I got thinking and.......

Here is a gift box made using the Bigz XL owl bag. It's a really lovely die perfect for party favours and the like and I'm sure you will be seeing it in many magazine projects and in many different colour combinations and materials.


This is a fabulous and super-useful die and as I said above, you will see oodles of pretty owl boxes so I wanted to shake it up a bit and throw in a die from the Prima (Flora Grande) collection. When I say die I am actually referring to a set of dies (nine to be exact) named Rondeaux which are basically, gears with hearts between the spokes in various sizes (I LOVE!!!!!).

I also want to use only one colour, (What!!!) and that colour is black, (Gasp!!!) so I will need a little help from my silver gilding wax (Phew!!!)

I started by die-cutting the four parts to make up the main body of the box from graphite sparkle which is a black heavy weight card with holes drilled through it and is made by Inspire Me Papers, check out the link above. Next, I set about putting the box together which is surprisingly simple as these things can often be quite fiddly! Once it was ready I gently rubbed the edge using the gilding wax, the one I used is called Treasure Pewter you can use a soft cloth but I prefer to use my finger tips which gives you more control but mainly because it smells like boot polish Mmmmmm! 


I Die-cut all the elements to finish the owl and embossed the main body using the Sweet Dots folder from the new Lori Whitlock collection. Next I strategically applied the wax to all the die-cuts except the eyes. and gently curled the three rows of feathers before assembling the owl.

There was still one bit missing, this is where the gears come in. I die-cut two sets to create the eyes and gave them the pewter treatment.

And here is the finished 'Steampunk' owl. For the finishing touches I used screw head brads in the centre of the eyes and mounted both sets of gears with 3D foam pads. I embossed the owls nose using the folder from the new Big Shot starter kit, don't worry if you don't have it there are plenty that will do the job just as well.


Just a reminder, if you want to see a little more of the Prima dies I featured as a guest designer on their blog last week and here is the link. the image below is one of two projects featured.