Showing posts with label Mini Cabinet Card. Show all posts

Tuesday, 4 September 2012

Demo at The Glitter Pot


I had such a fab time at The Glitter Pot on Saturday where I demonstrated along other crafters. I love it there, it is one of my all time favourite shops as they stock quite a few of my most used ranges.
Of course I was demonstrating the Big Shot.


And, of course, I had my Look Book of embossing techniques. Some of them are not that clever. But many of them are!


I love that little name card. I have been demonstrating at The Glitter Pot for many years so it is a great sight every time. The boxes you can see are all made with either the Cabinet Card or the Mini Magnetic Cabinet Card.


Some other samples that I made during the day and before hand.


 And I will leave you with this photo of my view of the room. On the left you can see Alex Kamann (a master of Copics), and on the right Jenny Hayes from Hobby Art. On the other demo room you could find Kay Carley, Jackie Hucksteep, Gilly and Jane Gill (a long time friend and someone whose work I admire very much!).

I look forward to next years event already!


Saturday, 12 May 2012

Mini Cabinet pen pot


Today I am sharing how to make the little pen pot using the Mini Cabinet Card die.


As the Mini Cabinet Card is a Magnetic Movers and Shapers die you will need either the Base Tray or the Vintage Cabinet Card to die cut it. Both Base and Vintage Cabinet card dies are designed to be used in combination with the magnetic movers and shapers dies, they just add the right amount of thickness for the magnetic dies to work. Remember the magnetic dies have exactly the same power of cutting as any other Bigz dies but with the added value of being able to cut within a shape in one go.


Take a piece of double sided patterned paper that measures 6 x 12" approximately.
Then score it at 2 1/2", 5", 7 1/2" and 10".


Once folded it should look like this, all the scored line parallel to each other. I like to use My Mind's eye papers for projects like this one as they offer just the right amount of thickness for scoring, folding and gluing.


To die cut it in perfect place (centred) secure it with low tack tape. It is important to make sure that the scored lines are in parallel to the edges of the die.


Once die cut, it should looked like this.


Trim off the rounded tab at one of the ends.


Score all the way down at the bottom of the rounded tabs.


Score all the way where the pips are, just about 1/4".


Make a V cuts where ever needed for a perfect fold.


Fold all scoring lines.

And glue together by glueing one end (the one with no rounded top) inside the other end.


Cut two pieces of 2 1/2" x 2 1/2" for the bottom of the pot.


Attach one of the bottoms to the pot from outside and let it dry.


Position the other square inside the pot. Trim off a tiny fraction if necessary.


Glue the side flaps for a more neat finish.


And here you have both boxes together.

I hope you enjoyed it!

Saturday, 5 May 2012

The Vintage Cabinet box


I will be perfectly honest. As much as I love this die and its possibilities, this idea was originated by Patricia Villa Boas, the Portugal distributor of Sizzix and the organizer of Chocolate Quente, the event where I taught this project. But with her permission granted, I can share it with all here. Beware it is a picture heavy post.


All measurements are in inches as it is easier for this project. the funny thing was that I originally did it all in inches, then thinking that in Portugal all would be in centimetres I translated the measurement, leaving in the UK the inches. First class, they wanted all measurements in inches so a quick change was needed. But of course, the next class was mostly in centimetres with a few inches people. By the end all measurements created a bit of a headache on my maths challenged brain!


So on we go!
You will need to begin with a full 12 x 12" piece of card. For the tutorial, I am using one of my favourite lines from Teresa Collins called Everyday Moments.


Cut the 12 x 12" in to two 6 x 12".


One of them trim 1 1/2" off the bottom -not including the white strip!)


Then score it at 3 3/4" from the left edge.


Score at 3" from the other score line - or at 6 3/4" from the left edge if it is any easier.


Take the other 6 x 12"  and trim it in half (so that you get two 6 x 6"). Then die cut them using the Vintage Cabinet Card. I always put the front of the card facing down towards the foam, unless I need the die cut to be flipped.


Then, score both cabinet card (one at a time) from the inside corner towards the bottom of the die cut.


Do the same at the other side of the card.


Then, score the bottom by following the inner corners.


Cut the small bit between score line so that you can create a small bit to tuck in.


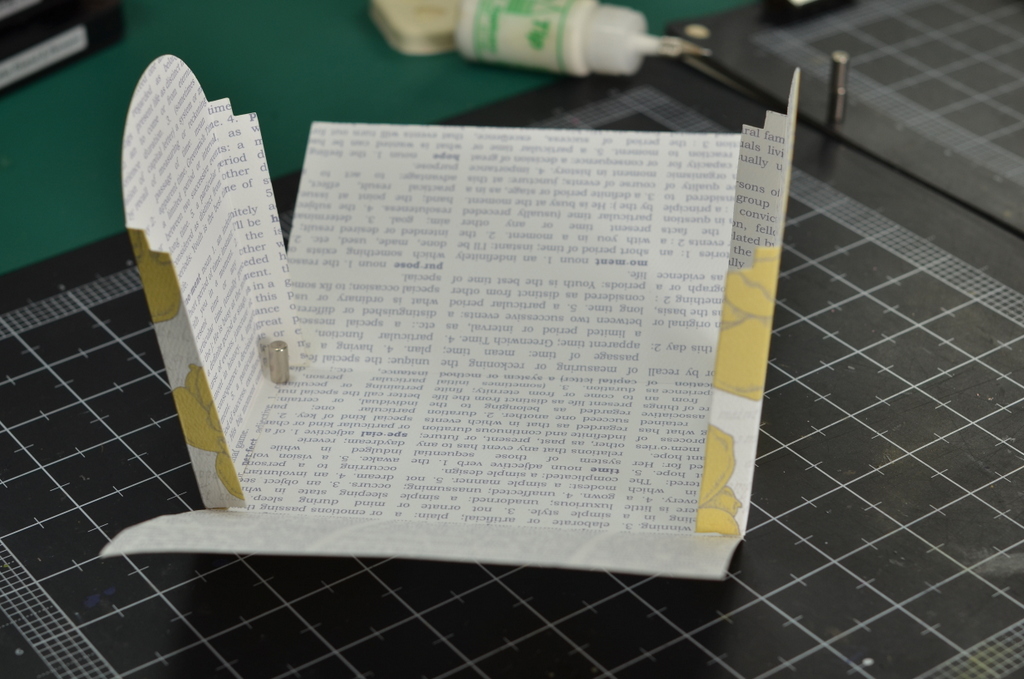
Then glue the bits to the scored bottom.


Like this. Remember to do the same to both die cut Vintage Cabinet Card.


Then, attach one of the card to the middle of the scored card.


Then attached the second die cut card.


Then glue the sides. I always use wet glue (Tacky Glue, PVA or Glossy Accents) as dry glue (any sort of tape) tends to dry out and eventually the whole things comes unstuck.


I use magnets to make sure that the glue bonds properly. But they are not essential, a good grip with your fingers will be ok!


Then add a line of your choice of strong wet glue along the back of the box.


And attach a piece of card that is 6 x 6". Let it dry completely before attempting to fold it.


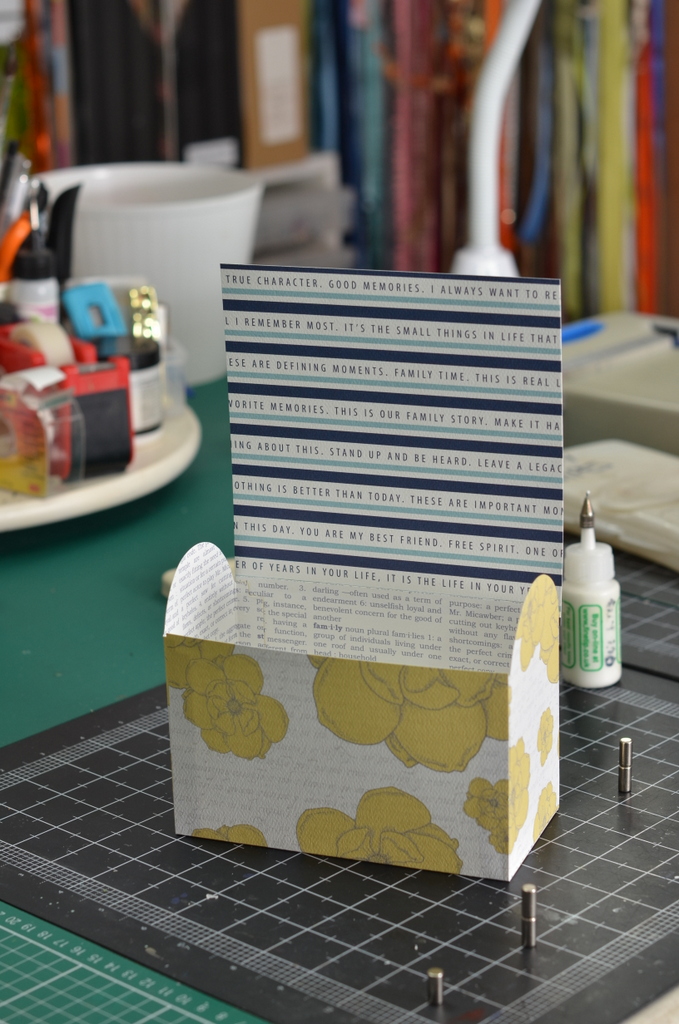
Opened and closed. To close just tuck the top inside the box.


To add decorative elements, I die cut the strips from the Vintage Lace.


And I just attached one of the them to the front edge of the box. It will reinforce the box as well as make it it prettier.


Once finished it can be used to store the Texture Embossing folders or other stuff.


Also, you can made this box wider, just start with a card that instead of being 6 x 12" is say 8 x 12", 10 x 12" or even 12 x 12". You will still have to trim the 1 1/2" from the bottom and score it at 3 3/4" and 6 3/4". And the cover will have to be 8 x 6" or 10 x 6". However I do think that the covert may come undone more easily if the box is wider.
Anyway, just another idea on how to use the Vintage Cabinet card. Next week a tutorial on how to make a companion pot made with the Mini Cabinet Card.

Wednesday, 2 May 2012

A Portugal trip


This last weekend I was invited as part of the Sizzix team to teach at Chocolate Quente XL, a consumer event run by Patricia Villa-Boas, owner of Tubo de Ensaio the Sizzix distributor in Portugal.  So here there are some photos.

The members were welcomed to the event with a goodie bag full of craft stuff and the smiles of Susana, Patricia and Rita.


I loved how they made the badges using dies.


The four teachers: Tiffany Smith, Patricia, Teresa Collins and myself.


I taught in the Brownies Room. Me brownies? How did they guessed?


 All ready for the first class, Big Shots, Vintage Cabinet Card, Mini Cabinet Card, Tattered Florals ready.


I was using the new release of My Mind's Eye Papers, Indie chic Saffron. I love it because it is textured and the colours are just beautiful.


This is the project I taught. If I can I will make the tutorial this week on how to make the back box and later on the smaller one too.

All the attendees seemed really happy with their creations, and everyone managed to finish the architectural design without any major mistakes.


Candyland was the shop area. Don't you just love the names given? Cupcake room, Macaroon, Brownie... By the way, the name of the club, Chocolate Quente means Hot chocolate, but it is the Spanish-Portuguese style, pretty much melted chocolate which is heaven.


The food was really nice, as it is always in Portugal. I truly believe that the best standard of food overall in the world is in Portugal. And that is coming from a Spanish person!


Look at this shiny chocolate, it was one of the best things I have EVER eaten. Raspberries and chocolate mousse!


 This is Patricia's project. I loved it! And was lucky enough to get a full set so I can make it at home. It uses the circle and circle scallop Framelits.


Saturday night we had a free raffle. There were so many prizes that made many very happy. Including some prizes from My Minds Eye which were announced via Skype by Sean from My Minds Eye. all the ladies loved him!

I was asked to pick up the numbers for the Sizzix prizes, which were a couple of Framelits sets by Pete Hughes and A Big Shot. They could not have been won by more deserving people, as Rosalia is Pete's number 1 fan, and guess who won the Big Shot Starter kit?


The youngest member of Chocolate Quente, Alfonso who at six (yes six) years old is a great crafter and a very well behaved boy.


And here you have Teresa Collins and Patricia Villa Boas at the very end of the show. It was such a pleasure to work alongside them as well as Tiffany. Such great ladies!