Showing posts with label back to school. Show all posts

Saturday, 19 September 2015

My Big School Ball


Hi everyone! September is here. Routines and school come back again. Because of that I wanted to do something new for my classroom. Working as  teacher I love to try new things with my students and if  it is possible I  prefer we can enjoy all  together. So this time I have designed a very big ball to learn  and play.


It was very easy and quick  to cut all the dresden plates, sew by machine and add  the red circles in the middle with blanket stitches with my Bernina 440 ( stitch 46).


Supplies:

Bigz XL Die - 10" Dresden Plate

659845   Sizzix Bigz L Die - Circles, 2", 3" & 4"

Fusible web
Stripes fabric
Print fabric
Red fabric 
Stuff to fill the ball


I have done a new video explaining all the tutorial. I hope you enjoy!


If you are interested in Dresden projects, you can take a look to  the Vintage Dresden Table Topper I did to celebrate Mother´s Day. 


Have a nice weekend and see you in two weeks and have fun!
Love
Mercedes


...........................................................**********************...........................................................


¡Hola a todo el mundo! Ya está aquí septiembre. La rutina y la vuelta al cole regresan otra vez como cada comienzo de curso. Por eso esta vez quería hacer algo para mi clase. Trabajando como maestra, me encanta probar cosas nuevas para mis alumnos y si es posible, disfrutar juntos. Así que esta vez he diseñado un balón grande para aprender y jugar.
Fue bastante fácil  y rápido cortar las piezas de dresden , coserlas a  máquina, añadir los círculos en medio y hacer una puntada decorativa sobre ellos. Yo he usado mi Bernina 440 y la puntada 46.


 Materiales:

Bigz XL Die - 10" Dresden Plate

Entretela
Tela a rayas
Tela estampada
Tela roja
Relleno para la pelota

He vuelto a hacer otro video explicando el tutorial. En él vais a ver  cómo corto las telas con la Big Shot Plus, añadiendo a la roja entretela por la parte del revés antes de cortar, para hacer los círculos y darle más consistencia cuando vaya a aplicarlos. La de rayas  y la estampada no necesitan  nada más. Se necesitan diez de cada para círculo grande.
Una vez que todo estén montados  los dresden, se cosen del revés dejando una parte abierta para meter el relleno , luego se cose a mano con puntada escondida.
Creo que el vídeo lo deja claro.
Espero que os guste.
Mira más arriba para visionario en youtube.
Si estás interesada en algún proyecto más con el troquel Dresden, puedes echar un vistazo al proyecto  que hice para el Día de la Madre, un Tapete Vintage.


Que pases un buen fin de semana y te diviertas. Te  espero dentro de un par de semanas.
Cariños
Mercedes

Tuesday, 15 September 2015

Color book organization


Happy Tuesday crafter , 
in this time when you return to school and working with books and papers I realized that they needed many bookmarks

I would like to colorful and different shapes so as to divide the pages for topics and make it more cheerful and fun.

This project can help you little order between the cards and rearrange your content, making the study and work more pleasant and very nice to see .


NECESSARY:
- Craft Asylum paper, home sweet home collection
- stick glue
- hot glue
- wooden craft sticks

A lovely week :))

Manuela
Pasticci di carta


*per i lettori italiani*

Buon martedì crafter,
in questo periodo in cui si torna a scuola e si lavora con libri e quaderni mi sono accorta di aver bisogno di tanti segnalibri.

Li desidero colorati e di forme diverse così da poter suddividere le pagine per argomenti e rendere tutto più allegro e divertente.

Il progetto di oggi può aiutarvi a fare un po' di ordine tra le carte e riorganizzare i vostri contenuti, rendendo lo studio e il lavoro più piacevoli e belli da vedere.

OCCORRENTE:
- carta Craft Asylum, home sweet home collection
- colla stick
- colla a caldo
- stecche di legno

Una buona settimana a tutti!

Manuela
Pasticci di Carta


Wednesday, 9 September 2015

Saul Bass inspiration for our teachers


Hi everybody!

Here, in a few days the children return to school, teachers meet again and will spend a whole course together. Why not bring a card to wish them a good year?

Since some time I wanted to play with color polypropylene for a funny card making, inspired by the credits for films created by Saul Bass.


And it was really funny create this happy and colorful cards.


Let's see them one to one.


I love it! easy, quick, funny and really cute.


This are the Sizzix products used in this project:

Be Happy!!

------------

¡Hola a todo el mundo!

Aquí, en pocos días los niños regresan a la escuela, los maestros se reúnen de nuevo con ellos y van a pasar un curso entero juntos. ¿Por qué no llevar una tarjeta para desearles un buen año?

Desde hace tiempo quería jugar con polipropileno de color para crear tarjetas divertidas, inspirado en los títulos de crédito para películas que creaba Saul Bass.

Y fue muy divertido crear esta tarjetas tan happy y coloridas.

¡Las adoro! rápido, fácil, divertido y muy cuquis!

Estos son los productos Sizzix usados en este proyecto:

¡¡Sed muy felices!!

Thursday, 3 September 2015

Back to school - kit bag


 It's the beginning of September and now suddenly it's back to school, and my granddaughter, Abi is starting school - so this week I'm making a little bag for her P.E. kit -


I have used 4 floral prints from the Little Bird Told Me fabric range from Lewis and Irene -
38cm x 30cms for the bag, and small pieces for the letters and flowers.
I fused web to the back of the fabrics for the letters and flowers before cutting them out - it makes it so much easier when stitching the shapes in place - no pins needed!
I used the Big Shot machine and the following dies to cut out the flowers and letters -
Flower, layers and leaves, by Dena Designs - 657690 -
http://www.sizzix.co.uk/product/657690/sizzix-bigz-die-flower-layers-leaves
for the capital  - Lollipop Shadow Capital letters - 657892
http://www.sizzix.co.uk/product/657892/sizzix-bigz-alphabet-set-4-dies-lollipop-shadow-capital-letters
and for the lower case letters - Lollipop Shadow Lower Case letters - 660112
http://www.sizzix.co.uk/product/660112/sizzix-bigz-alphabet-set-4-dies-lollipop-shadow-lowercase-letters
Remember when cutting out letters the fabric needs to be right side down on the die because the letters and cut in reverse.
The letters and flowers were fused into place one side of the bag -
I placed the letters about 12cm from the bottom edge, and 5cm in from the edge, but this doesn't have to be exact., and added the flowers underneath and to one side. I stitched all the letters and flowers in place as this bag may take quite a bit of hard use!.
To make the bag I folded it in half, right sides together and stitched the side and bottom - leaving a 2cm opening 2.5cm from the top -
and I used a zig-zag stitch to neaten the raw edges.
A 1cm fold was made around the top edge, onto the wrong side, and then folded over again 2 .5cm and stitched down -

The opening in the side seam allows a ribbon to be threaded through as a drawstring.
The bad is complete and can be turned right side out ready for use. If you like you can pull the ribbon through so that the knot is hidden inside.
I think I might have to make a new bag for her big sister - but that can wait until later.
Next week is a mystery.
Have fun stitching.
Angela

Tuesday, 1 September 2015

Back to school with Sizzix


Welcome back Crafter!
How was your holiday ??

I'm ready for a new year to spend among paper, scissors, glue, big shot and a lot of new punches to try.

Today I want to share with you a project I'm working on my brand, but you can also make your own if you have a good manual.

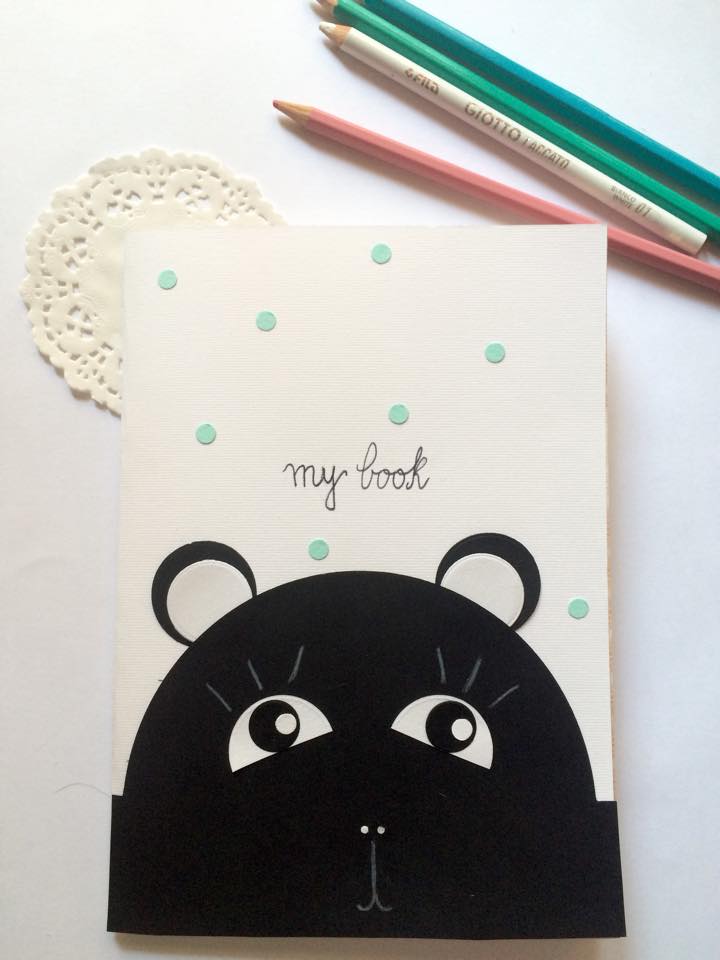
My daughter Eleonora always complains that his copybooks for school does not like, does not like the cover, designs, patterns, and then I tried to revisit them, adding some applications and creating various shapes with dies.


NECESSARY:
- a copybook
- color cardstock
- pencil
- white pencil
- marker pen
- ruler
- stick glue
- scissors
- paper puncher (different sizes)


I enjoyed a lot!
You can try to move the eyes of the image in different directions and you will realize how many different animals can give life to your copybook.


And now create!
next Tuesday with a new project!
Manuela 
Pasticci di Carta


*per i lettori italiani*

Bentornati crafter!
Come sono andate le vacanze??
Io sono pronta e carica per un nuovo anno in mezzo a carta, forbici, colla, big shot e tantissime nuove fustelle da provare.

Oggi voglio condividere con voi un progetto su cui sto lavorando per il mio brand, ma che potete realizzare anche da soli se avete una buona manualità.

Mia figlia Eleonora si lamenta sempre che suoi quaderni per la scuola non le piacciono, non le piace la copertina, i disegni, le fantasie, e allora ho provato a rivisitare il suo quaderno, aggiungendo qualche applicazione e creando varie forme con le fustelle.

Mi sono divertita tantissimo!
Provate anche a voi a muovere gli occhi dell'immagine in diverse direzioni e vi accorgerete di quanti animali differenti possono dare vita al quaderno.

E adesso sbizzarritevi!

OCCORRENTE:
- un quaderno
- cartoncino colorato
- matita
- matita bianca
- tratto pen
- righello
- colla stick
- forbici
- perforatore per carta (varie misure)


al prossimo martedì con un nuovo progetto!
Manuela
Pasticci di carta


Wednesday, 26 August 2015

Hi! I'm Quim Díaz and I have a very ugly pencil case.


Hello everybody!

Holidays end, it's about time to return to school or work, and has come into my hands a very ugly pencil case!

I thought a few days on how to do something cute with it. Finally with a little chalk and paint, and  one of my favorite Big Shot Plus Starter Kit dies I can have a beautiful pencil case.


And if you want to see how ugly it was before, and do something similar, here you have a video tutorial where you can see how I did it.


This are the Sizzix products used in this project:
660515 Sizzix Big Shot PLUS Starter Kit (White and Gray)

Be Happy!!

--------------------------

¡Hola a todo el mundo!

Las vacaciones finalizan, ya es hora de regresar a la escuela o el trabajo, y ha llegado a mis manos un estuche muy feo!

Pensé unos días en cómo podía hacer algo chulo con el. Finalmente con un poco de chalk paint y uno de mis troqueles preferidos del kit de inicio de la Big Shot Plus, he podido tener un estuche muy bonito.

Si quieres ver lo feo que era antes y/o hacer algo similar, arriba tenéis un video tutorial donde se puede ver cómo lo he hecho.

Estos son los productos Sizzix utilizados en este proyecto:
660515 Sizzix Big Shot PLUS Starter Kit (White and Gray)

¡¡Sed muy felices!!