Showing posts with label favour box. Show all posts

Friday, 30 October 2015

Timeless Love - gift box or favour


Hi Sizzix fans! Anna here with today’s Sizzix Tutorial.
I'm showing you two sweet Gift Boxes, very easy to make and so lovely!
This Box die is perfect to create a party table setting, wedding favour... or a cute gift box for Christmas.
 
Sizzix-Timeless Love-die-plus-gift box-favour-video tutorial by cafecreativo (1)

This is my first box embellished:

Sizzix-Timeless Love-die-plus-gift box-favour-video tutorial by cafecreativo (2)

My second box:

Sizzix-Timeless Love-die-plus-gift box-favour-video tutorial by cafecreativo (3)
 
Here is a video for you! In the video I explain how I made the box. Enjoy! The supply list is below ;)
 

Thanks for stopping by and till next time happy crafting!

Items used:

Sizzix Big Shot Plus Machine Only (White & Gray) (660020)

Sizzix Thinlits Plus Die Set 6PK - Timeless Love Gift Box (660833)

Sizzix Framelits Die Set 8PK - Circles (657551)

Sizzix Framelits Die Set 8PK - Circles, Scallop (657552)


patterned paper
cardstocks
twine
rhinestone
 
**************************************
Flag_of_Italy
 
Ciao a tutti i fans di Sizzix! Sono Anna ed oggi sono qui con un nuovo tutorial.
 
Nelle foto qui sopra vi mostro due scatoline, molto facili da fare! Per realizzarle ho usato la fustella per Big Shot Plus: Sizzix Thinlits Plus Die Set 6PK - Timeless Love Gift Box , dolcissima!
Il set di fustelle oltre alla scatolina base, comprende diversi abbellimenti come un uccellino, una rosa, un fiorellino ed un paio di rametti differenti.
Questa fustella, di grande formato, è sicuramente ideale per creare bomboniere di ogni tipo e scatoline regalo per ogni occasione.
 
Per spiegarvi come creare la scatolina, ho realizzato anche un video. Buona visione!
Come sempre l'elenco dei materiali è in fondo al post ;)
 
Grazie della visita!

Materiali:

Sizzix Big Shot Plus Machine Only (White & Gray) (660020)

Sizzix Thinlits Plus Die Set 6PK - Timeless Love Gift Box (660833)

Sizzix Framelits Die Set 8PK - Circles (657551)

Sizzix Framelits Die Set 8PK - Circles, Scallop (657552)


carte da scrapbooking
cartoncini
twine
strass

Tuesday, 20 October 2015

Bat Treat Box


 Hi friends!


Today we use our Big Shot to make a simple box of sweets for Halloween.

You need:


Cut the box with your box die and assemble using the bi-adhesive tape.

Use the box as a guide to draw bat wings from the right size, cut and stick it behind the box.

Cut two elongated triangles and paste it behind the box to make the horns. Cut two small triangles and paste inside of the lid of the box, in the front, to make the tusks. Stick the eyes.


This box is perfect with the Halloween garland two weeks ago I showed you, not you think?


What do you think? A quick and fun idea for Halloween. See you in the nex tutorial!

////////////////////////////////////////////////////////////

Ciao amici!

Oggi useremo la nostra Big Shot per fare una scatolina semplice per le caramelle e i dolciumi di Halloween

Materiali
Tagliare la scatolina nel cartoncino nero usando la fustella e assemblare usando il nastro. Usare la scatolina come guida per disegnare le ali del pipistrello alla dimensione giusta, tagliare ed incollare sul dietro della scatolina.

Tagliare due triangoli allungati ed incollare sul dietro per fare le orecchie.

Tagliare due triangoli bianchi piccoli ed incollare dal lato interno del coperchio della scatola, sul fronte, per fare le zanne. Incollare gli occhietti.

Che ne pensate? Un'idea veloce e divertente per Halloween!

Ci vediamo il prossimo martedì con un altro tutorial!

////////////////////////////////////////////////////////////

Hola amigos!

Hola amigos! Hoy usaremos nuestra Big Shot para hacer una cajita sencilla para los dulces de Halloween.

Materiales

Cortar la caja con el troquel y armar usando el celo. Usar la caja como guía para dibujar las alas del murciélago del tamaño justo, recortar y pegar por detrás de la caja.

Cortar dos triángulos alargados y pegar por detrás de la caja para hacer los cuernos.

Cortar dos triángulos blancos pequeños y pegar del lado interno de la tapa de la caja, en el frente, para hacer los colmillos. Pegar los ojos móviles.

Qué os parece? Una idea rápida y divertida para Halloween, hasta el próximo tutorial!

Sunday, 13 September 2015

Monochrome Favour Box


Recently, I picked up some marbled cardstock to make a few projects with. I thought it would be great for the gift box die which is included in the Sizzix Big Shot Plus Starter Kit.

I like to use a bone folder along all the folds of the box and then a hot glue gun to assemble it.


I added ribbon and a scalloped trim to make this monochrome favour box. It would be great for a classy wedding or even as a gift box for a birthday.

It was hard to photograph the marbled pattern, but I hope you can see it a little bit in these photos!


Thursday, 30 April 2015

Baby basket


Hello Sizzix friends!
Happy thursday!
Do you have already downloaded Free New Baby Paper Downloads?
They are so beautiful, adorable and particularly suitable for babies.
Today we use them to create lovely baby basket to use as favors!

I used:
Scissors
Glue

Chose two different pattern and die cut the boxes using the thinlits included in Sizzix Big Shot Plus Starter Kit 660515.
Decorate the boxes with different embellishments chosen from Free New Baby Paper Downloads.
I chose the stars banner for the handle of the basket.
I chose baby boy and baby girl banners to decorate the boxes. And again stripes, pois, hearts and more banners.


I think they are adorable!!!
See you next week!

Giovanna

-PER LE LETTRICI ITALIANE-

Ciao carissime amiche e buon giovedì!
Avete già scaricato le splendide Free New Baby Paper Downloads?
Sono bellissime, adorabili e particolarmente adatte a creazioni per i più piccoli!
Oggi vedremo come usarle per creare dei carinissimi cestini da usare come porta confetti!
Per questo progetto ho usato:
Sizzix Big Shot Plus Starter Kit 660515
Free New Baby Paper Downloads
Forbici
Colla

Scegliere due diversi pattern dalle carte che avrete scaricato e poi stampato su cartoncino bianco. Fustellare le scatoline con la fustella adatta inclusa nello starter kit della nuova big shot. Come vedete, acquistando soltanto lo starter kit è possibile già ottenere tante creazioni!! Basta davvero solo la fantasia!
Decorate le scatoline così ottenute scegliendo diversi abbellimenti dalle carte scaricate. Io scelto il banner con le stelle per creare il manico del cestino blu e il banner con i fiocchetti per il cestino rosa. E poi cuori, pois, strisce.....
Io penso siano davvero adorabili!!
Non credete anche voi???

Vi ringrazio per la visita!
Alla prossima!

Giovanna

Thursday, 26 March 2015

Favor box


Hello everyone and welcome back with a new tutorial!! 
Today I want to introduce some features of the new Big Shot Plus. It is fantastic in the new white and gray colors! 
The Starter Kit already offers great possibilities to create immediately cards, invitations, scrapbook pages, home décor, fashion, altered art, quilting and much more! The much larger plan allows to use sheets of A4!

With this tutorial I will show you how to easily create a delicious favor box.

I’ve used: 

Sizzix Big Shot Plus Starter Kit (White & Gray) 660515
Glue
Sissors
Cardstocks (white, yellow, green, light blue, pink, cardstock Craft Asylum included in Starter Kit.
Glitter (pink)
Ink

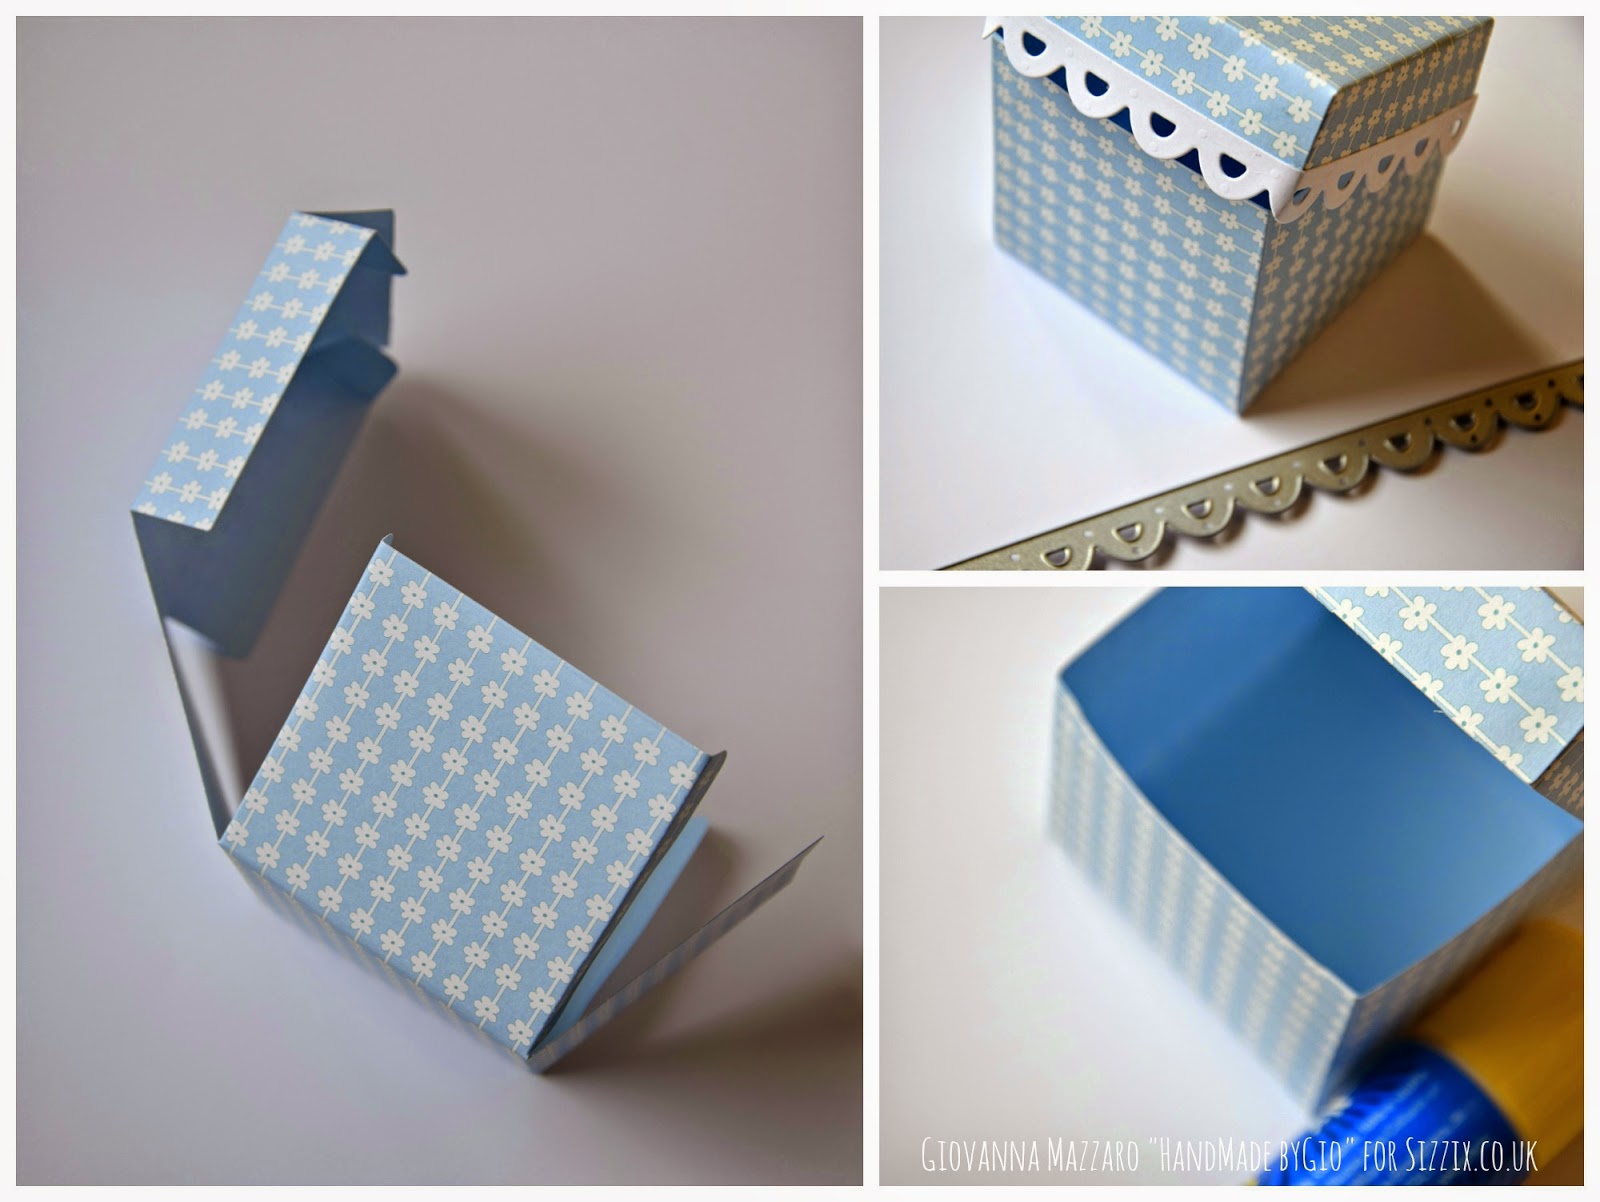
Die cut the little box with Tinlits Plus Die Set included in the Sizzix Big Shot Plus Starter Kit (White & Gray) 660515, using Craft Asylum Cardstocks. 
Die cut the wavy edge using the white cardstock.
Die cut the flower using the pink cardstock.
Die cut the tag using thle light blue cardstock.
These steps you can do thanks to the Tinlits Plus Die Set included in the Sizzix Big Shot Plus Starter Kit (White & Gray) 660515.
Now you have everything you need to create the favor box.
Fold the carstock helping with the marks clearly visible than paste parts.
Paste the white border.
Die cut the other flower with Sizzix Bigz Die - Flourish, Floral w/Leaves 656520, using white yellow and green cardstocks.
Compose the flower following the steps.
Give some color to the flower with ink.
Paste glitter to the center of the flower.
Now the favor box is ready to contain the sweets, with the tags will be perfect!!!
Thanks to all!!

 PER LE AMICHE ITALIANE

Ciao a tutte e ben ritrovate con un nuovo tutorial!!
Oggi voglio presentarvi alcune caratteristiche della nuova Big Shot Plus. E' fantastica nei nuovi colori bianco e grigio!

Lo Starter Kit offre già grandi possibilità per creare fin da subito carte, inviti, pagine di album, home decor, altered art, quilting e molto altro ancora! Il piano molto più grande permette di usare fogli di tipo A4!!

Con questo tutorial voglio mostrarvi come creare una deliziosa bomboniera.

Ho usato:
Colla
Forbici
Cartoncini
Glitter

Fustellare la piccola scatola usando il cartoncino Celeste con fiori bianchi della Craft Asylum.
Fustellare il bordino ondulato con il cartoncino bianco, il fiore con il cartoncino rosa, la tag con quello celeste. Tutte queste operazioni le potrete fare usando semplicemente il Tinlits Plus Die Set e i cartoncini Craft asylum, tutti inclusi nel Sizzix Big Shot Plus Starter Kit (White & Gray) 660515!!

Ora fustellare l'altro fiore con Sizzix Bigz Die - Flourish, Floral w/Leaves 656520, usando i cartoncini bianco giallo e verde.

Ora hai tutto per creare la tua scatola porta confetti!!
Piegare il cartoncino della scatola seguendo le pieghe ben visibili, dopo incollare le parti.
Incollare il bordino bianco.
Comporre il fiore sulla scatola seguendo gli steps nelle foto.
Dare un pò di colore al fiore con dell'inchiostro.
Al centro del fiore incollare i glitter.

Ora la tua scatolina è pronta per accogliere i confetti, con la tag sarà perfetta!

Spero vi sia piaciuto questo semplice tutorial.
Grazie a tutti!!!


Wednesday, 16 July 2014

Owl Mash Up!!


A'mash up' started as a musical term which describes the blending of two songs very often in very different styles/genres, think ABBA and Black Sabbath...... you get the idea!

This month we are releasing three new collections from Tim Holtz, Prima and Lori Whitlock. I love them all and I want to share as much as I can but time is against us my friends, so I got thinking and.......

Here is a gift box made using the Bigz XL owl bag. It's a really lovely die perfect for party favours and the like and I'm sure you will be seeing it in many magazine projects and in many different colour combinations and materials.


This is a fabulous and super-useful die and as I said above, you will see oodles of pretty owl boxes so I wanted to shake it up a bit and throw in a die from the Prima (Flora Grande) collection. When I say die I am actually referring to a set of dies (nine to be exact) named Rondeaux which are basically, gears with hearts between the spokes in various sizes (I LOVE!!!!!).

I also want to use only one colour, (What!!!) and that colour is black, (Gasp!!!) so I will need a little help from my silver gilding wax (Phew!!!)

I started by die-cutting the four parts to make up the main body of the box from graphite sparkle which is a black heavy weight card with holes drilled through it and is made by Inspire Me Papers, check out the link above. Next, I set about putting the box together which is surprisingly simple as these things can often be quite fiddly! Once it was ready I gently rubbed the edge using the gilding wax, the one I used is called Treasure Pewter you can use a soft cloth but I prefer to use my finger tips which gives you more control but mainly because it smells like boot polish Mmmmmm! 


I Die-cut all the elements to finish the owl and embossed the main body using the Sweet Dots folder from the new Lori Whitlock collection. Next I strategically applied the wax to all the die-cuts except the eyes. and gently curled the three rows of feathers before assembling the owl.

There was still one bit missing, this is where the gears come in. I die-cut two sets to create the eyes and gave them the pewter treatment.

And here is the finished 'Steampunk' owl. For the finishing touches I used screw head brads in the centre of the eyes and mounted both sets of gears with 3D foam pads. I embossed the owls nose using the folder from the new Big Shot starter kit, don't worry if you don't have it there are plenty that will do the job just as well.


Just a reminder, if you want to see a little more of the Prima dies I featured as a guest designer on their blog last week and here is the link. the image below is one of two projects featured.