Friday, 18 May 2012

Fabric ATCs with Framelits

Hi again!
Do you like experiments? I do!
I know Framelits are intended to be used mostly with paper and light cardstock... but I wanted to check what will happen if I use something... well... almost like cardsotck: sticky back canvas, one of my favorite products from Ranger.
Sticky back canvas is in fact a piece of delicate, self-adhesive canvas,with paper on the back - I suspected that Framelits may work with that kind of material as it is quite solid and not to thick too. Here is the effect I got - set of mixedmedia, canvas ATC cards. 

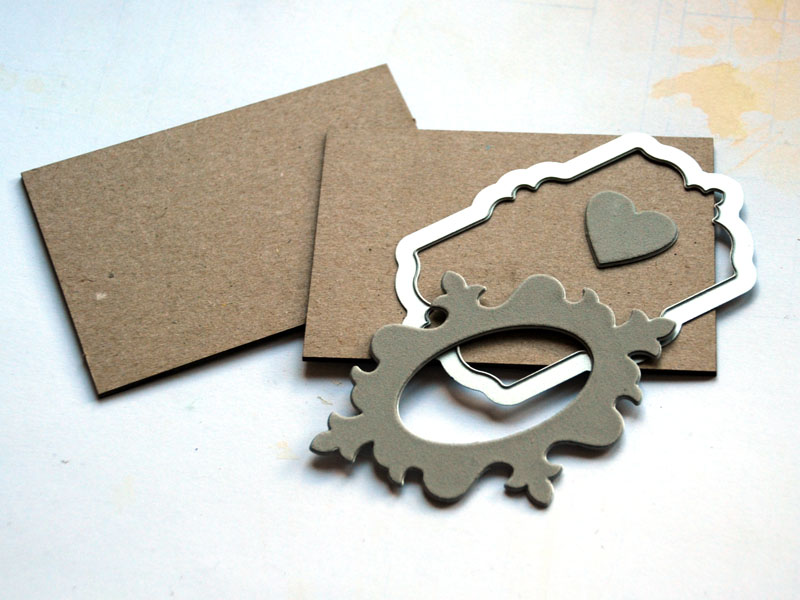
I started creating my cards with 2 pieces of ATC bases, piece of sticky back canvas and dies from two sets of Framelits: Sizzix Framelits - Frame, Fancy Oval (657902) and Sizzix Framelits- Labels, Fancy #3 (657907)I cut out small elements i wanted to use on my ATCs. I used scissors to finish the cutting, if needed. 


I stick a piece of Prima canvas sheet on the top of my aTC bases and covered them with a random layer of gesso, to make the colors lighter. 


Using some of the cut outs, lace and pieces of canvas I created layers on my ATCs. I sprayed them with shades of green and yellow and dried with a heating tool. Next, I stamped on the top of them with black Archival Ink (Ranger). 


My next step was adding the decorative elements on the top of the ATC cards - I used the self adhesive back of the canvas. I sprayed the cards once again and let the composition dry. 


Finally I added some acrylic drops, pins and metal, painted the cards a bit with gesso and covered the hearts with Glossy Accents (Ranger).  The ATCs were ready!


I hope you liked the idea and you will try using Framelits to decorate your small creations - this is so easy and inspiring!

I wish you all a wonderful creative week!
xoxo
Finn


Thursday, 17 May 2012

Mini book


Mini book "LOVE" by Karine Cazenave-Tapie, mini album amour par Karine

Hello everybody, Bonjour tout le monde

Hope you're fine ! J'espère que vous allez bien !
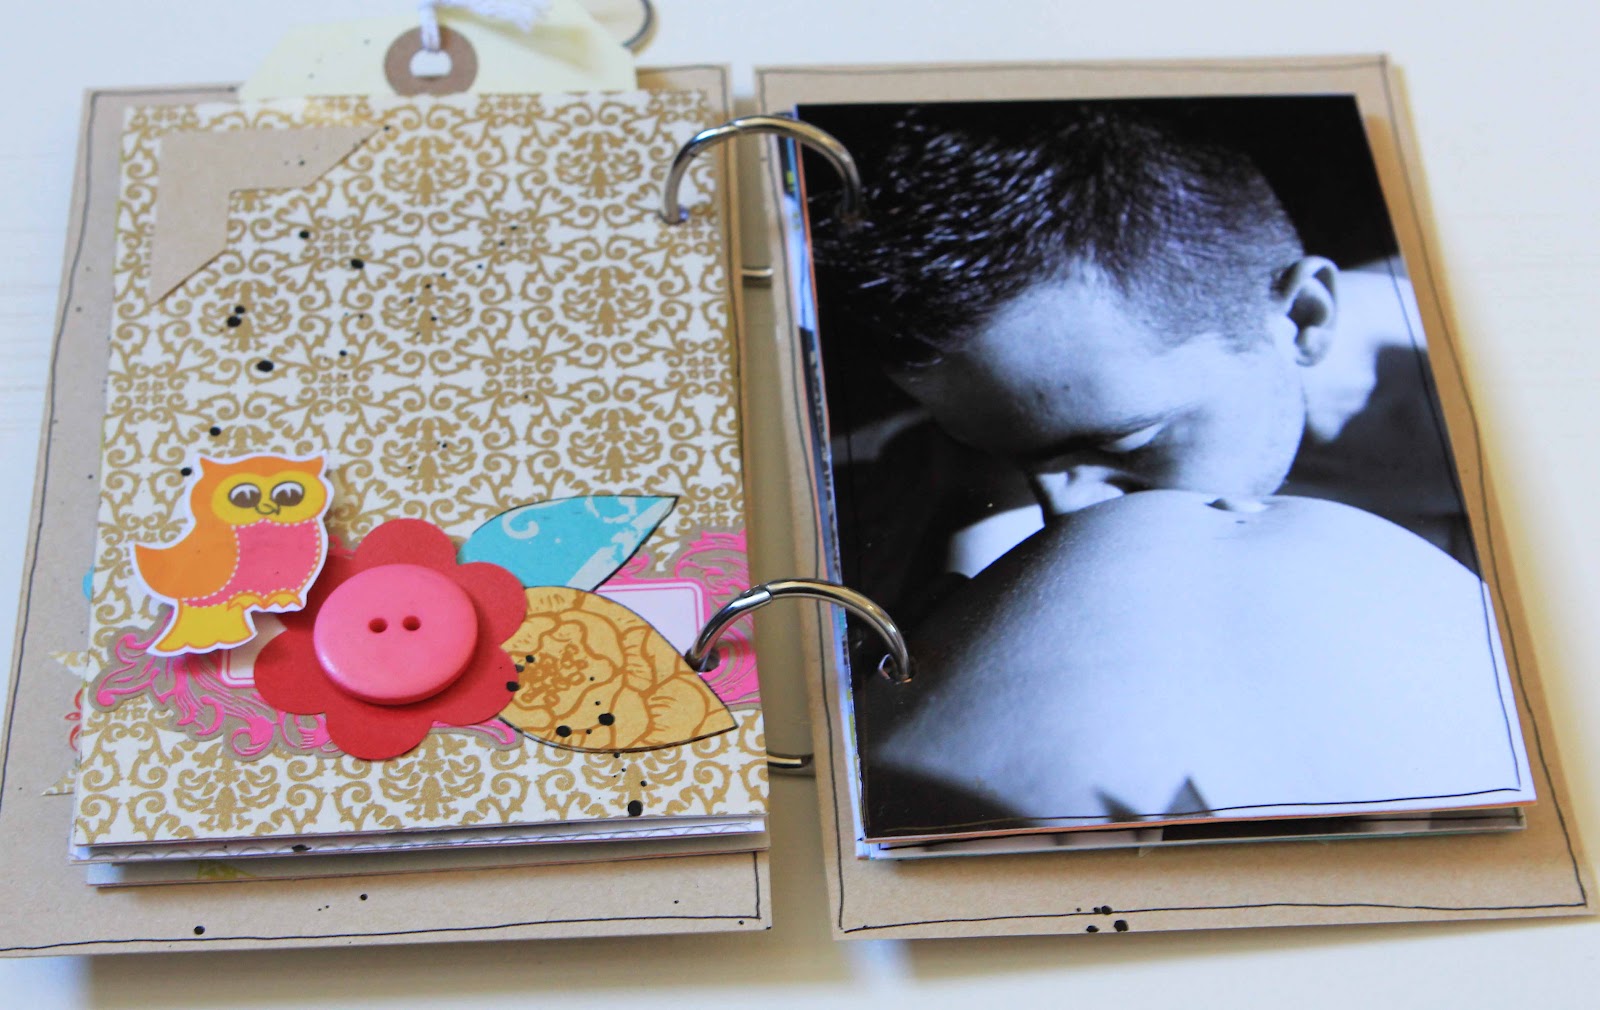
Spring is here in France and I wanted to make a colorful and fresh album for a friend who is pregnant :) Le printemps est enfin ici en France, j'ai eu envie de faire un mini album coloré et frais pour une jolie future maman ! Merci Aurélie pour ces jolies photos :)

She sent me 6 pictures about her and her boyfriend. A very beautiful selection so I wanted to create a memories book to give to her. Elle m'a envoyé 6 photos d'elle et de son ami. Une très jolie sélection que je vous propose ici en mini album :)

Follow me in 5 steps and create yourself your album. Suivez moi et réalisez ce mini en 5 petites explications !

All the embellishments are created with the Big Shot ! Tous les embellissements sont réalisés à la Big Shot

Material :

Cardstock : American Crafts
Patterned papers : Hambly
Transparencies : Hambly
Cardboard : Toga
Alphabets : Hambly, Jenni Bowlin
Buttons : American Crafts
Fabric flower : American Crafts
Brad : Pink Paislee
Washi Tape : Hambly
Leave : 7Gypsies
Pearls : Kési'Art
Stickers : Hambly
Dies : Sizzix

Step 1 : Select your pictures / Sélectionnez vos photos
I only use 6 pictures. I printed them in black and white in size : 4x12inches. J'ai utilisé 6 photos en noir et blanc au format 9x13cm


Step 2 : Build your mini book/ Construisez votre album

You just need to glue cardsdock on the back of every picture to strengthen it. So the size of every cardstock is the same as your picture (4x12 inches for me). Vous avez simplement besoin de coller l'envers de vos photos sur un cardstock afin de les renforcer, donc les pages de votre mini sont au même format que les photos soit 9x13cm

You need 6 differents papers. Vous avez besoin de 6 papiers différents
I selected these items : voici ma sélection


Cover every cardstock whith patterned paper. Recouvrez chaque cardstock de papier imprimé

Cut 2 pages in transparencies, découpez également deux imprimés transparents

Step 3 : Use your Big Shot and your favorites dies to create your embellishments/ Utilisez votre Big Shot pour réaliser vos embellissements 

I used dies Sizzix : dies utilisés

Use several pattered paper to create your flowers. Utilisez plusieurs imprimés pour créer vos fleurs

Complete with baby stickers just perfect for the mini book ! I really love using these funny animals and designs ! Complétez avec des autocollants bébé, les petits animaux sont juste parfaits et vraiment rigolos !


Add some title, little words to complete your book. Ajoutez votre titre, quelques mots ici et là afin de compléter votre mini

Step 4 : Build your cover / Construisez votre couverture

For the cover you need cardboard, corrugated paper exactly. Pour la couverture, utilisez du carton ondulé
Cut two pages to make the cover. Découpez deux morceaux 
I always make the cover at the end, because for me, they need to resume the whole book.Je termine toujours ma couture à la fin, car selon moi elle doit résumer l'intérieur de mon album

Embellish it with a doily'heart and a flower made with your Big Shot. Use several papers for more fancy. Embellissez avec un napperon en forme de coeur et une jolie fleur fabriquée à la big shot, utilisez plusieurs imprimés


Add the title LOVE.Ajoutez le titre LOVE

Step 5 : Bind your book/ Reliez votre album

Use your crop-a-dile to make the holes, link with metal rings. Utilisez votre crop-a-dile pour faire les trous

And now look at the whole book ! et voici toutes les pages du mini !


Thanks, Karine

Wednesday, 16 May 2012

Criss Cross Card


This stunning congratulations card will be certainly noticed. In this time of the year when nature is blooming I really like making cards which also bloom. In this card I've used some best seller dies from Sizzix, all of them designed by Tim Holtz.

CRISS CROSS CARD

This is called Criss Cross Card. You need two square cards. Take one card and cut it diagonally from center top to the bottom left. Take the other piece and cut it diagonally from the center top to the bottom right. Add adhesive to the square back of one of the card stock pieces and attach pieces together. Attach patterned papers to the square inside and to the triangles.

 Use adhesive tape to the bottom of the middle panel, as well on the bottom of the triangle flaps that will be on top of the card. Tape the card base together as a pocket.

Tag Inside of the Criss Cross Card is cut with Movers & Shapers Die - Tag & Bookplates (656938) and the letters with Decorative Strip Die - Upon A Time (656916).


I love making flowers. This Bigz Die - Tattered Florals (656640) is so beautiful and it goes so well together with Bigz Die - Tattered Leaves (656927). I used two kinds of patterned papers to this flower, I inked the edges with Distress Ink (Mustard Seed) and used some Yellow Stickles Glitter glue. Flowers are bend and wrinkled by hand and attached to each other with 3D adhesive squares. The leaves are also inked with Distress (Peeled Paint) and decorated also with Lime Green Stickles.

The Bigz Die - Elegant Flourish (656639) makes the final touch in to this card.


Tuesday, 15 May 2012

Play with your Camera!

 By Celine  Navarro


Karine and I often travel together and, YES, we always have fun together! We've both been into photography so much, of course, as we're scrapbookers. And when I saw these Camera dies by Sizzix, it was love at first sight.


To make this kind of layout, you'll need a 12x12 patterned paper, mists, gesso, a couple of stamps, embellishmens and alphas, and OF COURSE, your Big Shot and your Camera Movers & Shapers dies.


First, use some different color mists on your background.
Once dry, add some gesso with a brush.
I added some alpha stamps here and there.


Glue your pictures, your embellishments AND go cut your Camera dies! They add such a fun and modern look to any of your projects!


Repeat the element in different patterned papers to add interest to your background and to make them pop from your busy paper.


Aren't they gorgeous!?
Take care and have fun!
Céline

Monday, 14 May 2012

Shaker box + confetti layout


Hello everyone!
Are you ready for a new week? I don't like very much monday, the beginning of a new week, always a lot of things to do and it's not so simple to have a good start!!!!
Create is the key to start in a good way a new week!!!

Today I want to show you a new page, I am in love with it! I love the picture even is a little blurry and the composition! It was a lot of time that I would to create e shaker box to insert a lot of confetti, today tendency!!!

Let's start!

Materials you need:


Big shot machine (item code 657000)
movers & shapers number set ( item code 657841)
framelits hearts #2 (item code 657574) arriving soon in the shop and in your local retailers!!! You will love it!
Big shot pro machine (item code 656250)
patterned papers of your choice ( I used studio calico kits patterned papers)
sewing machine
vellum
trasparency
white card stock
embellishments of your choice ( I used studio calico kits)
confetti
3d double side tape

Create the shaker box!

It's so easy and funny!
Forst thing choose the shape you want to use. I used the heart and make it on a white card stock thanks the big shot pro! Once you have made it, put a piece of transparency behind the heart, on the back of the page. Sew it making a heart on the front of the page using the sewing machine!


put many confetti inside, I have added some little paper words as well. Put double side tape around your shape and close everything using papers or transparency or vellum like me.

Now the page!
The lovely details is the number "2" on the vellum cover on the photo! I love it so much! I have made it simply using the movers and shapers number set by tim holtz on the vellum, very cool effect!

I hope to have inspired you :)
Have an amazing monday!!!

Love,
Lory

Saturday, 12 May 2012

Mini Cabinet pen pot


Today I am sharing how to make the little pen pot using the Mini Cabinet Card die.


As the Mini Cabinet Card is a Magnetic Movers and Shapers die you will need either the Base Tray or the Vintage Cabinet Card to die cut it. Both Base and Vintage Cabinet card dies are designed to be used in combination with the magnetic movers and shapers dies, they just add the right amount of thickness for the magnetic dies to work. Remember the magnetic dies have exactly the same power of cutting as any other Bigz dies but with the added value of being able to cut within a shape in one go.


Take a piece of double sided patterned paper that measures 6 x 12" approximately.
Then score it at 2 1/2", 5", 7 1/2" and 10".


Once folded it should look like this, all the scored line parallel to each other. I like to use My Mind's eye papers for projects like this one as they offer just the right amount of thickness for scoring, folding and gluing.


To die cut it in perfect place (centred) secure it with low tack tape. It is important to make sure that the scored lines are in parallel to the edges of the die.


Once die cut, it should looked like this.


Trim off the rounded tab at one of the ends.


Score all the way down at the bottom of the rounded tabs.


Score all the way where the pips are, just about 1/4".


Make a V cuts where ever needed for a perfect fold.


Fold all scoring lines.

And glue together by glueing one end (the one with no rounded top) inside the other end.


Cut two pieces of 2 1/2" x 2 1/2" for the bottom of the pot.


Attach one of the bottoms to the pot from outside and let it dry.


Position the other square inside the pot. Trim off a tiny fraction if necessary.


Glue the side flaps for a more neat finish.


And here you have both boxes together.

I hope you enjoyed it!