Sunday, 23 March 2014

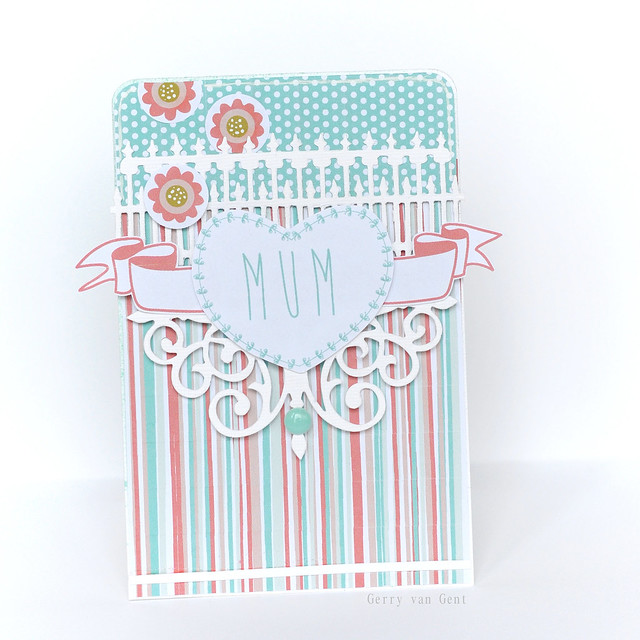
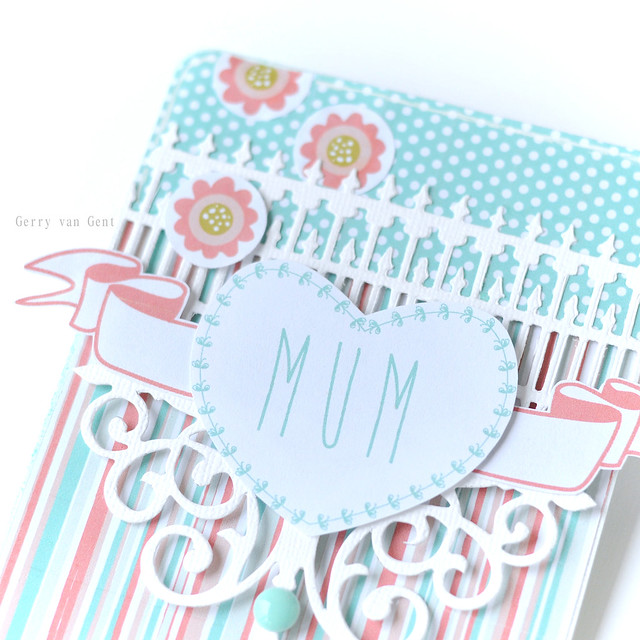
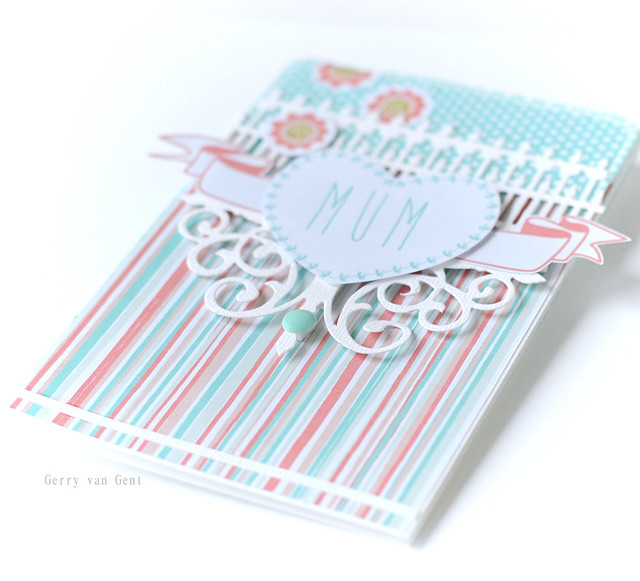
A "Mum" Card by Gerry van Gent

Hello Sizzix Friends!
Today I have another card to share with you 
which was created by using the Free Mothers's Day Papers.
In case you didn`t check the papers yet here is a link for you:

FREE PAPER DOWNLOADS for MOTHER'S DAY

Card size: 10 cm x 15 cm
Mum
657900 Sizzix Big Shot Machine
658221 Sizzix Originals Die Curly Gate
658711 Sizzix Sizzlits Decorative Strip Die Ironwork Gate
*     *      *
I used two of the pattern papers for my background.
Then I began decorating the card from top to bottom by
adding cut outs from Mother's Day Paper Downloads
and combining them with the beautiful dies.
The banner is originally a small one but to make it look
long I cut into two parts and added them to both sides of the heart.
Mum 1
Mum 2
Thank you for your visit!
Have a creative Sunday!

Saturday, 22 March 2014

Banner & Borders Venetian Card


Hi, it's Rachel here today with a card I created using the Sizzix Banner & Borders Thinlits Die #658788 along with Darkroom Door stamps and images.


When I first saw this die set, I knew it would work really well for borders on cards. This card is only showing one of the dies. There's actually 4 in the set, so it's a really versatile set. Here's how I created the card:

1. Stamp the Darkroom Door Tickets Background Stamp onto cream cardstock using Archival Coffee inkpad. Lightly sponge around the edges of the card using the same ink.
2. Die cut the swirl border from Banner & Borders Thinlits Die #658788 using Kraft Glassine paper. Adhere it underneath a Darkroom Door Venetian Filmstrip and attach to the card.
3. Cut a word from the Darkroom Door Venetian Wordstrips and mount onto dark brown cardstock. Adhere to the card using foam tape.


Such a quick card to make, but looks great! I love how these dies can use up little strips of paper too. I have lots of little strips of cardstock and patterned paper left over from projects and these dies are perfect for using them up!

Hope this has inspired you! Thanks for dropping by today!

Rachel

Friday, 21 March 2014

It's A Numbers Game ...


Hello it is Katie here.

This week I have had fun creating some cards featuring numbers.  Adding numbers is a great way to personalise cards for both children and adults, although as adults we would rather forget our age!!


Of course all of these can be altered using any numbers you wish. 

These large Sassy Serif Numbers are perfect for cards.  They are so versatile and great for scrapbooking too! 


The numbers and alphabet here are from the Block Talk Alphabet. Again this is a die which has so many uses.  


I have so many more ideas using these dies, maybe I will share a few more with you soon. I would love to feature some fun children's cards using numbers.

Have a lovely weekend and Happy Crafting x


Spring Home Hanging


Hi Everyone! This is Anna. To get in the spring mood, I am sharing a home decor project. I decided to create a wall hanging using some wonderful Sizzix products.
 
Anna Draicchio - sizzix big shot -home decor - Wall Hanging Spring (1)

Anna Draicchio - sizzix big shot -home decor - Wall Hanging Spring (2)
 
Items used:
cardboard
photo
cardstock: vanilla, turquoise, pink, light pink, green
patterned papers: Webster's Pages, Prima, Echo Park Paper, American Crafts
embellishments: “spring” and bird (American Crafts)
fabric: natural (Ikea), floreal
twine
eyelet
pom pom ribbon
sewing machine
thread
glue, hot glue
 
To make the wall hang base, cut a piece of cardboard 16x24 cm and completely cover it with fabric. Make two holes to insert the stripe of floral fabric to hang. Cut a rectangle of vanilla cardstock, sew the edges and adhere.
Use a Thinlits Die - Grid Works to cut out the turquoise cardstock and the photo. Assemble and attach to a turquoise square. Cut a stripe of patterned paper to make the curtain and adhere together onto the wall hanging, as shown. Cut a vanilla rectangle, use embossing folder to create a textured background and attach below window.
Cut a stripe to make the flower box. Use a Thinlits Die Set 6PK - Flower, Yarrow to cut out some flowers and leaves. Glue the flowers and the flower box below window. Make a banners with some triangles and twine and adhere n the high side. Add the title and embellishments. Adhere the pom pom ribbon... Hang and admire!
Well, I hope you liked my project and it inspires you to create some crafty goodness of your own.
Thanks for stopping by!
 
Anna Draicchio - sizzix big shot -home decor - Wall Hanging Spring (3)
 
**************************************
Flag_of_Italy Per le amiche italiane! :)

Ciao! Ecco un nuovo appuntamento con Anna. Per entrare nello spirito primaverile, oggi vi propongo un progetto di home decor allegro e colorato come la primavera! Ho deciso infatti, di creare un “quadretto” con una foto dei miei nipoti, usando alcuni prodotti Sizzix, naturalmente.
Se volete sapere come ho fatto a realizzare il progetto, seguite le spiegazioni qui di seguito...
 
Materiali:
cartone
foto
cartoncino: panna, turchese, rosa, rosa chiaro, verde
carte fantasia: Webster's Pages, Prima, Echo Park Paper, American Crafts
abbellimenti: "spring" e uccellino (American Crafts)
tessuto: naturale (Ikea), floreale
spago bicolore
occhielli
nastro pom pom
macchina da cucire
filo
colla, colla a caldo
 
Come fare:
Per realizzare la base, tagliare un pezzo di cartone 16x24 cm e coprirlo completamente con tessuto di colore naturale. Fare due fori per inserire la striscia di tessuto a fiori che servirà ad appendere il quadretto. Tagliate un rettangolo di cartoncino panna, di misura inferiore al cartone e qualche centimetro più basso. Fare una cucitura colorata a macchina (a scopo decorativo) lungo i bordi e incollare sulla base di cartone e tela.
Utilizzare la Big Shot e Thinlits Die - Grid Works per tagliare la griglia dal cartoncino turchese. Assemblare la griglia sopra la foto prescelta come a formare una finestra, incollando il tutto su di una base turchese. Tagliare una striscia di carta a righe per fare la tenda ed incollare in alto alla griglia, così come mostrato. Tagliare un rettangolo color panna, embossarlo con la mascherina e incollare sotto la finestra.
Tagliate una striscia turchese per fare la fioriera e creare i fiori: utilizzare Thinlits Die Set 6PK - Flower, Yarrow per tagliare alcuni fiorellini e foglie. Incollare sovrapponendo le foglie ed aggiungere i fiorellini qua e là, come in foto. Infine incollare sopra la fioriera.
Fare un banner con alcuni triangoli e un po' di spago, incollate nella parte alta. Aggiungere titolo ed altri abbellimenti, se volete. Come tocco finale, incollare il nastro pom pom... Appendere e ammirare!
 
Beh, spero che vi sia piaciuto il mio progetto di oggi e che possa ispirarvi a creare qualche home decor primaverile.
Grazie per essere arrivati in fondo a questo lungo post!
A presto

Thursday, 20 March 2014

Spring Cards !


Hello!

Spring is nearly here so here are two colourful cards to celebrate its arrival!
Are you up to acidulous Nature effect?

Supplies list:

Papers: Studio Calico
Cardstock: American Crafts, Bristol
Tape, Stars, Enamel dots: Studio Calico
Frames: Crate Paper
Watercolor inks: Twinklings H2O
Stamps: Craft Origine, Technique Tuesday
Embossing powder: Aladine
Others: Masking Tape, Tulle

Dies:

659436 : Sizzix Bigz Die-Garden Greens

Both cards’ background are realised the same way. The watercolour dry inks Twinklings H2O are just perfect to work on both smooth Bristol Paper or white cardstock.
Spray a bit of water in your ink jars. With a paintbrush, apply the ink on your background with small circular moves. Let the colours spread by spraying water and mixing colours.
Here I used the “Branch” Sizzix die. It is cut out of white paper and worked with three colours of watercolour inks: 2 different green and a yellow one for a luminous and colourful note!

Once your elements are dry, superimpose them and glue them with double-sided tape. Staple a little piece of tulle for more volume.
Add some masking tape strips and 3D matching embellishments!


Have a lovely day!


Karine

Bonjour !

A quelques jours du Printemps, voici deux petites cartes printanières qui annoncent bien la couleur !
Un côté nature acidulé ça vous tente ?

Matériel :

Papiers : Studio Calico
Cardstock : American Crafts, Bristol
Stickers : Studio Calico
Scotch, étoiles, enabel dots : Studio Calico
Cadres : Crate Paper
Aquarelles : Twinklings H2O
Tampons : Craft Origine, Technique Tuesday
Poudre à embosser : Aladine
Divers : Masking Tape, tulle

Die utilisé :

659436 : Sizzix Bigz Die-Garden Greens

Les fonds de mes deux cartes sont réalisés de la même façon. Que ce soit sur une surface lisse comme le Bristol ou sur du cardstock blanc les aquarelles sèches Twinklings H2O se travaillent à merveille !
Vaporisez un peu d'eau dans vos godets et à l'aide d'un pinceau appliquez sur votre fond en effectuant des petits mouvements circulaires, faites fuser la couleur avec votre vaporisateur et mixer les couleurs.
J'ai utilisé ici une découpe "branche" Sizzix. Celle-ci est découpée dans du papier blanc et travaillée avec 3 couleurs d'aquarelles. J'ai utilisé ici deux sortes de verts et du jaune pour une décoration lumineuse et colorée !

Une fois vos éléments secs il vous suffit de les superposer et de les coller avec du double face. Un petit morceau de tulle sera agrafé pour donner un peu de volume.
Complétez avec des touches de masking tape et des décorations assorties en volume !

Très bonne journée à vous,

Karine

Sewing For Pleasure!


At last - all the prep has been completed and the stand looks lovely!  We have decorated with beautiful double sided butterfly bunting and we've embellished an apron, cushion and towel - to show off this  lovely die.


 So far we have run 3 workshops, only 24 for to, and all 3 have been full and at least 30 needle-cases have been completed and others taken home to complete.


So do come along - don't miss out - the earlier you come the more likely I am to still have a voice!!!! I think I'll might be using sign language or flash cards by Saturday afternoon.


Also you can find Beth, my beautiful youngest daughter, demonstrating the dies and Big Shot on the Cotton Patch stand. You'll also be able to see some lovely quilts displayed, that have been made by Nik from Cotton Patch.

It's a great show - I'm surrounded by temptation - buttons, ribbons, not to mention thread and wonderful fabrics - too much to choose and so little time - which is why the Big Shot and dies are so fantastic, I still have more ideas than I have time to create, but it does re-dress the balance a little.

If you're coming to the show - ENJOY - and don't forget to come and see us on stand G08 - very near the main entrance.
Bye for now.
Angela

Wednesday, 19 March 2014

A Good Vintage!


Just to clear up one thing before we start.....I'm not referring to my Mum in the title of this blog, but to the style of card so if you are reading this Mum I'm sorry for any confusion!

Last week I had the absolute pleasure to be invited to a wonderful event in the beautiful city of Maribor in Slovenia. I was one of several workshop instructors from around Europe and the US teaching a wide range of skills including card making, jewellery, Painting, felt work and much more. It was so well run and attended, the customers and staff were so friendly and helpful and the organisers Primoz and Mihaela were such gracious and attentive hosts.

If you ever find yourself in that (very beautiful) part of the world drop in and see what they are all about, you won't be disappointed. To find out more, follow this link.https://www.facebook.com/art.trade

This week I am featuring a card which was very similar to one of the workshops I did in Maribor with a few minor tweaks.

I used My Mind's Eye paper from the Lost & Found 2 collection, an assortment of Distress Inks and thats pretty much it with the exception of my dies and folders.

I used the butterfly Sizzlit and Tab Framelits die from the Big Shot starter Kit I'm sorry if you don't have these dies but there a dozens of similar dies which you could substitute achieving equally stunning results. The Embossing folder I used is the Circle Frame & Rosemary Set which is currently on sale so click on the link and grab yourselves a real bargain. I also used some tiny flowers from the Susan's Garden Yarrow, you could also use the Black-eyed Susan, the Sunflower or the Forsythia to create a similar effect.

I started by debossing a 13 x 13cm piece of the spotty card and I then used my craft knife to trim around the pattern in the centre to create an aperture. I then used an Old Paper Distress Ink pad to enhance the debossed motif by gently rubbing over the pattern in a circular motion with my foam applicator.I also took special care to ink around the outer part of the square.


Old Paper is quite a light shade and I always work gradually starting with the lightest colour and working through. The other colours I used were Mustard Seed, Wild Honey and Vintage Photo the last of which I use very sparingly and with great care. As I add the colours I do so in a random fashion working heavier in some areas than others, I concentrate mainly on the pattern and edges.


Once the inks are dry I scrunched the corners and sanded lightly over the creases before distressing the edges for which there is a fabulous little tool designed to do the job, failing that you can use the blade of your scissors.


The photograph I found on the Internet and printed it out onto matt white photo paper before trimming to size and adding a little colour with my inks to age it further and help it to blend with the rest of the card.


I die cut two butterflies from the spotty card and trimmed away the right hand wing from both before inking. I then attached them together at the body and curled the edges of the top wing to add dimension prior to attaching them to the rear of my photo.


I die cut several tiny flowers and inked the edges prior to shaping them using a stylus and foam mat from the Susan's Garden Tool Kit . Next, I attached a row of flowers to the fairies head forming a garland and added a tiny pearl gem to the centre of each, I used the rest to decorate the aperture card.


Finally, I used my PC to create the Mother's Day phrase (Muffaroo for all you font fans)  and printed it onto the spotty paper before die cutting with my Framelits die and attaching to the card after inking of course!


And here is the finished card, I attached the assembled aperture and fairy to a 15 x 15cm base card at a slight angle using 3D foam pads and added a vintage looking bow to give a softening effect.


I do hope you like it (I hope my mum does too!)


Tuesday, 18 March 2014

Spring card

Hi everyone
I hope you had a great week, today i will show you a spring card.
Itemes used:
Sizzix Bigz Die Ornate Frame 658720
Sizzix Bigz Die Garden Greens 659436
Sizzix Sizzlits Decorative Strip Die - Brick Wall 659436
Supply list:
Paper: Bed of Roses from Galeriapapieru
Ink: Archival ink watering Can from Ranger
Stamps: Happy Birthday Tim Holtz colletion- Simple Sayings CMS 155
Brads and flowers
 
Thanks for stopping by, see you next Tuesday
Pia
Hej igen
Jeg  håber du har haft en dejlig uge, i dag vil jeg vise et forårskort jeg har lavet
 
Dies jeg har brugt:
Sizzix Bigz Die Ornate Frame 658720
Sizzix Bigz Die Garden Greens 659436
Sizzix Sizzlits Decorative Strip Die - Brick Wall 659436
Andre materialer:
Papir: Bed of Roses from Galeriapapieru
Ink: Archival ink watering Can from Ranger
Stempler: Happy Birthday Tim Holtz colletion- Simple Sayings CMS 155
Brads og blomster
Tak for at du kiggede forbi, vi ses næste tirsdag
Pia

4 you...


Hi everyone...today I have a tag to show you.


Supply list:
657900 Sizzix Big Shot machine 
659573 Sizzix Sizzlits Decorative Strip Die - Spring Greenery 
659372 Sizzix Framelits Die Set 5PK w/Stamps - Framed Silhouettes

Papers: Manila Tag # 8, Vellum, Manila Kraft Cardstock, old book paper
Stamps: Stampers Anonymous Tim Holtz Collection
Inks: Distress Stain - Pumice Stone, Dusty Concord, Peeled Paint, Mowed Lawn, Distress ink Pad - Walnut Stain, Pumice Stone, Archival Ink - Jet Black
Other: Tulle, Seam Binding Ribbon, Rubons, ChitChat, Glue N'seal

How to do:
Glue old book paper to the tag with Glue N'seal. Color the tag with Distress Stain - Pumice Stone and Dusty Concord. Dry it with heat gun.

Stamp  frame, silhouette on Manila Kraft Cardstock and die cut with Sizzix Framelits Die Set 5PK w/Stamps - Framed Silhouettes.
Distress the edges with Distress ink Pad - Pumice Stone.
Color Manila Kraft Cardstock with Distress Stain - Peeled Paint and Mowed Lawn.
Die cut greenery with  Sizzix Sizzlits Decorative Strip Die - Spring Greenery
Color Seam Binding Ribbon with  Distress Stain - Pumice Stone and Dusty Concord. Let it dry.
Glue the frame and silhouette on the tag with 3D foam. 
Stamp and die cut banner in vellum with Sizzix Framelits Die Set 5PK w/Stamps - Framed Silhouettes. 
Glue greenery, banner and tulle on the tag. Add a bow on the top of the tag.


Thanks for stopping by...wish you a great day!
Anne Kristine 

♥♥♥♥♥♥

Heisann...  i dag har jeg en tag å vise deg...


Materialer:  
657900 Sizzix Big Shot machine 
659573 Sizzix Sizzlits Decorative Strip Die - Spring Greenery 
659372 Sizzix Framelits Die Set 5PK w/Stamps - Framed Silhouettes

Papir: Manila Tag # 8, Vellum, Manila Kraft Cardstock, old book paper
Stempler: Stampers Anonymous Tim Holtz Collection
Inks: Distress Stain - Pumice Stone, Dusty Concord, Peeled Paint, Mowed Lawn, Distress ink Pad - Walnut Stain, Pumice Stone, Archival Ink - Jet Black
Annet: Tyll, Seam Binding bånd, Rubons, ChitChat, Glue N'seal

Beskrivelse:
Lim gammel bokside til tag'en med Glue N'seal. Farg tag'en med Distress Stain - Pumice Stone og Dusty Concord. Tørk med varmepistol.
Stemple ramme, silhouette på Manila Kraft Cardstock og stans ut med Sizzix Framelits Die Set 5PK w/Stamps - Framed Silhouettes.
Distress kantene med Distress ink Pad - Pumice Stone.
Farg Manila Kraft Cardstock med Distress Stain - Peeled Paint og Mowed Lawn.
Stans ut grener med  Sizzix Sizzlits Decorative Strip Die - Spring Greenery
Farg Seam Binding bånd med  Distress Stain - Pumice Stone og Dusty Concord. La det tørke.
Lim ramme og silhouette på tag'en med 3D puter.
Stamp banner på vellum og stans ut med Sizzix Framelits Die Set 5PK w/Stamps - Framed Silhouettes. 
Lim banner, grener og tyll på tag'en. Sett på en sløyfe i toppen av tag'en.

Takk for at du stikker innom her og ønsker deg en fin dag!
Anne Kristine