Tuesday, 24 February 2015

Shabby Chic with Romy


Hi!
Welcome on the Sizzix blog on this Tuesday!
Today I would like to show you a shabby chic or vintage-themed tag that I made with some of my favourite Sizzix Alternations dies and a beautiful sentiment die from Sizzix.


The Tag & Bookplates die from Tim Holtz is certainly my absolute favourite die from Sizzix thus far. I have probably used it over 150 times already, but still cannot get enough of it. The basis of this tag was also made with this beautiful die.

I used the harlequin die from the Tim Holtz Mixed Media set to create the brown background on top of the pink tag.


I further embellished my cards with some hearts that were made with the Heartfelt die. I used two large hearts and a couple of tiny hearts and added pink pearls to make them look more elegant. Last but not least, I added the sentiment "Sunshine" on the bottom of my tag. This sentiment was made with the beautiful 'Happiness Phrase Set'.


Thank you so much for stopping by today!
Have a wonderful day!
 
In Dutch:
Hoi!
Welkom op het Sizzix blog op deze dinsdag!
Vandaag wil ik jullie graag een tag in shabby chic of vintage stijl laten zien, die ik heb gemaakt met een aantal van mijn favoriete Sizzix Alternations stansen en een mooie tekststans van Sizzix.
 
De Tag & Bookplates die van Tim Holtz is absoluut mijn favoriete stans van Sizzix tot nu toe. Ik denk dat ik hem al minstens 150 heb gebruikt, maar toch kan ik er nog geen genoeg van krijgen. De basis voor deze tag was dus ook gemaakt met deze mooie stans.
 
Ik heb de ruitjesstans van de Tim Holtz Mixed Media set gebruikt om de bruine achtergrond te maken bovenop het roze achtergrondlaagje.
 
Ik heb mijn tag verder versierd met hartjes die zijn uitgestanst met de Heartfelt die. Ik heb twee grote harten gebruikt en een aantal kleinere hartjes. Daar heb ik roze pareltjes aan toegevoegd om ze eleganter te maken. Uiteindelijk heb ik ook nog het word "Sunshine" verwerkt onderaan op mijn tag. Dit woord is uitgestanst met de mooie "Happiness Phrase Set".
 
Hartstikke bedankt voor je bezoekje vandaag!
Nog een fijne dag!

How old are you?


Hello everybody,

For our Tuesday gathering, I suggest scrapping a page in the traditional format.
The originality is in the layout of this project: the idea is to create a crown to emphasise your picture.


For that purpose, you need to draw with pencil a circle of the size of your choice, big enough to not be confused with your picture: you can use a compass or a template (e.g. a plate can be used).


Choose your dies to be cut:


Then, following the line of your circle, you can decorate the crown with cutting shapes.
Free your creativity by choosing shapes specific to your picture theme: flowers, leaves, hearts, triangles


Play with colours and sizes of your shapes to boost and put into relief your page.
Don't forget to add a small title, then you're done!

Some details:


I hope this page will have inspired you!

Supply list:

658300:  Sizzix Big Shot Starter Kit
667119:  Sizzix Thinlits Die Set 4PK - Scribbles & Splat NEW!
660210:  Sizzix Thinlits Die Set 102PK - Alphanumeric NEW!
660801:  Sizzix Thinlits Die Set 4PK - Speech Bubbles NEW! 
656545:  Sizzix Big Die - Flowers, 3-D
658541:  Sizzix Big Die - Brows
657119:  Sizzix Big Die - Leaves

Paper: American Crafts, Heidi Swapp, Crate Paper
Strass: Artemio
Alpha & Stickers: Fancy Pants Design
Feather & Flag: Bella BLVD

Have a good day, 

Isalilou

*************

Bonjour à toutes et tous,

Pour notre rendez-vous du mardi, je vous propose une page de scrap au format traditionnel.

L'originalité est dans la mise en page de ce projet: l'idée est de créer une couronne pour mettre en valeur votre photo.

Pour cela, il suffit de tracer au crayon un cercle de la taille de votre choix, suffisamment grand pour ne pas être confondu avec votre photo: vous pouvez utiliser un compas ou un gabarit (une assiette pas exemple peut convenir). 

Ensuite, en suivant le trait du cercle, vous pouvez "décorer" cette couronne avec des découpes de formes. Laissez libre cour à votre créativité en utilisant des formes spécifiques au thème de votre photo: fleurs, feuillages, cœurs, triangles...etc….

Jouez avec les couleurs et les tailles de découpes pour donner du dynamisme et du relief à votre page.

N'oubliez pas d'ajouter un petit titre et le tour est joué

J'espère que cette page vous aura inspiré!
Bonne journée

matériels utilisés:
658300:  Sizzix Big Shot Starter Kit
667119:  Sizzix Thinlits Die Set 4PK - Scribbles & Splat NEW!
660210:  Sizzix Thinlits Die Set 102PK - Alphanumeric NEW!
660801:  Sizzix Thinlits Die Set 4PK - Speech Bubbles NEW! 
656545:  Sizzix Big Die - Flowers, 3-D
658541:  Sizzix Big Die - Brows
657119:  Sizzix Big Die - Leaves
Papiers: American Crafts, Heidi Swapp, Crate Paper
Strass: Artemio
Alphabet & Stickers: Fancy Pants Design
Plume & Drapeau: Bella BLVD

Bonne journée,

Monday, 23 February 2015

Pintxos LO

Hi everybody! Elena here

Today I want to show you a LO that i made using a photo of food. One of my favorite things to do when I travel is to try new kinds of food, and normally I take some photos to remember it. But sometimes is difficult to make a beautiful LO from those photos, because they don't have people on them.


Supply list:


In this case I gave some importance to the photo by placing a Polaroid frame on it and I have die cut some elements to highlight the photo and I have die cut the title and all the embellishments on the page. I have used some ink and a black gel pen to give more importance to the tittle.


Hola a todos! Hoy os enseño una página hecha con una foto de comida. Una de las cosas que más me gusta hacer cuando viajo es probar nuevas comidas y sabores y, normalmente, suelo hacer bastantes fotos para recordar esos momentos. Pero muchas veces esas fotos no son muy bonitas, porque no suele aparecer gente en ellas. En la página que os enseño hoy he resaltado la foto con un marco Polaroid y he troquelado todos los elementos de adorno y el título.

¡Feliz lunes!


Emergency Party Tags


My half-square triangles, offset-chevron quilt top is coming along nicely - I've managed to sew a couple more blocks over the half-term holiday but I'm having a little departure this week from sewing.

It was my youngest son's 4th birthday party on Sunday and when I dug out the books I'd bought and stashed away a while ago to put into the party bags, I realised that there was no way they were going to fit into a standard party loot bag. Cue a frantic dash to the shops to find some larger bags and the best I could find on short notice were packs of brown paper sandwich bags.
With little time to spare I needed a quick and easy way to make them a bit more party-ish and so immediately turned to my Big Shot and Lollipop Shadow Numbers, 01234 die and cut a batch of number 4's from some blue glittery card.


With a hole punched in the top and some string threaded through and knotted they were instantly turned into tags.


And then tied to a handle of a bag. I'd already used my Lollipop Shadow Numbers die a few weeks back to make bunting and decorate the party cups and so the bags actually now fitted in nicely!


A very quick way (thankfully) to spruce up some plain bags and make them a bit more personal. Of course now I wish I'd had more time and could have cut out some multi-coloured spots using my Circles, 3/4in die to decorate the bags further so that they were really party-ish and matched with the bunting and cups - if only I was more organised!


Sunday, 22 February 2015

Package made with love


Hello!
It's sunday and it's time for a new creative project.
Spring is almost around the corner and I'm in the mood for colours.
I like mixing and matching pastel colours with neon colours and today I share with you my last package idea.


You need:
Sizzix Thinlits Die Set 102PK - Alphanumeric (1" Tall) by Tim Holtz (660210)
Sizzix Thinlits Die Set 4PK - Sunny Flower (660807)
Sizzix Thinlits Die Set 4 PK - Speech Bubbles (660801)
Sizzix Framelits Die Set 8PK - Circles, Scallop (657552)
Sizzix Framelits Die Set 6PK - Banners, Fancy (658601)
Cardstock (hot pink, white)
Wrapping paper
Baker's twine (same colours of wrapping paper)
Glue
Scissors
Tape


Cut the white cardstock using a Rectangle Framelit (I haven't this Set to I used the Banner Fancy Die Set).

Die cut the phrase WITH LVE from Alphanumeric Thinlits Set and the letter O from Sunny Flower Thinlits Set using your white rectangle.

Paste the hot pink cardstock under the white rectangle with glue and cut the surplus pink cardstock.

Die cut the cardstocks using Sunny Flower Thinlits Set.

Die cut a circle scallop from Framelits Circles Scallop Set (size 5,27 cm) using white cardstock.

Die cut two banners from Speech Bubbles Thinlits Set using hot pink cardstock.

Arrange and paste the paper cockade made with the sunny flower, the circle scallop and the banners.

 
Wrap your gift up using a polka dots wrapping paper (pastel green-white) and a tape.
 
Wrap the package with baker's twine (pastel green-white) on one side without precision.
Make a double knot.
 
Paste 'with love' banner above the twine.
 
Paste the cockade over the banner.
Our package, made with love, is done!
 
Thank you for reading and have a nice sunday!


* Per le lettrici italiane *
 
Buona domenica a tutti!
La primavera è ormai alle porte e ho voglia di colore.
Adoro abbinare colori pastello a colori fluo per creare un contrasto che mette subito allegria.
Oggi voglio proporvi il mio ultimo pacchetto regalo.
 
Sizzix Framelits Die Set 6PK - Banners, Fancy (658601)
Cartoncini (bianco e rosa neon)
Carta regalo
Baker's twine (negli stessi colori della carta regalo)
Colla
Forbici
Nastro trasparente

Ritagliare un rettangolo di cartoncino bianco.
Potete aiutarvi con il Rectangle Framelit (io non possiedo questo Set quindi mi sono aiutata con il Banner Fancy Die Set).

Fustellare dal cartoncino bianco appena ritagliato la frase WITH LVE usando l' Alphanumeric Thinlits Set e la lettera O usando una delle fustelle presenti nel Sunny Flower Thinlits Set.

Incollare un pezzo di cartoncino rosa neon sotto al rettangolo di cartoncino bianco e fustellate l'eccesso di cartoncino rosa.

Fustellare il girasole alternando i due colori di cartoncino.

Fustellare il cerchio presente nel Framelits Circles Scallop Set (diametro 5,27 cm) usando il cartoncino bianco.

Fustellare due banner dal Speech Bubbles Thinlits Set usando il cartoncino rosa neon.

Comporre e incollate tutti i pezzi fino a creare una coccarda.

Confezionare il vostro pacchetto usando la carta regalo e il nastro adesivo trasparente.

Avvolgere su un lato del pacchetto lo spago senza essere precisi e fare un doppio nodo.
 
Incollare sopra allo spago (e in particolare sopra ai nodi) il banner con la scritta with love.
 
Incollare la coccarda a lato del banner.
 
Il nostro pacchetto, fatto con amore, è completo.
Ci rileggiamo domenica prossima.
Grazie della visita!


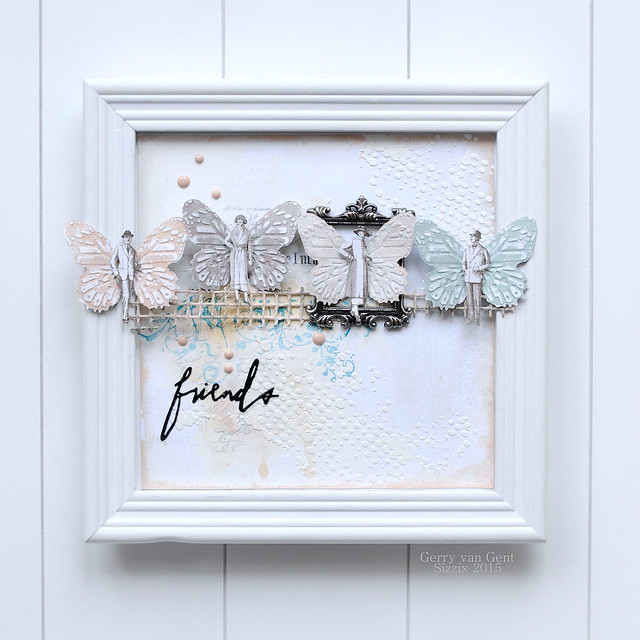
Home Decor Frame by Gerry van Gent

Hello Sizzix friends and happy Sunday!

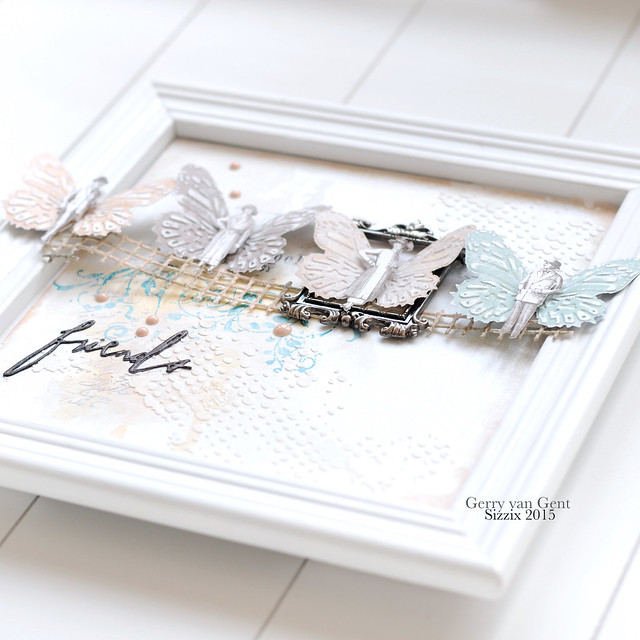
Today I prepared for you a home decor frame
featuring two stunning NEW dies by Sizzix. This frame is super
easy to create and it makes it a great present for your....friends :-)
The size is 25 cm x 25 cm (approx. 9,9 inches x 9,9 inches)

HD Frame
siz
657900 Sizzix Big Shot Machine
NEW 660218 Sizzix Thinlits Die Set Handwritten Love
NEW 660236 Sizzix Bigz Die w/Texture Fades Butterfly Duo
*      *      *
The white background paper was treated with a few colors of spray paint and ink. 
N.B. The inner frame is 19 cm x 19 cm! 
Two different stamps were used here:
1. A text stamp so it will match my "Friends" title.
2. A flourish stamp to match the butterflies - Flowers & butterflies 
are always a perfect match .
close 2

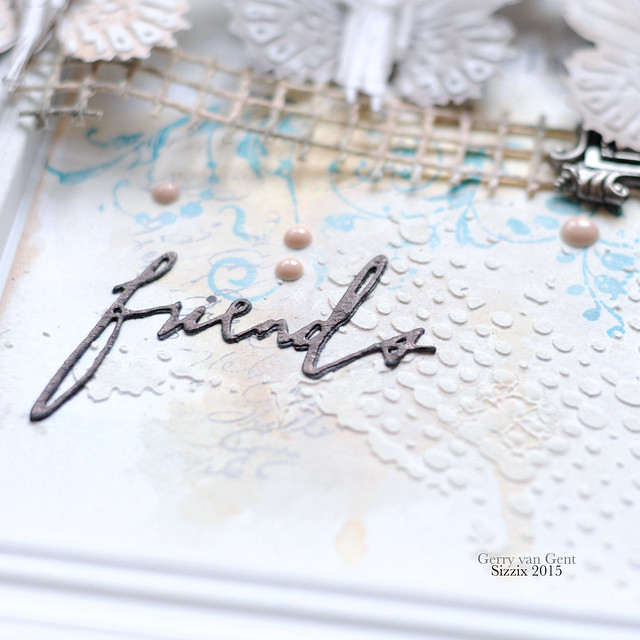
The "friends" title was die-cut twice and adhered on top of each other.
I used black cardstock...and because I was missing a bit of "glam" I 
"painted" the letters by using a black "Sharpie" marker.
Love the "shiny" result!
close 1

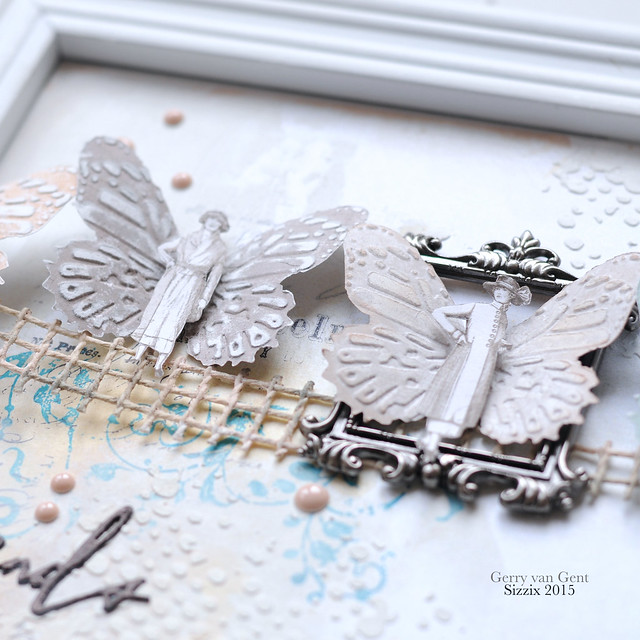
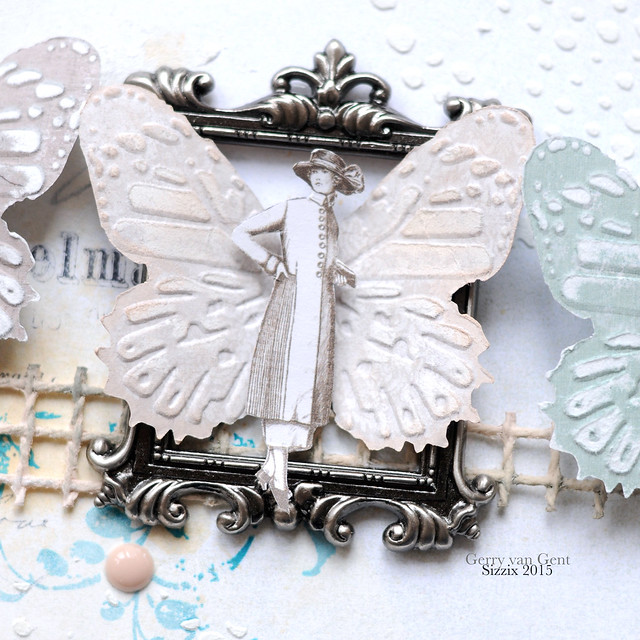
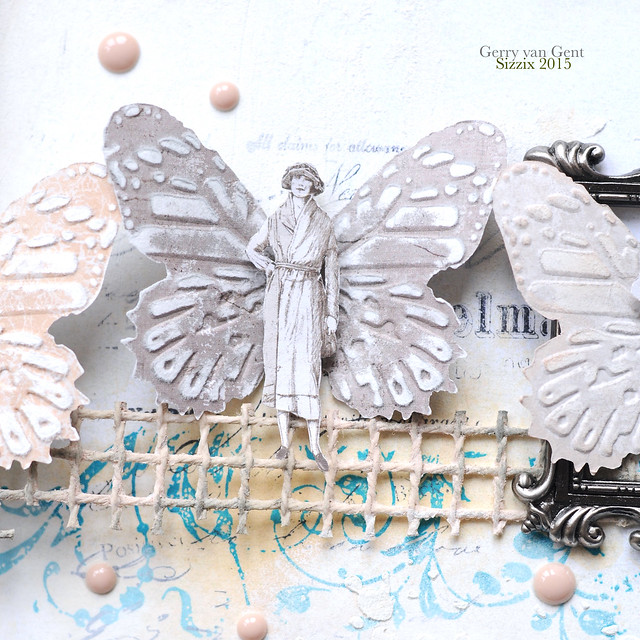
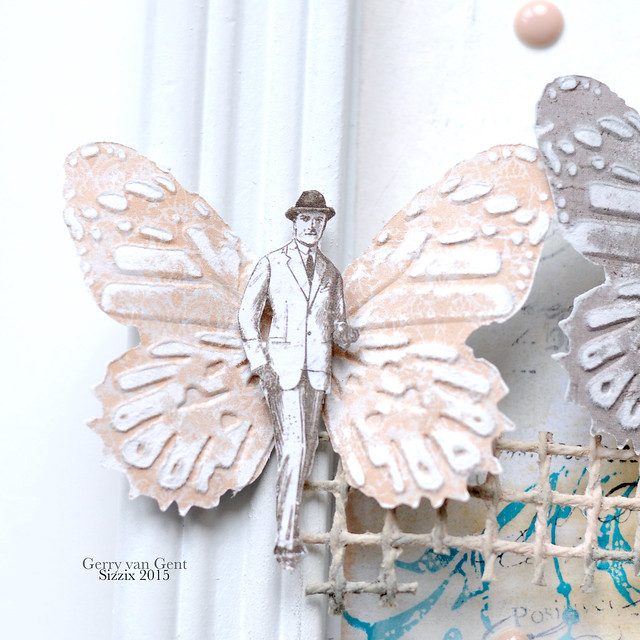
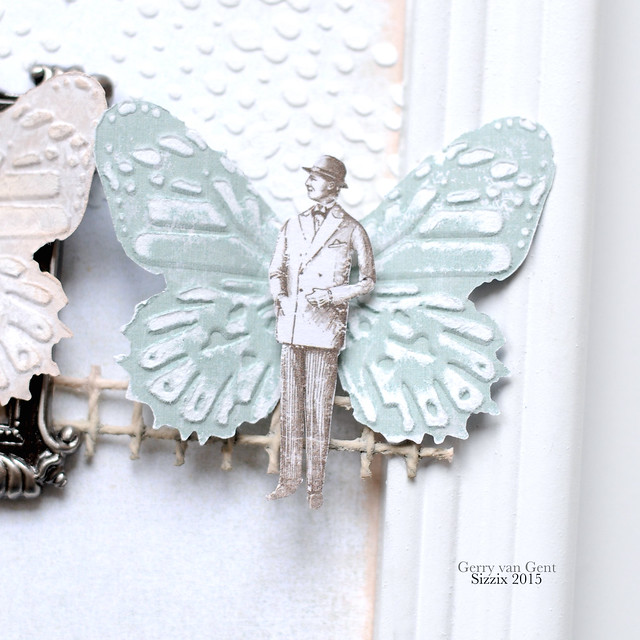
Well, I simply love the new Butterflies Die by Tim Holtz. 
No wonder I made this home decor frame featuring these cuties.
I used 4 different pattern papers to die-cut them and then emboss them.
Did you know that the Butterfly Duo Bigz die comes with an 
Embossing folder so you get this amazing texture on these butterflies?
f1
Once the butterflies were die cut and embossed I used sanding paper to distress them...
f2
... after that I fussy cut four images so I can decorate the butterflies...
m2

m1

close 4
OTHER PRODUCTS I USED:
Prima Marketing - stencil, clear stamps
Maja Design - pattern paper
Tattered Angels - clear stamps
Lindy's Stamp Gang Sprays
Dutch Doobadoo - modeling paste
*      *      *
Have a creative Sunday!
Gerry

Saturday, 21 February 2015

Butterfly Greeting Cards with Sequins


Hi everybody,
butterflies are always a super fun idea, right? It is almost springtime and I really love to have them on my projects now. A few days ago I have found my big collection of sequins and I had the idea to create some shaking cards with them. All you need are the following things:

Sizzix Big Shot Starter Pack (Powder Blue & Teal) #658300
Or single Big Shot:
Sizzix Big Shot (Powder Blue & Teal) #657900
For the Butterfly I used the Sizzlit in the Starter Pack, but you can also use:
Sizzix Triplits Die Set 13PK - Butterfly #659596
Sizzix Thinlits Die Set 8PK - Butterflies, Intricate #659971
Cardstock, adhesive, stamps, foil for the background of your butterfly and colorspray


Just make some blurs of color and cut out a butterfly shape with your Big Shot and the dies. Glue a piece of foil on the back and build a ring around the butterfly with some pieces of thick cardstock or something similar. The sparkle part of it: Fill it with some of your favorite sequins! :) Last step, just glue your blank card inside to cover the foil. Wait a minute and then, shake your card! :)


The stamp means "a really special moment". I think this stamp fits to so many different occassions. Love it!

You will have some leftovers after die cutting, but please don´t throw them away. They are cute embellishments for upcoming projects like Scrapbooking layouts, some new cards or home deco. ;)


Now I am off for a Girlsday and I will give each of the girls one of these cards. I hope they will like them. :) Have you ever made a shaker card? Do you want a tutorial of how I made others? :)

Have a nice day, xo Julia


------------------------------------------------
Hallo ihr Lieben,
Schmetterlinge gehen immer, oder? Vor allem so kurz vor dem Frühling dürfen sie bei mir nicht fehlen. In den letzten Tagen fiel mir meine Sammlung an Pailetten in die Hände und ich dachte mir, ich bastel mal ein paar Schüttelkarten. :) Dafür benötigt ihr folgende Dinge:


Sizzix Big Shot Starter Pack (Powder Blue & Teal) #658300
Oder die Big Shot einzeln:
Sizzix Big Shot (Powder Blue & Teal) #657900
Für die Schmetterlinge habe ich die Sizzlits aus dem Starter Paket genommen, alternativ gehen aber auch folgende Stanzen:
Sizzix Triplits Die Set 13PK - Butterfly #659596
Sizzix Thinlits Die Set 8PK - Butterflies, Intricate #659971
Sowie: Cardstock (zum Ausstanzen), Kartenrohlinge, Klebemittel, Folie, Stempel und Farbspray für die Kleckse

Einfach mit der Big Shot die gewünschte Form austanzen, Folie dahinter kleben und um diese Form herum auf der Rückseite (auf der auch die Folie klebt) eine Art Damm bzw. Erhöhung bauen. Das geht mit 3D-Klebepads oder aber wie hier mit selbstklebendem Kork. Dort füllt ihr dann die Pailetten rein und klebt euren Kartenrohling drauf. Geht total easy und sieht klasse aus!

Beim Stanzen bleiben diese hübschen Schmetterlinge übrig. Bitte nicht wegschmeißen, die können noch wunderbar für weitere tolle Projekte verwendet werden. :)

Ich bin heute auf einem Mädelstag und werde die Karten direkt an meine Begleitungen verschenken. :) Ich hoffe sie freuen sich! Habt ihr auch schon Schüttelkarten gebastelt? Hättet ihr gerne eine Anleitung wie ich es gemacht habe? :)

Habt einen schönen Tag, xo Julia


Cutting freeze paper for appliqué with Sizzix dies


Hi everyone! Today I come with a new idea. I have been using Sizzix dies for doing some applique in a different way, using cutting out freezer paper.
You have been some of my work  sewing some stitches with my machine on the piece that I want to appliqué on the fabric.
This time I wanted to use my beautiful Liberty fabric I bought from London last summer and I wanted something more delicate and with a  linen background.
And here it is ,  a nice flower  with stems thanks to Nel Whatmore  die that was waiting for me to use.


Here I go with the steps if you want to try it.
First cut out the freezer paper  with Polly Doodle die. There are different petals so I liked this one. You can try other combination if you prefer.


Ironed the freezer paper on the wrong side of the fabric, exactly on some of the nice flowers in the fabric. 


Cut out with my scissors leaving something  around the templates and used my iron.


Peeled the paper and used some glue like Sewline  to stick  the  outside stitching edge, especially with small pieces or points in the petals.
Pinned and appliquéd with hidden stitches by hand. 


I have a pair of ideas to finish my work......but you  will see  later when I sew the rest and do some quilting. 
I hope you enjoy this technique and how you can use Sizzix dies.Remember you can use the templates with freezer paper again!
Happy weekend and  I see you in two weeks.
Love
Mercedes


........................................................************************...........................................................


¡Hola a todo el mundo! Hoy vengo con una nueva idea usando los troqueles de Sizzix. ¿Sabías que se puede usar también para cortar freezer paper y hacer aplicaciones ?
Ya has visto algunos de mis trabajos aplicados cosiendo puntadas por encima de la pieza que quiero aplicar, pero esta vez quería algo más delicado ,usando una de las telas Liberty que compré el verano pasado en Londres y sobre un fondo de lino.
Y ahí lo tienes, una flor con ramas gracias al troquel de Nel Whatmore que estaba  todavía esperando poder usar.
Te cuento los  pasos por si quieres intentarlo.
Primero corté las piezas con el troquel Polly Doodle. Hay diferentes pétalos y centros de flor por lo que puedes sacarle mucho partido a este troquel  y hacer tu combinación favorita.
Planché las piezas sobre el  revés de la tela eligiendo alguno de los motivos de flores para tener centrados.
Corté con las tijeras dejando un margen para aplicar y usé la plancha para planchar hacia adentro. Echa un  vistazo a las fotos.
Luego quité el papel y pegué con pegamento, como Sewline,  algunas partes más complicadas o pequeñas .
Sujeté con alfileres y apliqué a mano.¡Y listo!
Tengo un par de ideas para acabar este trabajo  pero lo verás más tarde cuando termine de coserlo y hacer algo de acolchado.
Espero que te haya gustado esta técnica de aplicado usando los troqueles de Sizzix
Feliz fin de semana y  te veo en un par de semanas.
Cariños

Mercedes