Showing posts with label Elisse. Show all posts

Sunday, 12 April 2015

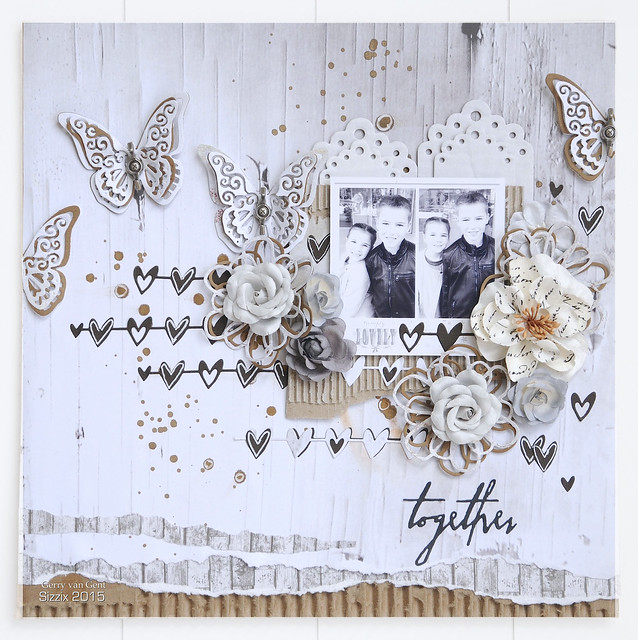
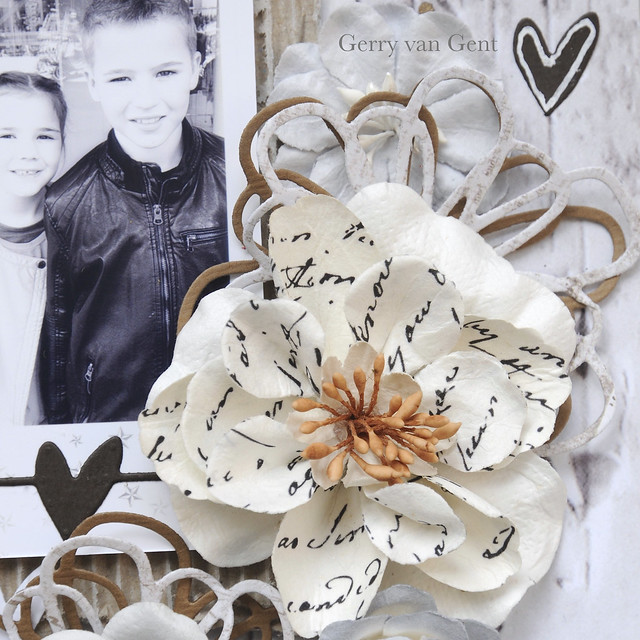
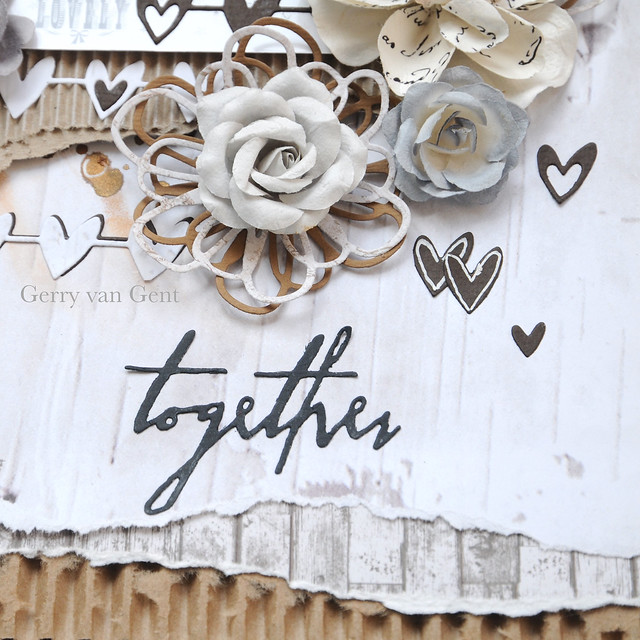
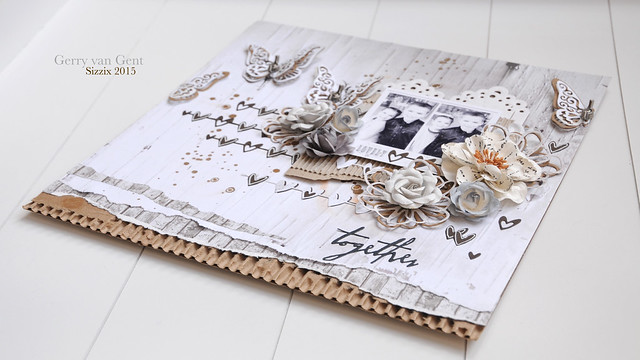
"Together" layout by Gerry van Gent


Hello Sizzix Peeps!
Did you have a great week so far? I hope so :-)

Well, I am an Instagram fan and I love posting photos there taken
with my phone. Some of the photos I take are really faves and worth
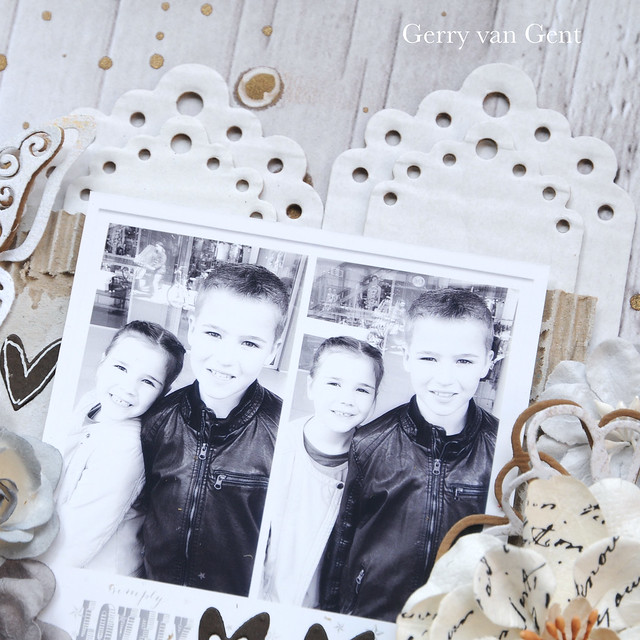
scrapping. Just like this photo of my kids - had to treasure up it on a layout.
For my blog post today I used the absolutely awesome Sizzix Big Shot Plus 
machine and some of the awesome dies included in the Starter Kit!

Together_gerry
siz
660515 Sizzix Big Shot Plus Starter Kit (White & Grey)
660473 Sizzix Thinlits Die Set Decorative Trim #2
660218 Sizzix Thinlits Die Set Handwritten Love
658526 Sizzix Bigz Die Elisse
*      *      *

I began creating the layout by die cutting the scalloped tags - two of each size.
For the tags I used corrugated cardboard which I left "natural" ...
c9

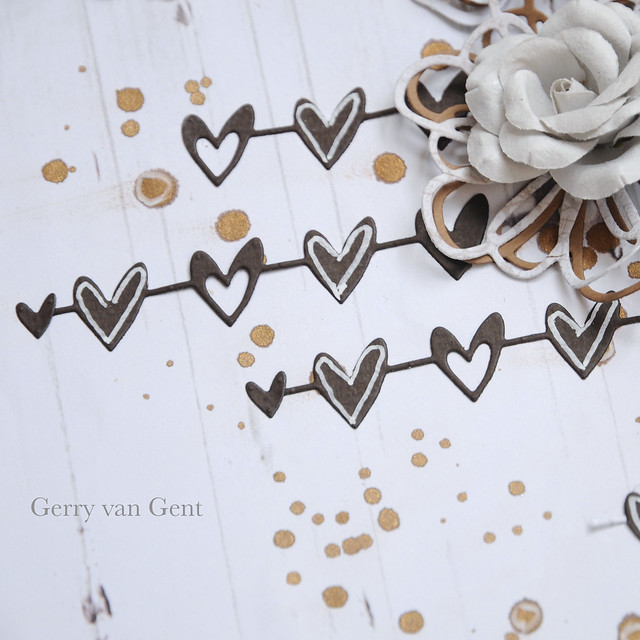
From the Decorative Trim #2 die set I used the hearts border....
I die cut it a few times and I outlined some of the hearts with white pen.
c3

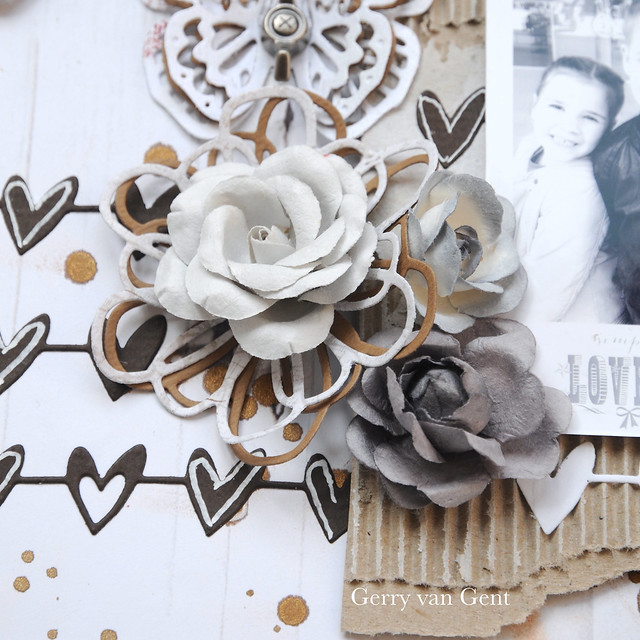
The beautiful flower die from the Starter Kit was die cut in total 6 times.
For each flower I used two different colors.
c4

c8

I wanted the background to be more playful so....
I cut separately some of the hearts from Decorative Trim #2
 and adhered them on the background.
c5

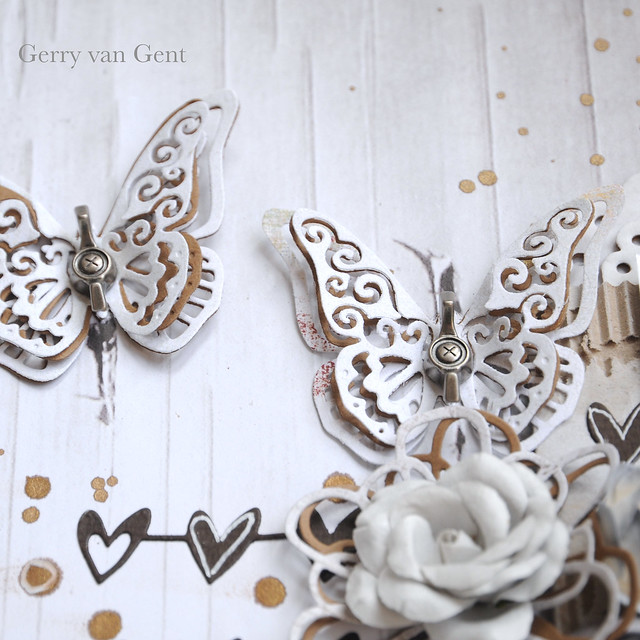
I am so in love with the butterflies from the Starter Kit....
they are so intricate and pretty!
For my project I die cut the butterflies lots of times and 
I simply layered them - I prepared 3 "sets" of butterflies...
c1
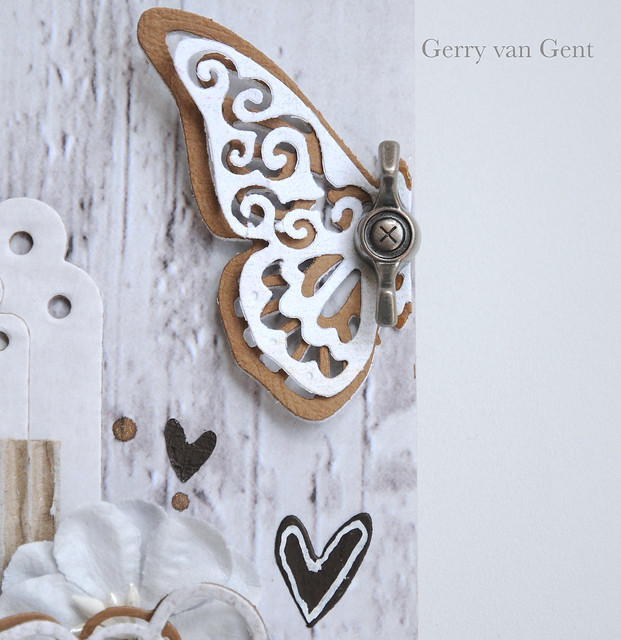
One of the layered butterflies was cut in the middle and used 
for decoration at both (left/right) edges.
c2

16:9
OTHER PRODUCTS I USED:
Prima Marketing flowers
Prima Marketing Bloom Girls Spray
Ingvild Bolme Metallic Embellies
Sakura white pen 
*       *       *
Thank you so much for visiting us today!
Have a creative Sunday!

Tuesday, 6 August 2013

Envelope album


Hi everyone
I hope you have a great  and creative week
Today i will show you my envelope mini album using different sorts of Sizzix dies.I want to  use the album for photos of my projects  I've created and published on the Sizzix blog in 2013, a wonderful memory of all those lovely creative hours with wonderful Sizzix product.
Items I have used:
Big Shot starter kit(658300)
Sizzix Bigz Elisse ( 658526 )
Sizzix Bigz Abor ( 658523 )
Sizzix Bigz Manposa ( 658530 )
Framelits Tags ( 658611 )
Framelits Wrappers, Circle ( 658613 )
Thinlits Bunch of Flowers ( 658602 )
Decorative strip Vintage Lace ( 657481 )
Supply list:
Paper: Graphic45- 8x8 paper Bohemian
Ink: Vintage Photo from Ranger
Glossy accent, pontura paint-orange and red


 Thanks for stopping by and I hope it gave you some inspiration. See you next  Tuesday. Wish you a great week

Hej alle
Jeg  håber du har haft en dejlig og kreativ uge. I dag vil jeg vise et album lavet med kuverter. Jeg vil sætte foto ind af alle de blogindlæg jeg har  her på Sizzix bloggen i 2013. Et dejlig minde om mange pragfulde  kreative timer med de fantastiske Sizzix produkter.
Dies jeg har brugt:
Big Shot starter kit(658300)
Sizzix Bigz Elisse ( 658526 )
Sizzix Bigz Abor ( 658523 )
Sizzix Bigz Manposa ( 658530 )
Framelits Tags ( 658611 )
Framelits Wrappers, Circle ( 658613 )
Thinlits Bunch of Flowers ( 658602 )
Decorative strip Vintage Lace ( 657481 )
Andre materialer:
Paper:Graphic45- 8x8 paper Bohemian
Ink: Vintage Photo from Ranger
Glossy accent, pontura paint-orange and red
Tak fordi du kiggede forbi, jeg håber du fik lidt inspiration. Vi ses næste tirsdag ønsker dig en dejlig uge

Tuesday, 23 July 2013

Gift tags


Happy Tuesday everyone.
Today I will show you two gift tags using Ellise and Manpose by Prima marketing, Flower,Black-Eyed Susan.

Items used:
Sizzix Big Shot Machine only (657900)
Sizzix Bigz Die - Elisse (658526)
Sizzix Bigz Die- Mariposa ( 658530)
Sizzix Bigz Die-Flower,Black-Eyed (658422)
Supply list:
paper: Prima-Divine_ 6x6 paper pad
Ink: Distress ink -Vintage Photo-, -Peeled Paint-
Stamp: IO clearstamp
Ribbon, Pontura paint-babypink-,brads
  
I hope you enjoyed my project, see you next Tuesday.
Wish you a great week
Hej Alle
Så er det tirsdag igen og jeg vil vise nogle gave tag hvor jeg har brugt Ellise og Manpose by Prima marketing, Flower, Black-Eyed Susan.
Dies jeg har brugt:
Sizzix Big Shot Machine only (657900)
Sizzix Bigz Die - Elisse (658526)
Sizzix Bigz Die- Mariposa ( 658530)
Sizzix Bigz Die-Flower,Black-Eyed (658422)
Andre materialer:
papir: Prima-Divine_ 6x6 paper pad
Ink: Distress ink -Vintage Photo-, -Peeled Paint-
Stempler: IO clearstamp
Bånd, Pontura paint-babypink-,brads
Jeg håber du fik lidt inspiration, vi ses næste tirsdag.
Du må have en god uge

Friday, 19 July 2013

Label & Card: Homemade Cherry Jam


Happy Friday everyone! This is Anna.
I'm so excited to share my new project with you today! I decided to create a little gift set with some homemade cherry jam.  I love creating homemade jams every year and my family loves enjoying them all year long.  Homemade jam also makes for a quick and easy gift when you need something fast.

cafe creativo - Anna Drai - big shot sizzix - card - packaging - cherry jam (1)

I have to say my favorite thing about this project is the jar of cherry jam! Aren’t the dies Wrappers Fancy from the set just so cute? All alone-perfect!  I'm totally loving these possibilities for this set. A theme like this is a great way to show some of the different ways that dies set can be used.
I cut a piece of fabric. Then, I tied a piece of red ribbon around the top.  I added a butterfly and a little tag that I had created with Prima die. I used a Framelits die  to cut out a circle scallop and placed it on the jar lid.

cafe creativo - Anna Drai - big shot sizzix - card - packaging - cherry jam (2)

After decorating my jar of cherry jam, I created a coordinating card. It's quick and easy!!
I used red buttons for the cherries and the Arbor die for the leaves. I cut out the sentiment with Banners, Fancy.

cafe creativo - Anna Drai - big shot sizzix - card - packaging - cherry jam (3)

Slipping these two little items in a small basket makes the perfect small thank you gift!
Well, I hope you enjoyed it!!
Thanks for stopping by and have a wonderful weekend!

Items used:

Sizzix Big Shot Starter Kit (Powder Blue & Teal) (658300) (machine + butterfly and heart die)
Sizzix Framelits Die Set 8PK - Circles, Scallop (657552)
Sizzix Framelits Die Set 6PK - Wrappers, Fancy (658614)
Sizzix Bigz Die - Arbor by Prima Marketing Inc. (658523)
Sizzix Framelits Die Set 6PK - Banners, Fancy (658601)
Sizzix Bigz Die - Elisse by Prima Marketing Inc. (658526)
white cardstock
patterned paper (Ikea, Prima, American Crafts)
paper doily
scraps of pink felt, natural fabric, cardboard, gold paper
washi tape
red buttons
rustic twine, yarn
bakery twine red and white
red ribbon

**************************************
Flag_of_Italy Per le amiche italiane! :)

Buon Venerdì a tutti! Ecco un nuovo appuntamento con Anna.
Vi mostro il mio progettino della settimana realizzato con la Big Shot: ho creato un piccolo set da regalare, composto da un vasetto di marmellata di ciliegie fatta in casa e una simpatica card in tema.
Mi piace fare le marmellate con la frutta di stagione, in modo da poter gustare il sapore durante tutto l'anno. Inoltre, le confetture fatte in casa sono anche un regalo perfetto, quando ho bisogno di un pensierino dell'ultimo minuto. ;)

Devo dire che la cosa che preferisco di questo progetto è il barattolo di marmellata di ciliegie! Non sono troppo carine le etichette tagliate con le fustelle Wrappers Fancy?!  Dopo aver tagliato dunque le etichette, le ho fermate dietro al barattolo con un po' di washi tape. Ho tagliato con la forbice un pezzo di stoffa, per fare un cerchio approssimativo, che ho appoggiato sopra il tappo del barattolo. Poi, ho annodato un nastro rosso intorno ed ho aggiunto una Tag che avevo creato con le nuove fustelle disegnate da Prima. Quindi con la colla a caldo ho aggiunto una farfalla di feltro tagliata con la fustella Bigz dello Starter Kit. Ho usato anche un Framelits per tagliare un cerchio scallop, che ho posato sul coperchio del barattolo.

Dopo aver finito di decorare il mio vasetto di confettura di ciliegie, ho creato una card coordinata. E' facile e veloce da fare e non ha bisogno di molte spiegazioni.
Ho usato due bottoni rossi e un po' di spago per creare le ciliegie e la fustella Arbor per le foglie, che ho scelto di fare color oro per un tocco più prezioso ;) Ho tagliato la scritta (stampata al computer) con una fustella del set Banners Fancy. Un po' di carte dai colori allegri hanno fatto il resto. Tutto qui!
Se volete potete infilare vasetto e biglietto in un cestino: avrete così un piccolo dolce regalo, perfetto per una visita ad un'amica! Spero che la mia idea vi sia piaciuta!

Grazie per essere passati di qui e vi auguro di trascorrere un meraviglioso fine settimana!
Ci vediamo venerdì prossimo!

Materiali:

Sizzix Big Shot Starter Kit (Powder Blue & Teal) (658300) (macchina + fustelle farfalla e cuore)
Sizzix Framelits Die Set 8PK - Circles, Scallop (657552)
Sizzix Framelits Die Set 6PK - Wrappers, Fancy (658614)
Sizzix Bigz Die - Arbor by Prima Marketing Inc. (658523)
Sizzix Framelits Die Set 6PK - Banners, Fancy (658601)
Sizzix Bigz Die - Elisse by Prima Marketing Inc. (658526)
cartoncino bianco
carta patterned rossa (Ikea), turchese (Prima), con ciliegie (American Crafts)
carta dorata
centrino di carta
ritagli di feltro rosa, di tessuto naturale, cartone
washi tape
bottoni rossi
spago, filo
cordoncino bicolore rosso e bianco
nastro rosso

Monday, 8 July 2013

Elisse pocket card


Hi everybody! Elena Here.

Today wanted to create a pocket card, but as I was thinking about it, I came with the idea of making the pocket on the outside of the card instead of making it inside the card. I like very much how it came out, you have a nice pocket with tags on the card, but you can still write your message inside.


Supply list:
  • 658526 Sizzix Bigz Die - Elisse
  • American Crafts paper and die cuts
  • Bakers twine, doily, black gel pen, stamps, black ink
  • Adhesives: Tombo Mono Aqua, foam squares
I  have created a base card of 10x10 cm and have made the pocket with te same pattern paper. Then I have die cut some tags with more pattern paper and cardstock and I have embellish the card with some twine, die cuts from the paper collection, a doily... It si so simple to make, but with those cute tags you don't need anything else. I love them!


Happy Monday!
......................................

Hola a todos! Hoy os enseño una tarjeta que a la hora de hacerla pensé: ¿Y si hago el bolsillo fuera en lugar de dentro? Y dicho y hecho :)

Sobre una base de tarjeta de 10x10 cm he creado un bolsillo en el exterior con el mismo papel decorado, he troquelado unos cuantos tags  y después he adornado la tarjeta con una blonda, cordón, rotulador... la verdad es que no le hace falta mucha cosa, estos tags son tan monos que ellos solos ya decoran la tarjeta. ¡Me encantan!

¡Feliz lunes!

Sunday, 30 June 2013

A Gift Box by Gerry van Gent


Happy Sunday Sizzix friends!
Today I want to share with you a gift box
which I created using a few new Sizzix dies.

657900 Sizzix Big Shot Machine
658520 Sizzix Sizzlits Dec. Strip Die Sew Cute
658521 Sizzix Sizzlits Dec. Strip Die Venice
658524 Sizzix Bigz Die Classique
658526 Sizzix Bigz Die Elisse 
657524 Sizzix Sizzlits Die Set Card Phrases Set #3

This is what I did to make the gift box

1. Die Cut the bigger label 8 times:
- 4 times using corrugated cardstock
- 4 times using pattern paper

2. Attach the labels to one another by using 
double-sided tape.

3. Cut out of corrugated cardstock a square
 (approx. 7cm x 7cm) to use as a bottom.

4. Begin decorating the sides of the box:
- use flowers, cut outs, embellishments
- add the die-cut swirls, phrase, heart button, 
- add twine "handle" and decorate it with a 
die-cut heart border.

I also die cut the smaller size labels and add to 
two of the sides of the gift box.
Once again I die cut them from corrugated 
cardstock and pattern paper.


OTHER PRODUCTS I USED:
Prima Marketing - "Fairy Belle" collection
Prima Marketing - flowers
Ingvild Bolme - Jeans Buttons vintage trinkets
Ingvild Bolme - Bird Homes resin

*  *  *
I hope you enjoyed my project today!
Have a great Sunday!
Gerry

Friday, 28 June 2013

“My Favorite Photo” Mini Album by Anna Draicchio


Hello! A new rendez vous with Anna. This is a super simple tutorial to create a customised coloured background that could be used for cover of mini album, layouts or cards.
I make a minialbum for a young bride. It is very easy to put together!

cafe creativo - Anna Drai - big shot sizzix - mini album (1)

Items used:

Big Shot Machine (657900)
Sizzix Framelits Die Set 6PK w/Stamps - Flowers, Daisies (657916)
Sizzix Bigz Die - Elisse by Prima Marketing Inc. (658526)
Sizzix Framelits Die Set 8PK - Circles, Scallop (657552)
Sizzix Framelits Die Set 8PK - Circles (657551)
Sizzix Framelits Die Set 6PK w/Stamps – Banners (658289)

cardstock: white, light pink
patterned paper
color mist: glimmer mist Tattered Angels
ink,  acrylic block
washi tape
bakery twine pink and white
notebook paper
paper doily
sequins
sewing machine, yarn

How to make:

To begin, take a rectangle of white cardstock (A4) and place some stamps of Framelits kit on the paper.
Take a bottle of mist and liberally spray all over the card stock. The stamps can be easily cleaned up with baby wipes or water. Carefully, pull the stamps back off the paper and clean them.

cafe creativo - Anna Drai - big shot sizzix - mini album (2)

After the mist dries, take the same stamps and place on your acrylic block and stamp the actual image into the negative area that was misted. For a mini album, you could embellish the cover, add a title and be done!
The cover of my mini is attached to the pages with twine. I used a needle to thread the twine through the holes and tied the twine into a bow.

cafe creativo - Anna Drai - big shot sizzix - mini album (3)
cafe creativo - Anna Drai - big shot sizzix - mini album (4)

This was a really quick and easy way to make a lovely little minibook.

cafe creativo - Anna Drai - big shot sizzix - mini album (5)

Thanks for stopping by!
I wish you all a great and inspiring weekend!

**************************************
Flag_of_Italy Per le amiche italiane! :)
Ciao!
Ecco un nuovo appuntamento con Anna. Oggi vi mostro un minialbum dove ho usato alcuni prodotti Sizzix, anche in modo un po' inusuale. L'album/quaderno l'ho realizzato per una giovane sposa, affinchè possa inserire ricordi, poesie, foto del suo matrimonio o del viaggio di nozze.
Vediamo come ho fatto...

Materiali

Big Shot Machine (657900)
Sizzix Framelits Die Set 6PK w/Stamps - Flowers, Daisies (657916)
Sizzix Bigz Die - Elisse by Prima Marketing Inc. (658526)
Sizzix Framelits Die Set 8PK - Circles, Scallop (657552)
Sizzix Framelits Die Set 8PK - Circles (657551)
Sizzix Framelits Die Set 6PK w/Stamps – Banners (658289)
cartoncino: bianco, rosa chiaro
carta patterned
colore a spruzzo
inchiostro, blocco acrilico per timbri
washi tape
spago bicolore rosa e bianco
pagine di schedari, notes
centrini di carta
paillettes
macchina per cucire, filo

Procedimento

1- Per cominciare, prendere un rettangolo di cartoncino bianco (mis A4), piegarlo a metà e disporre i timbri del set Framelits sulla carta.
2- Prendere l'inchiostro mist e spruzzare sul cartoncino. Togliere i timbri dal foglio con cura e pulirli. I timbri possono essere puliti con salviette o acqua e sapone. Non preoccupatevi se assorberanno il colore, è solo una questione estetica, perchè una volta puliti non rilasceranno più l'inchiostro.
3- Una volta asciugato il colore, usando le stesse sagome di timbri, posizionatele sul blocco acrilico e timbrare nella zona in negativo rimasta vuota.
4- Decorare la copertina con altre sagome di fiori e cerchi fustellati e cuciti. Raddoppiare la copertina cucendo a zig zag lungo i bordi un altro foglio A4. Finire di abbellire con centrino di carta, cerchio, washi tape e titolo.
5- Scegliere alcuni fogli differenti: carte fantasia, pagine di vecchi libri, notes, centrini di carta... di dimensione massima di un A4. Sistemarli uno sopra l'altro al centro della copertina.
6- Fare due fori con un grosso ago al centro per rilegare con un cordoncino bicolore.
7- Piegare a metà il mini album e decorare l'interno a piacere con altre sagome tagliate con la vostra Big Shot.

Fatemi sapere se provate a farlo anche voi!
Alla prossima :)