Showing posts with label scraps. Show all posts

Friday, 30 October 2015

Creating Curves - part 3


HI, Trudi here from Quilting Prolifically, back from the excitement of Quilt Market in Houston.

So I finally got my quilt on with my quilt top.  I've named this one 'curves not curves'.

I started off with these dies:

659838 Bigz Square 4 1/2"
659832 Bigz Half Square Triangle 4 1/2" pieced
659853 Bigz L Isosceles & Right 4 1/2" H  
657611 Bigz Half Square Triangle 2 1/2" pieced


and a plan.

I made 2 different blocks, you can see them in this post.

I made my top completely from scraps, so the Sizzix Big Shot Plus was great for cutting the shapes.

The next dilemma was how to quilt it.  I always had a plan to quilt curves into the piecing to accentuate the curve and take your eye away from those straight lines of the piecing.

So I added curved lines in the orange peel section, extending them all the way to the half square triangles and filled the curves with feathers.


In the center curved square area I used curved cross hatching to highlight the curves even more.


I am really pleased with the overall effect the quilting has had on changing the straight lines into curves.


 Its funny what your eye will pick up and see, but choose to ignore.


I also extended the quilting out into the borders to continue the curved story of this quilt.  I think it worked well.


So next time you fancy doing a curved quilt, but don't fancy dealing with the curves, try piecing in straight lines, but quilting the curves in to create the curved effect.

 I hope you'll come back next month to see what inspiration has struck!

Friday, 28 August 2015

Creating Curves - part two


Hi, Trudi here from Quilting Prolifically. So last month I made a great start on my curves, not curves quilt.


18 of these Shoo Fly blocks done, and I was well on my way to getting the other 18 alternate blocks done too!


This second block is made up of nine patch of 4 1/2" squares.  Plain squares in the corners, and squares made with the Isosceles Triangle die, and 2 1/2" Half Square Triangles to make the center square in square block.


another set of 18 blocks are done.

Alternate the blocks in the lay out and hey presto  ... its starting to take shape!


I barely had enough space on my living room floor to lay this out, So to piece it, I gathered up the rows, stacking the blocks in order and taking them out to my sewing machine in my studio in the garden.  

(one sure way to get your daily step quota up!)

As I pieced the rows, I laid them over the long arm, then pieced the rows together.


I've added a plain border, and this is now ready to quilt.  

The curves are already visible in the pattern, and not one curve has been sewn.  
I'm hoping that a little (ok, maybe a lot) of custom quilting in those areas will really enhance the curved effect.  

Remember, this whole quilt, that is now 82" square, is made from scraps.  I did cut some yardage for the outer border and some of the white areas, but it is all a mish mash of white on whites and very low volume fabrics. 

So if you have a large pile of scraps, and fancy making your own version of this quilt, these are the dies I used along with my Big Shot Plus


659838 Bigz Square 4 1/2"
659832 Bigz Half Square Triangle 4 1/2" pieced
659853 Bigz L Isosceles & Right 4 1/2" H 
 657611 Bigz Half Square Triangle 2 1/2" pieced

So, I'll be back next month with the full reveal of how the quilting can really make a difference to enhance those curves.  If your have a go at making thee blocks for your own Curves, Not Curves quilt, please tag me on social media, I'd love to see!


Saturday, 4 April 2015

Greeting Card with a quote and a die cutted Flower


Hey everyone,
it´s me again, Julia. My project for this weeks post is a beautiful greeting card with a black stamped quote on it. Framed in pink and embellished with a precious die cutted flower. I LOVE IT! 

But first, let me tell you what we need to make some cards like this:
Pink cardstock, blank cards, enamel dots, clear stamps with a quote (mine is from the American Crafts Dear Lizzy daydreamer collection), black inkpad


Sometimes I really love sitting at my crafttable and just make a bunch of cute flowers. It´s so meditative and of course I can get rid of aaaaaall my old scraps. Maybe that´s why I love die cutting so much! You can reuse your old paper scraps to make some really new and beautiful items, right? That´s so awesome. 

With one of these pretty flowers I created a greeting card. Simple but effective! :)


Have fun making this card. Hope to see you next week, when I have a new inspirational project for you! :) Happy easter, xo Julia

PS: Don´t forget to have a look at the SPRING FEVER SALE! There are a lot of beautiful Dies you definitely need. ;) 

--------------------------------

Hi ihr Lieben,
ich bin es wieder, die Julia

Aber zuerst einmal kommt hier die Liste der verwendeten Materialien
Pinker Cardstock, Kartenrohling, Enamel Dots, Clear Stamps mit Zitat o.Ä, (meiner ist aus der Daydreamer Kollektion von Dear Lizzy American Crafts), Stempelkissen in Schwarz

Manchmal überkommt es mich und ich fange an meine ganzen Papierschnipsel zusammen zu suchen und damit ein paar schöne Kleinigkeiten zu machen. Dank der Big Shot ist das auch super einfach. Aber nicht nur das, irgendwie ist das auch ein wenig wie meditieren… ;) Einfach machen, ohne nachzudenken. So sind einige dieser Blumen hier entstanden.

Mit einem dieser Blümchen habe ich eine Karte gebastelt. Relativ einfach gehalten, schlicht aber mit dem gewissen Etwas. :)

Ich wünsche euch ganz viel Spaß beim nach basteln und freue mich auf euch, wenn ich kommende Woche wieder mit einem neuen Projekt hier bin. Frohe Ostern ihr Lieben, xo Julia

PS: Verpasst nicht den SPRING FEVER SALE! Es gibt viele tolle Stanzen im Frühjahrsangebot, insbesondere wundervolle Blumen. ;) 

Saturday, 10 May 2014

A Drunkard´s Path cushion with pom poms


Drunkard´s Path block have always  been  one  of  the block I wanted to try. I had seen nice quilts and it was one the first I was wishing to use with my Big Shot.
Oh, girl, I´m in love with these two dies. I don´t need to use my scissors or any special ruler and spend time and time cutting the pieces. Just in few minutes you can get a lot of  them .
The two dies match together , so the only thing you have to do is think what fabric you want to try and how you can display them.

My project this week is about this well known block.
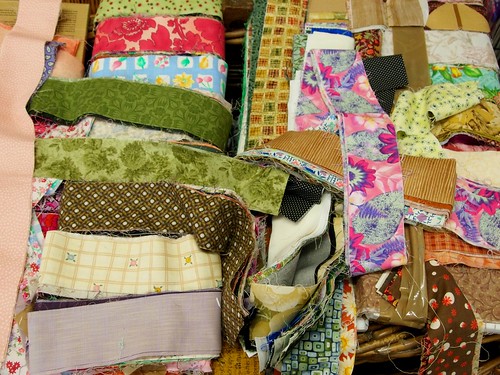
I chose some scraps from my stash and  gave them a  new opportunity to be a nice cushion.
As I love pom poms, I added around it. I think the final effect is better than I could wait. I love it !!


My cushion is an square of 15.5" x 15.5"


Supply List :


657900


657168

New stock code: 659849

657169


New stock code: 659850

Scraps of fabric of six differents prints ( for the Drunkdard´s Path blocks )
Batting
White fabric for the back of the top
Light fabric for the back of the cushion
two buttons
65 "  of pom poms  ribbon


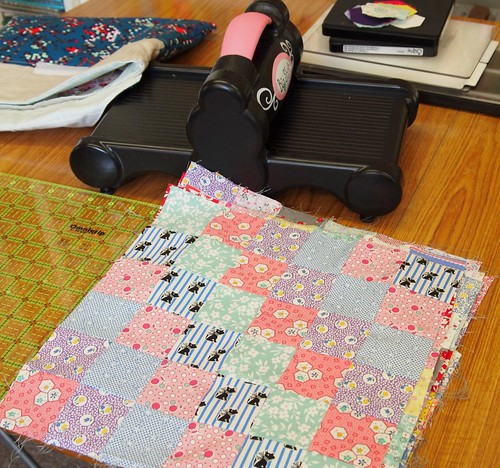
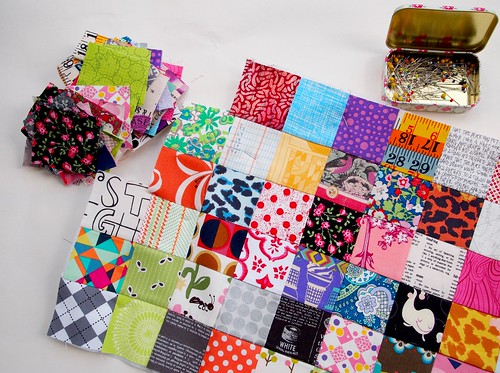
First I cut the Drunkard´s Path Quarter Circle  ( 24 pieces  in different fabrics ) and then I did the same with the other die , the Drunkard´s Path Fan Background  ( 24 pieces in different fabrics ) 
I sew one  light piece  with a dark piece.

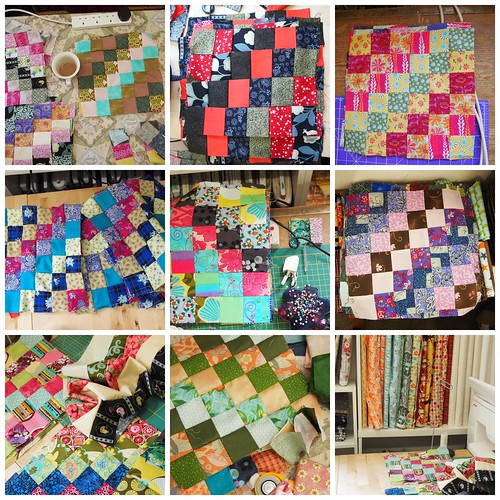
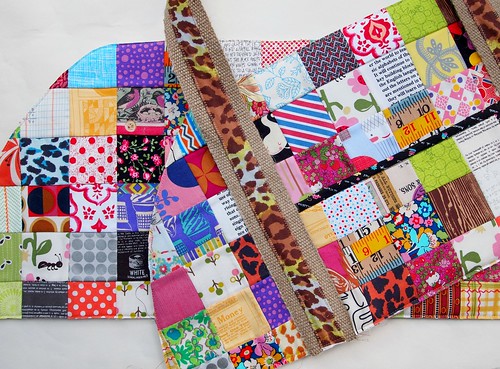
You can try different ways  to sew the blocks and will get a new vision of the same block.
When you have decide what is the best for you , then sew  all the blocks , first doing  the circle block .You need four circle blocks that have to be sewn together again.
Here you can see  how I tried different combinations..


After I  did the sewing of the top, I quilted it  layering the top , batting and white fabric , like a sandwich.


For the back of the cushion I sew again two more blocks  and added a rectangular piece in one side. Here is where  I sew two buttons later.
I  had ready the other piece of fabric with the buttonholes.


Before to sew the top and the back of the cushion , I pinned  the pom pom ribbom.
Finally I sew the two vintage buttoms I had bought in an old shop some time ago and I had a new and nice cushion !!!


This can be a nice present too. 
Oh, Happy Mother ´s Day for the american gals who are celebrating this day next Sunday. 

Hope you have a wonderful weekend!!!
Love
Mercedes


..................................................................************* ..................................................................


Drunkard´s Path ha sido siempre uno de mis bloques favoritos que quería coser alguna vez. Había visto  quilts que me gustaban con él y  fue uno de los primeros que quise probar con mi máquina Big Shot.
Estoy enamorada de estos troqueles. No necesito usar las tijeras ni ninguna regal especial , ni gastar tiempo cortando ambas piezas.
En pocos minutos tienes  un montón cortados.
Los dos troqueles  van perfectamente juntos , asi que solo tienes que pensar qué telas quieres elegir y ponerte con ello.

Mi proyecto para esta semana es sobre este bloque. Elegí algunos trozos de tela que tenía y les dí la oportunidad de convertirse en un bonito cojín.
Como me  encantan los madroños , los añadí. El efecto final es mejor de lo que esperaba y me encanta.

Mi cojín tiene una medida de 40 cm x 40 cm


Materiales:


657900


657168

New stock code: 659849

657169


New stock code: 659850


Trozos de tela de  seis diferentes estampados (  para los bloques )
Tela blanca para la trasera del top
Dos botones
1.65 cm de cinta de madroños
Guata
Tela clara  para la trasera del cojín


Primero corté los  bloques con los dos troqueles , 24 de cada uno en diferentes telas . Cosí una clara con una oscura.
Puedes intentar diferentes combinaciones y obtendrás una vision distinta según coloques las telas. Cuando decidas lo que más te gusta , cose  . Primero formarás el bloque del círculo. Así hasta hacer cuatro que luego coserás entre sí.
En la foto puedes ver  distintas combinaciones que  probe.

Después de coser el top, lo acolché colocando primero el top ,luego la guata y por ultimo la tela blanca, haciendo un sandwich .

Para la parte de atrás del cojín cosí dos bloques más y añadí en un extremo un rectángulo de otra tela, Aquí es donde luego cosí los botones.
La otra pieza de arriba la prepare también haciendo unos ojales.

Antes de coser el top y la trasera del cojín del revés, añadí los madroños sujetos con alfileres.
Finalmente cosí los botones vintage que había comprado en una tienda antigua hacía tiempo y ya tenía un nuevo y bonito  cojín.

Esto también puede ser  un buen regalo . Por cierto , feliz Día de la Madre a las chicas americanas que que lo celebrarán el próximo  domingo.

Que tengas un maravilloso fin de semana
Cariños
Mercedes


Monday, 24 June 2013

teaching with a big shot


For the past couple of Sundays I've been at a knitting and patchwork shop just outside of Leeds called The Skep teaching Bonnie Hunter's scrappy trips around the world blocks.

This pattern is perfect for using up random fat quarters or strips of fabric that you have in your stash that you don't like too much (it's also perfect for those favourite fabrics too).I've made quite a few of these quilts now, they're fast, they're fun and they use up a lot of fabric.

When you use the 2.5" strip die to cut your strips it's also really REALLY fast to get all of your fabric prepared. I've got to admit I get a bit carried away when I'm cutting strips and end up cutting far too many every time!

We had a whole basket of strips to play with, some were lovely, some were quite interesting (to put it politely!)

skep2


But I encouraged everyone to grab a mix of colours and prints to get the full effect of the pattern

skep1

and I think you'll agree, the results were lovely! There's no such thing as a fabric that's too ugly in a scrap quilt - when it's pieced into a scrappy block you don't notice the 'ugliness' and instead you see the colour or the tone. The big shot is perfect for cutting scraps, and keeping them under control in smaller pieces that can be easily sorted and stored.

You can make your own 'jelly rolls' with the 2.5" strip, or mini charm packs with the square dies, sort them into colours and keep everything nicely organised. Believe me, it makes you feel ever so slightly smug and pleased with yourself when you turn a big pile of scraps into manageable pieces for easy use!

skep3


Monday, 13 May 2013

thinking outside the (scrap) box


Last week I made a bag, using a fabulous and very simple pattern, by a friend of mine. I don't often (if ever) make bags, and the process was so enjoyable that this weekend (when I really should have been doing many many other things judging by the mountain of laundry that is sat by the washing machine) I pulled out some of my best fabric scraps and my ever favourite 2.5" bigz square die and starting cutting squares.

sewing squares

Watching the little pile grow was so much fun, and when I'd cut what I thought was probably more than enough I starting sewing them together into rows, following the pattern pieces for the bag as a guide.

what you building in there?

Soon I had 2 pieces that were big enough for the main panel of the bag. I added a front pocket (which wasn't in the pattern, but I had cut more than enough squares so it seemed like a good idea) and attached the handles.

panels - done!

Now I'm waiting for some stiff interfacing to arrive and I can add the bottom panels of my bag and sew it all together. I think I need to plan a weekend away with my new bag!!!!

I love how by thinking outside the box ever such a little I changed the entire look of the bag - this one screams 'I make quilts', don't you think?! And what is even better is I made it from scraps - so it didn't cost me anything, except for the interfacings. More money to spend on new fabric and maybe some new dies for my big shot too!