Showing posts with label Sizzix. Show all posts

Sunday, 27 September 2015

Sizzix At The Handmade Fair


Last Sunday I took a trip to Hampton Court Palace to experience The Handmade Fair. It is a huge fair filled with craft workshops, talks, demos, shopping and food. I went to visit the Sizzix team at their stand to say hello and take some photos.

I thought I'd share them with you today!


The decorations inside the tent were really pretty!


Lots of people were learning to use a die cutting machine for the first time.


The project was to make this decorative match box - one I'll be trying out very soon too!


It was really great to see so many people enjoying the Big Shot Plus machine! I hope you enjoyed my photos today and I'll be back next week - maybe with a little Christmas project!

Tuesday, 30 June 2015

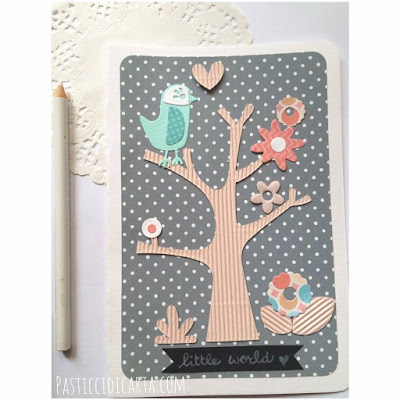
tree little card


Hi crafter!

Today I want to create a special tree, greetings card for a child that's in my heart, because the tree is a lot of us, of our life, of our roots.


And so among flowers, butterflies, clouds and animals, this little card has grown more and more.

And you ??
What are you waiting to create your favorite tree ??

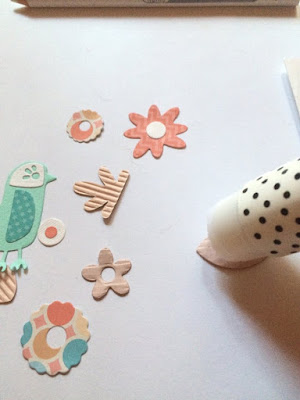
NECESSARY:
cardstock or paper scrap
scissors
stick glue
white pencil

See you next project!
Manuela
Pasticci di carta


*per i lettori italiani*


Ciao crafter!


Oggi ho voglia di creare un albero un po' speciale, un biglietto d'auguri per una bimba che ho nel cuore, perché l'albero rappresenta molto di noi, della nostra vita, delle nostre radici.

E così tra fiori, farfalle, nuvole e animali, questo biglietto è cresciuto piano piano.

E voi??
Che aspettate a creare il vostro albero preferito??

OCCORRENTE:
Cartoncini colorati o carta scrap
forbici
colla stick
matita bianca


arrivederci al prossimo progetto!
Manuela
Pasticci di carta

Friday, 20 March 2015

About mini horses and summer stories....


Hi there,

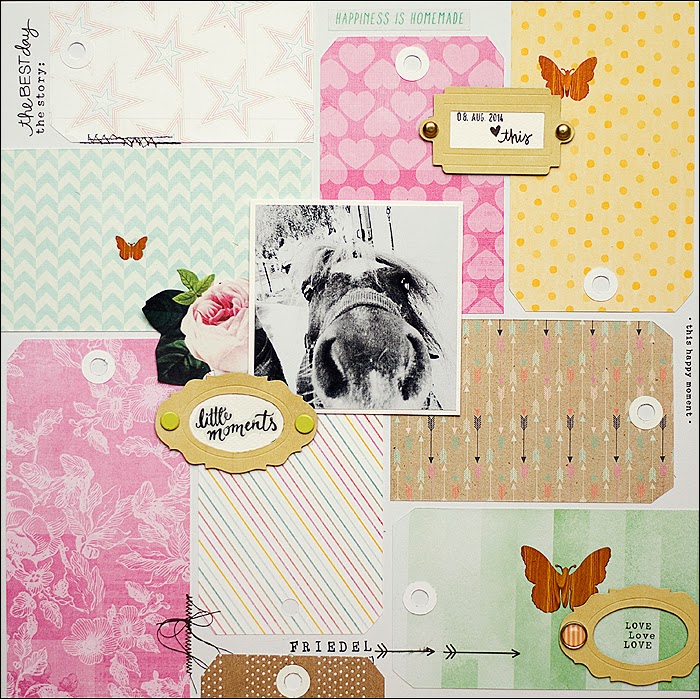
last year on a lazy sunny friday evening i met "Friedel".
Friedel is a cute mini horse - and together we went for a walk over sunburnt fields...

No fear! I did not rode him...


For a long time i thought about how to scrap about our little summer adventure....
Something colorful and funny.... but i couldn't decide which paper to choose.

And than i had an idea. Why not use all the papers?

Therefor the Tag & Bookplate Die (#656938) is perfect...
so i was able to use all kind of patterns and papers...

And the bookplates are so cute for a little journaling...

What do you think?


Materials:
Sizzix Big Shot Plus Starter Kit (#660515)
Sizzix Movers & Shapers L Die - Tags & Bookplates (#656938)


Have a nice weekend...
Stephanie

*******

Hallo ihr,

letztes Jahr an einem faulen sonnigen Freitag Abend habe ich "Friedel" kennengelernt.
Friedel ist ein Mini-Pony - und zusammen sind wir über die sonnenverbrannten Felder spaziert...

Keine Sorge - ich bin nicht auf ihm geritten...

Lange habe ich darüber nachgedacht wie ich unser gemeinsames Abenteuer verscrappe.
Schön bunt und lustig... aber ich konnte mich nicht für ein Papier entscheiden.

Und dann hatte ich eine Idee... Warum nicht alle Papiere verwenden?

Hierfür ist das Tag & Bookplate Die (#656938) perfekt.
So konnte ich alle Farben und Muster benutzen...

Und die kleinen Bookplates aus dem Set sind so süß für kleinen Text....

Was denkt ihr?

Materials:
Sizzix Big Shot Plus Starter Kit (#660515)
Sizzix Movers & Shapers L Die - Tags & Bookplates (#656938)


Habt ein schönes Wochenende...
Stephanie

Thursday, 13 November 2014

Christmas Week 1 with Karine


 Hello,

The end-of-the-year celebrations are coming closer now and it’s time to prepare greetings cards! All this week, the entire Sizzix team will show you how to create pretty and easy cards to inspire you again and again…

You can download the wonderful papers and die cuts offered by Sizzix by clicking here: http://www.sizzix.co.uk/free-festive-papers-2014-downloads

Here is a card with my favourite winter colour combo:

Supply List:

Papers: Sizzix downloadables
Cardstock, glitter paper: American Crafts
Coloured dots: Ephéméria
Glitter adhesive: Pause Créative
Label: Freckled Fawn
Others: gold leaf, pin

Dies:

658300 : Sizzix Big Shot Starter Kit
659426 : Sizziz Sizzlits Decorative Strip Die-Bow-Tied
658759 : Sizzix Thinlits Die Set 4PK-holiday-greens
660042 : Sizzix Texture Fades Embossing Folder 2PK-greetings-greens-set

Start by printing the nice snowflake pattern paper – you can download it here :)

I have printed this pretty snowflake pattern paper on a white cardstock.

Emboss a white cardstock with the Season Greetings folder. Cut a nice foliage pattern out of glitter paper.
Add a small bow knotted with glitter adhesive from Pause Creative. Assemble the whole in the lower right corner and you’re nearly done with your card!

Add some volume by inserting a pin and some colourful dots!

I hope you liked my card!


Have a lovely day,

Karine

Bonjour,

Les fêtes arrivent à grand pas, il est temps de commencer à préparer ses cartes de voeux ! Toute l'équipe Sizzix vous propose cette semaine de belles cartes faciles à réaliser pour toujours plus vous inspirer :)

Je vous propose de vite télécharger les superbes papiers et découpes offertes par Sizzix en cliquant ici http://www.sizzix.co.uk/free-festive-papers-2014-downloads

Voici une carte dans mon combo hivernal préféré :)

Matériel :

Papiers : Sizzix à télécharger
Cardstock, papier paillettes : American Crafts
Pastilles couleur : Ephéméria
Adhésif paillettes : Pause Créative
Etiquette :Freckled Fawn
Divers : feuille dorée, épingle

Dies :

658300 : Sizzix Big Shot Starter Kit
659426 : Sizziz Sizzlits Decorative Strip Die-Bow-Tied
658759 : Sizzix Thinlits Die Set 4PK-holiday-greens
660042 : Sizzix Texture Fades Embossing Folder 2PK-greetings-greens-set

Commencez par imprimer le superbe imprimé flocon en le téléchargeant ici

J'ai imprimé ce joli papier flocons sur un cardstock blanc.

Embossez ensuite toujours sur un cardstock blanc la plaque Seasons Greetings. Découpez un joli feuillage dans un papier pailleté.
Ajoutez un petit noeud relié par un adhésif pailléte Pause Créative, assemblez le tout dans l'angle bas droit et votre carte est pratiquement terminé !

Rajoutez un peu de volume en fixant une aiguille et des petites pastilles assorties !

J'espère que ma carte vous aura plu !

Bonne journée

Karine

Thursday, 2 October 2014

Downton dilema


 Well it's only how to put the quilt together! - there's and easy way for the piecing, which is difficult to plan, or there is a difficult way to piece which is very easy to plan - still not sure which option to take - here are the options -
 

 I can make each pinwheel complete and then lay them out to get a balance of colour and pattern - but the piecing will be complicated, or
 
I can stitch the shapes into triangles - but as you can see from the numbering on the pieces in each triangle that it is quite complicated - so I'm off to the sewing machine to see which method I'm going to adopt - back soon.
The decision is made - this method was quite tricky to stitch precisely although as previously discussed it's easy to plan.
 This triangle method gives me a much neater result - not so many difficult half seams - so I'm going to attempt this method and hope that I can plan it well enough.
As I have about 20 different fabrics to work with I think this method will work.
My next task is to cut some more half hexagons with die -http://www.sizzix.co.uk/product/658880/sizzix-bigz-die-5-half-hex and get sewing again. I'm going to cut 24 half hexagons from each fabric and see how far I get - this may just end up as a bed runner-or a single bed quilt - I'm not sure yet. I'll keep you informed as it progresses!
Next week I'm demonstrating at Alexandra Palace at the Knitting and Stitching show. I'll be on The Cotton Patch stand, I'm not sure of the number, so if you're at the show come and say hello.
Hope to see you next week.
Angela


Friday, 3 January 2014

Masculine page with girly Sizzlits? - 1964


Hi and all the best for the New Year!
I started 2014 as always - super busy, preparing samples for CHA and trying to work on new projects for the coming year. I always have tons of ideas and plans - and usually not enough time to do half of them :) Life is life - you just have to smile and try harder, right?

Today I'm sharing with you one of my favorite projects from the last days - mixed media scrapbooking page about one of my uncles - I loved this old photo from the fist sight and I just had to do something with it - of course! As I'm obsessed with layering last days pieces of my favorite Sizzix cut-outs were very helpful!


As you can see I went for more "grungy" look this time and I'm so very happy with the final result! A lot of Archival Ink, Neutral 7 Dots Studio paper (9th Wave) and a lot of Stamping and layering was just what I needed!


You can see 2 Sizzix Sizzlits Dies used on this project: they look pretty girly in the first moment...but hey, some cutting, ink and right layering and they are perfect match for this project! 
- 658506 - Sizzix Sizzlits Die - Vintage Doily
- 658502 - Sizzix Sizzlits Die - Flower, Daisy 

So maybe it is time to have a second look at your stash and it is possible you will find a lot of inspiring, sometimes surprising designs!
Sending best wishes
Finn

Monday, 23 September 2013

simple pot holder tutorial


Quick and simple gifts ideas are always handy, whether they're for Christmas, birthdays or any other occasion.


Everybody has to eat, so everybody has to cook - a pot holder is perfect because we all use them, or oven gloves, or something to get hot pans off the stove or out of the oven!

I used the 2.5" square die to make simple 9 patch blocks from scraps. I then used my scissors to cut out squares a little larger than the patchwork block from cotton wadding, an insulating wadding such as bosal poly-therm fleece (you need both a cotton wadding and an insulating wadding to make sure you don't burn your hands), and backing fabric.


They're layered up like so;


Backing fabric right side facing down, insulating fabric with shiny side facing down (towards where the heat will be), cotton wadding and then the patchwork block on top - with the right side facing up.


Pin baste and quilt (I just quilted simply in a grid following the lines of the seams in the block. The layers are quite bulky so make sure you use a walking foot when you quilt)

Trim off the excess backing fabric and wadding, bind (you can find a binding tutorial here), and it's ready to gift!

If you want to add a hanging loop, use a grommet kit. A quick internet search will bring these up for you, or you can find them at haberdashery or craft shops. They're inexpensive and very easy to use. You just need a hammer and to follow the directions that come with the kit. Make sure the grommet is metal and not plastic - you don't want it to melt!


And there you have it - a quick and easy gift that is useful and inexpensive.

I'll have another quick Christmas gift idea next week.


Friday, 23 August 2013

Back from ProzArt 2013!


Hi again friends!
Just as I promised I'm back with photo relation from our Scrapbooking Art Retreat in Poland - ProzArt 2013. This international scrapbooking event took place ina little town near Poznan - and one of the main goals of this extra long weekend was not only to meet people, take classes and create - but also take a deep breath and relax... and we succeed! This was one of the most amazing events of my life - and I'm very thankful to Sizzix for great support and sponsoring Prozart - it made our Art Retreat even more special!
But I'm here to share photos... just take a look a this bunch of lovely, talented, creative ladies from Poland, Finland, UK, Israel, Norway, Ireland and Romania :)


Here is what what we did during our creative weekend...
First of all -  we had a lot of time for creating and a room full of wonderful, inspiring products we could use - mostly thanks to our great sponsors (including Sizzix of course!).


"Sizzix corner" was very popular during our evening crops and creative challenges... 


We had challenges, games and prizes for the winners, of course!


And finally a photo session which gave us photos to use during 3 full-time classes taught by world-recognized designers: Karola Witczak, Kasia Krzyminska and me:)


In the end, there was always extra time for admiring the projects and thinking about some more creative fun!


What can I say? We all had great time and were sorry the event finished so fast. There was so much creative energy, wonderful personalities, new friendships and warm, supportive atmosphere it could last for a week longer :) It is not a surprise we are already planning ProzArt 2014, is it? :)

Sending good energy and warm hugs
Finn