Showing posts with label Gift tags. Show all posts

Monday, 2 November 2015

Romantic gift box and gift tag


Hi everybody! Elena here. 

Today I want to show you a little gift box in a very romantic style.


Supply list:


To make the gift tag I have die cut two sixes of the scallop circle in two different card colours and have glued them together. Then I have rolled the rose and adhered to the middle of the tag, punched the two leaves and glued them behind the rose. This gives a very romantic look to the box but clean and modern at the same time.


I hope you like this box and gift tag!

Elena

..........................

¡Hola a todos!

Hoy os enseño una caja y tag de regalo con una aspecto romántico pero muy actual. 

Para hacer el tag, he troquelado los dos círculos de galleta en dos colores diferentes y los he pegado entre ellos. Después he enrollado la rosa y la he pegado en el centro, después he troquelado las dos hojas y las he pegado debajo. 

Espero que os guste!

Elena

Tuesday, 13 October 2015

Cork Number Tags for Gift Wrap


 Hi friends!


Today we wrap original gifts using number tags cut into cork sheets and decorated with washi tape. It is an original idea for personalized gifts with the age of the celebrated, or year anniversary, etc.


You need:


Cut a square of the cork sheet about the size of our number die, and you decorate it as you like using washi tape. Cut the number with our Big Shot.

We can wrap the gift with a nice paper, take several turns of thread and fix the number with a small peg.


We may also use a paper bag and close it or placing the numbers on the edge with a peg


What do you think? From these basic ideas you can personalize your gifts in a thousand different ways, until next tutorial!


////////////////////////////////////////////////////////////

Ciao amici!

Oggi faremo dei pacchi regalo originali usando etichette a forma di numero, tagliate in fogli di sughero e decorati con washi tape. E' un'idea originale per personalizzare i regali con l'età del festeggiato, oppure gli anni di un aniversario.

Materiali
Tagliare un quadrato di sughero della misura della nostra fustella e decorare con washi tape. Tagliare il numero con la Big Shot.

Possiamo incartare il regalo con una bella carta, avvolgerlo con diversi giri di filo e fissare il numero con una molletta, oppure usare un sacchetto di carta e chiuderlo fissando il numero con una molletta al bordo.

Che ne pensate? Partendo da queste idee potete personalizzare i vostri pacchi in mille modi diversi. Ci vediamo il prossimo martedì con un altro tutorial!

////////////////////////////////////////////////////////////

Hola amigos!

Hoy envolveremos regalos originales usando etiquetas en forma de números recortados en láminas de corcho y decorados con washi tape. Es una idea original para personalizar regalos con la edad del festejado, o los años de aniversario, etc.

Materiales

 Cortamos un cuadrado de la lámina de corcho del tamaño aproximado de nuestro troquel de número, y lo decoramos a gusto usando washi tape. Cortamos el número con nuestra Big Shot.

 Podemos envolver el regalo con un papel bonito, darle varias vueltas de hilo y fijar el número con una pinza pequeña. También podemos usar una bolsa de papel, y cerrarla colocando el o los números en el borde con una pinza.

 Qué os parece? Partiendo de estas ideas básicas podéis personalizar vuestros regalos de mil maneras diferentes, hasta el próximo tutorial!

Monday, 5 October 2015

How to make a golden paper rose.


Hi everybody! Elena here. 

Today I want to show you how to make this beautiful golden rose and the circle gift tag.


Supply list:
Enjoy the video!


..........................

¡Hola a todos!

En el vídeo de hoy os muestro cómo podéis hacer esta preciosa rosa dorada y el tag redondo.

¡Espero que os guste!

Elena

Sunday, 17 May 2015

New Home Gift Tag


I really love making gift baskets for friends when they move into a new home. I include food items, candles, wine, treats and things for their new spaces. Usually I will wrap the baskets in clear cellophane and decorate with a tag or bow.

Today I'm sharing a New Home Gift Tag which takes just a few minutes to make. I hope you like it!

Supplies:

I started by embossing the tag to give it texture. I then cut out the house shapes as well as a scalloped trim using a die from the starter kit.


I glued the roof onto each house in alternate colours and then used sticky pads to fix them to the tag for a 3D effect.


I added the scallop over the top of the houses for a finishing touch!


I live in Cambridge in the UK and all the houses are lined up in a row like these. Shame they aren't all pastel pink and blue though! 

Have a super Sunday everyone. Until next time!

Friday, 20 March 2015

Gift Box and Card


Hi Sizzix fans! Anna here with a Sizzix project.
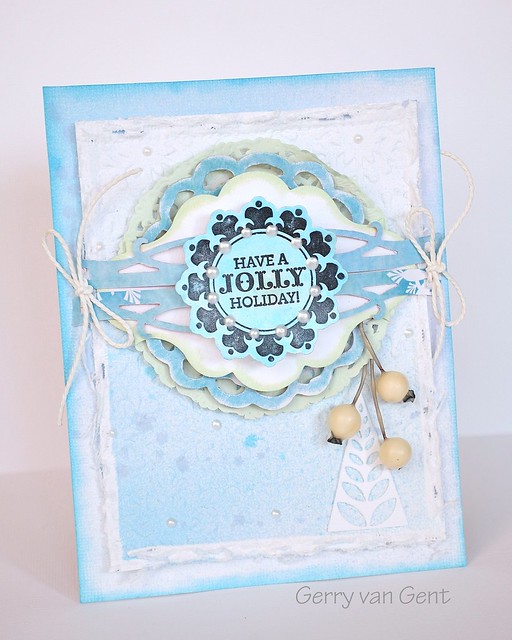
Today I'm showing you a simple gift idea. This little box is really easy to make and so lovely! Inside there are crayons for a boy, but you can fill with chocolates for an Easter treat.
 
cafe creativo - sizzix big shot - box - gift - scatolina (1)
 
To create the box you need the great Sizzix Bigz XL Box & Card by Stephanie Ackerman and a pair of Extended Cutting Pads. I also die cut a Card using the die of that name. The box is embellished with a window circle made with Framelits.
 
cafe creativo - sizzix big shot - box - gift - scatolina (2)
 
cafe creativo - sizzix big shot - box - gift - scatolina (3)
 
To create the box:
Die-cut from patterned paper and apply double-sided tape to the two long side flaps.
Fold all crease lines in the same direction. Fold the front of the Box to meet the back of the Box and adhere along the side flaps.
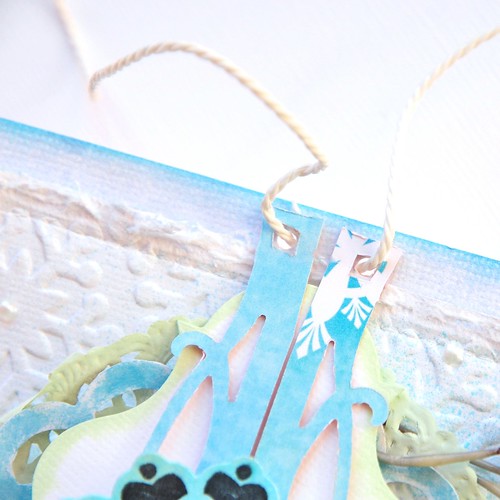
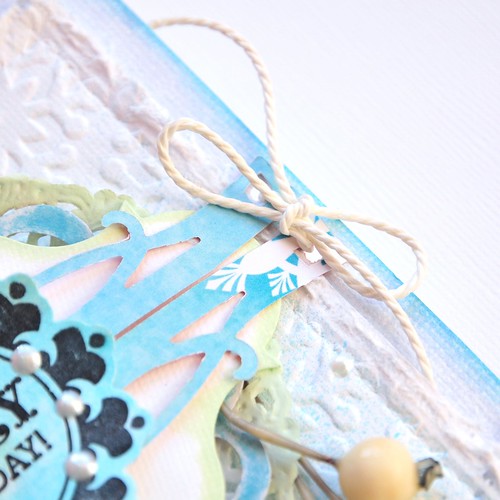
Insert the gift and apply a piece of washi tape. Wrap the box several times with twine.
 
cafe creativo - sizzix big shot - box - gift - scatolina (4)
 
To create the tag:
Cut out a card from cardstock with XL die.
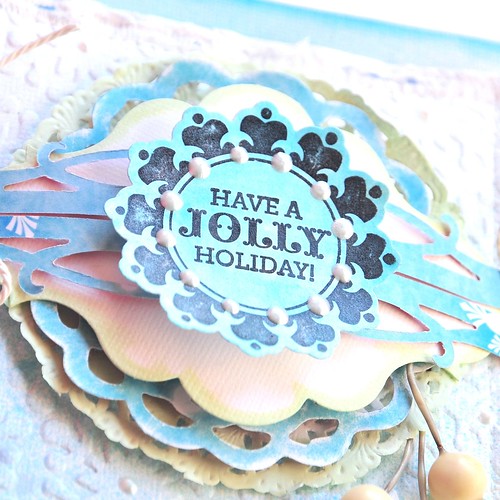
Let a few drops of spray ink. Re-use the circle that you have cut out in the box and apply. Stamp and die-cut the sentiment with Thinlits set and apply with foam board tape.
Adhere a mini tag with stapler and staples.
Embellish with sequins and paper clip.
 
This die is so versatile and my mind is overflowing with ideas for this cute little die, from a crayon box to Wedding favors, Easter Treat and just about everything in between. I love that I can use bits and pieces of this die and adapt it to fit any holiday or occasion.
Thanks for stopping by :)
 
Items used:
cardstock
patterned paper (We R Memory Keepers - Chalkboard - Chevron)
spray ink
ink pad
washi tape
twine
sequins
paper clip
foam board tape
double-sided tape
stapler and staples
 
**************************************
Flag_of_Italy
Per le amiche italiane! :)

Ciao a tutti gli amici di Sizzix! Sono Anna e sono qui per condividere un veloce tutorial usando le fustelle Sizzix.
Oggi vi mostro, infatti, un'idea regalo carina e semplice. Vedrete che questa scatolina è davvero facile da fare!
All'interno ci sono dei pastelli a cera, da regalare ad un bambino, ma si può riempire benissimo con cioccolatini per un pensierino per la prossima Pasqua.
Per creare la scatolina è necessario avere la splendida Sizzix Bigz XL Box & Card by Stephanie Ackerman ed un paio di piani di taglio lunghi. La fustella taglia qualunque tipo di cartoncino, anche spesso, segnando ogni piega per facilitare il montaggio. Con la stessa fustella ho tagliato anche una piccola card. La scatolina è impreziosita da una finestra rotonda, realizzata grazie alle fustelle Framelits.

Per creare la scatolina:
Fustellare la struttura usando una carta scrap e applicare colla o biadesivo per i due lembi laterali lunghi.
Piegare tutte le parti già segnate. Piegare la parte anteriore della scatola in modo da combaciare con il retro e incollare lungo le alette laterali.
Inserire il dono (pastelli, confetti, cioccolatini...) e applicare un pezzo di washi tape a scopo decorativo. Avvolgere lo spago intorno alla scatolina più volte e frae un fiocco.

Per creare la tag:
Con la stessa fustella, tagliare una card dal cartoncino prescelto.
Lasciate cadere qualche goccia di colori vari. Riutilizzare il cerchio che si è ritagliato in precedenza per creare la finestra della scatolina ed incollare. Timbrare e fustellare il "sentiment" con il set di Thinlits e incollare sopra al cerchio con scotch spessorato.
Applicare una mini tag con la graffettatrice.
Infine, abbellire con paillettes e graffetta.

Questa fustella è davvero versatile, tanto che ho in mente diverse idee per utilizzarla, dalle bomboniere a piccolissimi album accordion. Vedrete che potrete adattarla ad ogni tipo di ricorrenza o di occasione.

Grazie per la visita... felice scrap! :)
 
Materiali:
cartoncino
carta da scrapbooking (We R Memory Keepers - Chalkboard - Chevron)
colore spray
inchiostro tampone per timbri
washi tape
spago colorato
paillettes
graffetta
scotch spessorato
biadesivo
graffettatrice


Saturday, 14 March 2015

Poetry Tags


Hi,
today I will show you my variation of Poetry Tags.
I used my Big Shot and the classical Sizzix Framelits Die Set Squares #657585 to cut out some squares for my tags.

A big one and a small on for each tag.
I used white, light grey and craft colored cardstock, gluedots, eyelets and cotton ribbon.

To fix the cotton ribbon, I used a vertical slot punch and my crop-a-dile for the eyelets.
I selected also a few stamps out of my stock with proverbs and poetry.

You can use the poetry-tags to decorate some arrangements of branches in spring

or add it on gift wraps for example.

I hope you enjoy and have a nice day!

Annika

Saturday, 22 November 2014

Chritmas Tag and Wrap by Olga


Hello all!

We continue Christmas challenges with Sizzix and this time it's a Gift Wrap and Tag week. I love tags and ready to create them as often as cards)) I don't wrap presents this way but when I do this is a separate project for me)) I used again FREE Christmas Papers Downloads as the designs are so beautiful and so festive!


I wrapped Kinder chocolate so I hope my kids will like to unwrap it))


The products I used:


Have a nice day!

Olga

Tuesday, 17 June 2014

Your heart...


Hi everyone... hope you had a great week...today I have a gift tag to show you.


Supply list
658300 Sizzix Big Shot Starter Kit (Powder Blue & Teal)
659448 Sizzix Texture Fades Embossing Folders 2PK - Chevron & Lattice Set
658720 Sizzix Bigz Die - Ornate Frame
656633  Sizzix Movers & Shapers Die - Baroque

Papers: Watercolor cardstock, Sizzix packaging, old book paper
Stamps: Unity Stamps
Inks: Spray Mist Color Bloom - Lime Wedge
Other: Sweetheart Blossom  - Wild Orchid Crafts, Seam Binding Ribbon, button

How to do:
Die cut gift tag in Sizzix packaging with Sizzix Movers & Shapers Die - Baroque and emboss it with Sizzix Texture Fades Embossing Folders 2PK - Chevron & Lattice Set
Color watercolor cardstock with Spray Mist Color Bloom - Lime Wedge and water. Let it dry.
Die cut the frame with Sizzix Bigz Die - Ornate Frame
Die cut hearts from  Sizzix Big Shot Starter Kit (Powder Blue & Teal)


Thanks for stopping by and have a great day ♥
Anne Kristine

♥♥♥♥♥♥

Heisann...håper du har hatt en fin uke.. i dag har jeg en pakkelapp å vise deg.

Materialer:
658300 Sizzix Big Shot Starter Kit (Powder Blue & Teal)
659448 Sizzix Texture Fades Embossing Folders 2PK - Chevron & Lattice Set
658720 Sizzix Bigz Die - Ornate Frame

Papir: Akvarell kartong, Sizzix emballasje, gammel bokside
Stempler: Unity Stamps
Inks: Spray Mist Color Bloom - Lime Wedge
Annet: Sweetheart Blossom  - Wild Orchid Crafts, Seam Binding bånd, knapp

Beskrivelse:
Stans ut gavelappen i Sizzix emballasje med Sizzix Movers & Shapers Die - Baroque og emboss med Sizzix Texture Fades Embossing Folders 2PK - Chevron & Lattice Set
Farg akvarell kartong med Spray Mist Color Bloom - Lime Wedge og vann. La det tørke.
Stans ut rammen med Sizzix Bigz Die - Ornate Frame
Stans ut hjerter med  Sizzix Big Shot Starter Kit (Powder Blue & Teal)

Takk for at du stikker innom her og ha en herlig dag ♥
Anne Kristine

Sunday, 6 October 2013

"Have A Jolly Holiday!" Card by Gerry van Gent


Hello Everyone!
I have a card to share with you that I created
for my blog post today.
xmas card_gerry
657900 Sizzix Big Shot Machine
658628 Sizzix Textured Embossing Folders Winter Snowflakes Set
658730 Sizzix Bigz Die {Brenda Walton} Gift Tags
658506 Sizzix Sizzlits Die Vintage Doily
658623 Sizzix Framelits Die Set w/Stamps Trees, Leafy
658279 Sizzix Framelits Die Set w/Stamps Tags
658948 Sizzix Thinlits Die Frame, Fancy Rectangle
*  *  *
Here are a few close-ups for you....
close 1
*The smallest size of the Trees, Leafy was die-cut from white cardstock.
** White pearl drops were added to the centres of the embossed Winter Snowflakes.
close 2
I used only part of the Frame, Fancy Rectangle mainly to decorate 
the Gift Tag. Then I used the openings in the end to add twine.
close 3
close 4
Thank you for your visit today!

Tuesday, 10 September 2013

Card with tags and stars....


Hi everybody....today I have made a card for you with Brenda Waltons Gift Tags -Sizzix Bigz Die - Gift Tags ...beautiful design on these Gift Tags ♥
The stars I found on this Sizzix Die - Sizzix Bigz Die - Stars, Celestial 


Supply list:
657900 Sizzix Big Shot Machine Only (Powder Blue & Teal)
658730 Sizzix Bigz Die - Gift Tags
658345 Sizzix Bigz Die - Stars, Celestial 
656627 Sizzix On the Edge Die - Scallops
657826 Sizzix Sizzlits Decorative Strip Die - Washer Border

Papers: Authentique, Manila tag #12
Stamps: Stampers Anonymous Tim Holtz collection
Inks: Distress ink Pad - Walnut Stain, Broken China, Archival Ink - Jet Black, 
Other: Tim Holtz Stencil, Seam Binding Ribbon, Button, Feather.


Fold Patterned paper to a card and die cut the edge with  Sizzix On the Edge Die - Scallops
Die cut 3 stars with Sizzix Bigz Die - Stars, Celestial and distress the edges with Distress ink Pad - Walnut Stain. Sew or glue the stars to the card. 
Die cut 2 Gift Tag with  Sizzix Bigz Die - Gift Tags
Die cut border with Sizzix Sizzlits Decorative Strip Die - Washer Border and glue it together with Gift Tag , ribbon and feather. Sew a button on the star and glue it to the card.


Distress Manila tag # 12 with Distress ink Pad - Walnut Stain and Broken China. Distress the tag with Tim Holtz Stencil....add some text and glue a Gift Tag (for journaling)  to the main tag.
Wish you a great day and thanks for stopping by.
Anne Kristine

♥♥♥♥♥

Hei alle sammen ...i dag har jeg laget et kort med Brenda Waltons Gift Tags -Sizzix Bigz Die - Gift Tags ...nydelig design på disse tags'ene ♥
Stjernene fant jeg på denne Sizzix die - Sizzix Bigz Die - Stars, Celestial 

Materialer:
657900 Sizzix Big Shot Machine Only (Powder Blue & Teal)
658730 Sizzix Bigz Die - Gift Tags
658345 Sizzix Bigz Die - Stars, Celestial 
656627 Sizzix On the Edge Die - Scallops
657826 Sizzix Sizzlits Decorative Strip Die - Washer Border

Papir: Authentique, Manila tag #12
Stempler: Stampers Anonymous Tim Holtz collection
Inks: Distress ink Pad - Walnut Stain, Broken China, Archival Ink - Jet Black, 
Annet: Tim Holtz Stensil, Seam Binding bånd, knapp, fjær.

Fold mønsterark til et kort og stans ut kanten med  Sizzix On the Edge Die - Scallops
Stans ut 3 stjerner med Sizzix Bigz Die - Stars, Celestial  og distress kantene med Distress ink Pad - Walnut Stain. Sy eller lim stjernene til kortet.
Stans ut 2 tags med Sizzix Bigz Die - Gift Tags
Stans ut borden med  Sizzix Sizzlits Decorative Strip Die - Washer Border og lim det sammen med tag, bånd og fjær. Sy en knapp i midten av stjernen og lim det til båndet.
Distress Manila tag # 12 med Distress ink Pad - Walnut Stain og Broken China. Distress tag'en med Tim Holtz Stencil....stemple tekst på tag'en og lim Gift Tag (for journaling)  til den store tag'en.

Ha en fin dag og takk for at du stikker innom her.
Anne Kristine