Showing posts with label Eileen Hull Inspiration Team. Show all posts

Saturday, 20 December 2014

Crafting On The Go


I am just returning from a trip to Disney World with our daughter, SIL and grandsons- 2 1/2 and 10 months old. What a fun and magical experience to see the Disney characters through the eyes of little ones.

I have to say I did miss my creative time- those guys kept us hopping! But one thing I like about die cutting is that you can cut things ahead of time and 
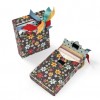
bring them with you. I cut a stack of the new Recipe Cards & Labels and a few Recipe Card Boxes from the new Vintage Kitchen collection and tucked them in my bag. I was able to pull them out at various points when I had a few minutes to myself to create (after the little ones were in bed!) 

These dies are versatile- you can use them in so many ways! I really like how they feel when you die cut them from matboard- they are nice and sturdy to write on and take inks and sprays really well- but they are great cut from watercolor paper or patterned paper too.


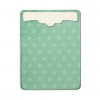
The Recipe Card measures 3" x 4"- the same size as Project Life cards so they will fit in pocket pages. Or as the name suggests, they may be used for recipes or you could fill a box with coupons (one batch of cookies every month), flash cards for spelling or math, or adhere a gift card to the front. If you fold a piece of paper in half and place the fold just inside the cut line of the die, you can also make a small card. 

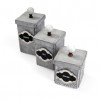
You can fit about eight to ten matboard cards in a Recipe Card Box. I also like to write on the box- on this one I lettered Eileen's Journaling Cards- but you can easily personalize it with a person's name, event or occasion.


The Recipe Card Box goes together so easily with just two lines of strong double sided tape- 
I used iCraft tape by ThermOWeb.


Today we had seven hours to kill at the airport waiting for our flight and I was able to work on some cards.


Visit my blog to see how to make these Quick and Easy Journaling Cards and for lots more ideas and inspiration on ways to use these Vintage Kitchen dies.

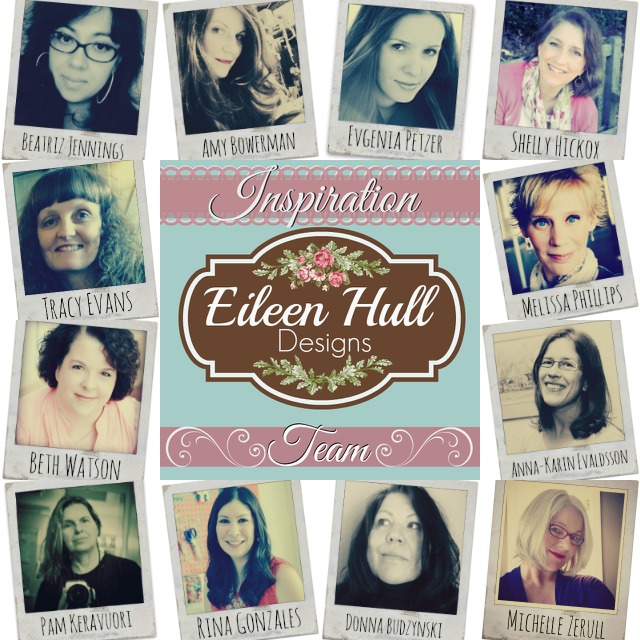
Here are just a few more ideas to tempt you! They were created by my amazing Inspiration Team:


 Lisa Hoel creates a festive gift basket with the Loaf Pan!


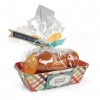
Shelly Hickox creates an adorable ornament with the Cookie Box die.


A walk down Memory Lane with Michelle Zerull- a storefront made from the Canister die.


 Tracy Evans makes an adorable Winter Wonderland Birdhouse with the Canister die!


Anne Redfern creates a Caroling vignette with the Artist Trading Blocks dies!

I hope you will join our Art With Heart Challenge and show us what you have been working on. A prize is involved!
                         

Saturday, 19 July 2014

Summer Happenings


I hope you all have been enjoying your summers! I am back from my #PaperTrail Tour teaching crafts from my vintage camper. Read about my teaching travels on my blog here.

It was so much fun I am now gearing up for the next one. Here's my feature in Where Women Create! Road trip!


I leave on September 2 for TWO MONTHS. There are all kinds of fun events planned along the way, including stops to teach in stores, visiting craft celebrities and I'll be teaching private classes too. Scotty is being set up as a Pop-Up Trailer Shop as we speak, and will be loaded up with dies and vintage embellishments. I can't wait and am so blessed to be able to take the time to do this. I hope you will follow along on my Facebook page and blog where I will be posting pics and videos.

My Inspiration Team has been going to town creating beautiful projects while I have been on the road. Please hop on over to my blog on Tuesdays to see the latest designs from them- I promise it is worth the trip! Each month we have a theme for our Art With Heart Challenge. For July it is Red, White and Beautiful. You are invited to play along and post your latest creations- there's a fun prize involved too!
Here are a few inspirational peeks...


Visit Shelly's blog for a great tutorial on how to construct this amazing Garden Tote.


Michelle Zerull shows how to make a cool Mail Box.


Anna-Karin Evaldsson created a summer album- love it! 
Rina Gonzales makes a cool summer banner from the Canning Jar die.


Here's a fun patriotic block from Tracy Evans.

A flower arrangement by Donna Budzynski makes a great patriotic centerpiece!

On Thursdays we have new projects posted on The Artists on the Block site where artists from all over the world are taking the Sizzix 3" Block/Cube/Bank die to the next level- exploring new techniques and combining the blocks to make storage pieces- so inspiring!

Pam Bray created this beautiful block for her son's wedding. So many flowers and all handmade!


Next time I will share more Team ATB photos. Keep on crafting...

Saturday, 15 March 2014

DIY Wedding Favor Boxes


Wedding bells are ringing! My daughter is getting married in six weeks! The replies are starting to come in and Pam and I are gearing up to start making the wedding favor boxes. 

I happen to have a few Sizzix boxes for her to choose from :-). She decided that she would like to give Jordan almonds in a little net bag. This is the same favor that my mother gave at her wedding many years ago!


The almonds will be packaged in the 2" square box from the Blocks/Cubes ScoreBoard die. (I haven't bought them yet- afraid I will snitch them)


These blocks above are decorated in a Baby theme but they can easily be changed to accommodate any style- the block are a blank canvas to decorate! By adding paper, embellishments and trims, you can make boxes for any occasion.

The colors in Pam's wedding are white, aqua and violet. Her invitations are thick white cardstock that are embossed with the new Polka Dot and Starflower folders and then lightly inked over in aqua to show off the embossing. The boxes will match that theme.

You will need:
 
  1. Die cut boxes from white matboard. You will need to cut 2 strips to make one box. 
  2. Place strip in embossing folder and run through Big Shot. You will notice that it takes a little more effort to roll this through but it works fine. The matboard is thicker than paper so there is a bit more resistance.
  3. Lightly ink over embossing in aqua.
  4. Add 2" black and white photo to top of box. (*I used a product called Craft Attitude which is a film that you can print on, trim and glue directly to the box and it looks like the image is printed right on the surface- cool stuff!) 
  5. Add double sided tape to three of the four tabs. Remove the release paper and assemble box, leaving the top flap without adhesive to open and close the box. Here's a video of the Square Box being assembled- same idea for this one.
  6. Add almonds to box!
And now for some more great news... drumroll please! The Eileen Hull Inspiration Team has been announced! 

Meet the Eileen Hull Inspiration Team! | Eileenhull.com #lovesizzix

I can't believe how much talent we have in this group! Check out my blog to see a bio of each designer and links to their sites. Every month we will have an Art With Heart Challenge with a certain theme. You are invited to post your creations along with the team. At the end of the month, someone will win a prize package.

Many thanks to my Inspiration Team Coordinator, Amy Bowerman of Plucking Daisies for making this all happen. I am looking forward to seeing what these amazing designers create!

Please LIKE my Facebook page. That's where I will be posting my travels. In two weeks, I am headed off in my vintage camper for Phase 1 of the #PaperTrail, a teaching extravaganza. The camper is my mobile studio and will be crafting my way around the US. Stay tuned for updates on my blog! Yes, I know it's right before the wedding- it's just how things worked out... 

Thanks for stopping by...I think life is about to get a little crazy!