Showing posts with label Framelits Hexagons. Show all posts

Friday, 10 July 2015

Paper boat card


Hi Sizzix friends!

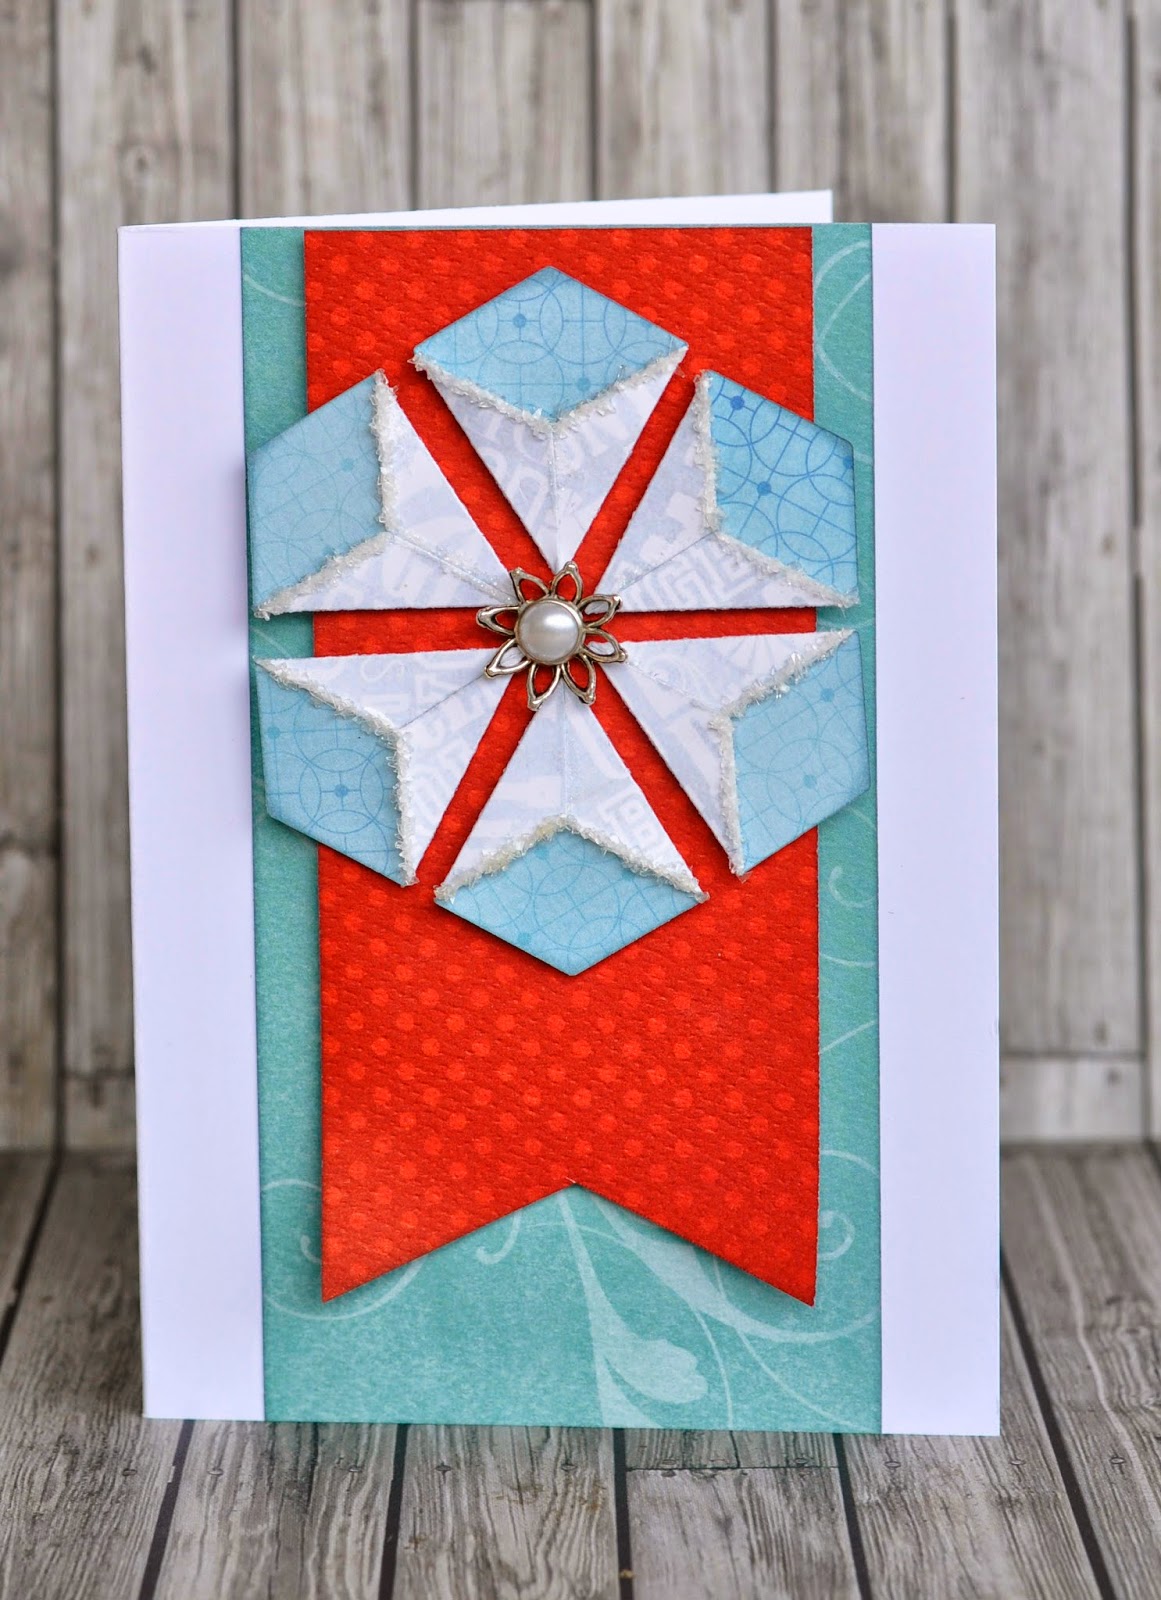
Today I want to show you my last Summer card. It’s a hexagonal card inspired by the sea, to create it I’ve used some of the Framelits from the Essentials Range and my Big Shot Plus, of course!!! 


It is so cute and reminds me the sea, with the waves and a little paper boat!!!  


Here are the materials and the dies I have used:


White cardstock, scrapbooking paper, hexagon and scallop squares, a stamp and enamels.
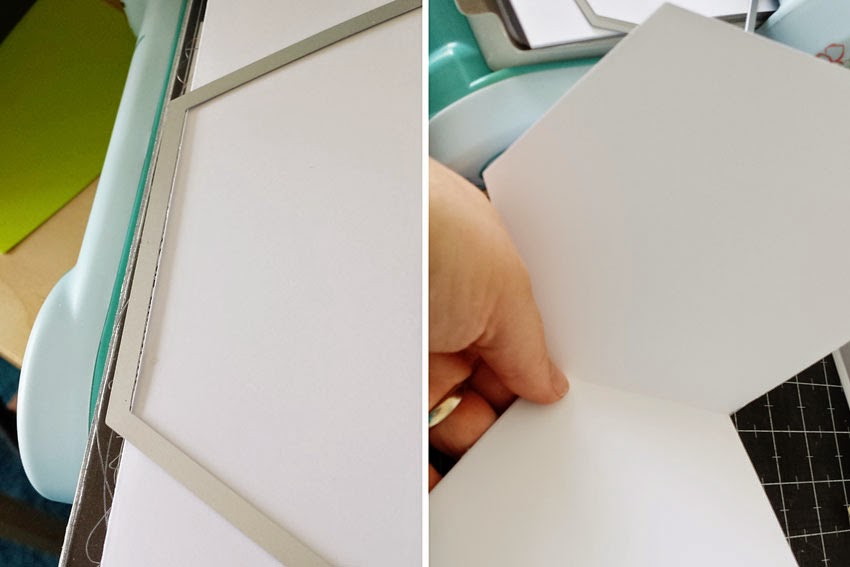


And a simple steps:


I have used the the scallop squares dies to die-cut the top of these halves hexagons to reminds waves.


More details of the card: 

I have used the foam pads to put each piece of paper together, giving volume to the card.


I’ve also distressed the edges in blue and yellow Distress ink. 


I hope you have enjoyed this hexagonal summer card . Thanks for your visit!


Have a creative and happy Friday!


------------------------♥------------------------♥--------------------------♥------------------------

¡Hola a todos!

Hoy os quería enseñar la última tarjeta veraniega que he realizado. Se trata de una tarjeta hexagonal inspirada en el mar, para realizarla he utilizado un par de Framelits del Essential Range y por supuesto mi Big Shot Plus !!!
Es una tarjeta muy resultona que recuerda al mar con sus olas y su barquito de papel!!! 
Y estos son los materiales y troqueles que he utilizado:  cartulina blanc, papel para scrapbooking, hexagon y scallop squares Framelits, un sello y enamels.

Unos sencillos pasos: He utilizado el Framelit del cuadro festoneado para darle forma a la parte superior de los medios hexágonos en tono azul para que parecieran las olas.

Más detalles de la tarjeta: Cada pieza de papel está enganchada con almohadillas 3D dándole volumen a la tarjeta. He entintado los bordes con tinta Distress amarillo y azul.


Espero que os haya gustado e inspirado esta tarjeta veraniega hexagonal. ¡Gracias por la visita!


¡Feliz y creativo viernes!

Wednesday, 22 October 2014

Clean and simple


If you asked anyone I work with to describe me, the word 'simple' may crop up quite a bit although the word 'clean' would be conspicuous by it's absence (I'm a bit messy when I'm working!). Having said that, when it comes to card making Clean & Simple is what I prefer nine times out of ten. 

A few weeks back I made some cards using hexagons which I have taken with me to various shows and demo's recently and they always seem to be popular which I why I want to revisit the idea but with a festive twist.

I will be using a couple of the new Texture Fades embossing folder sets from Tim Holtz namely the Beaded Garland & Snowflake set and the Greeting & Greens set together with the Framelits Hexagons set.

I will also be using a selection of Distress inks to bring the embossing to life.

I started by using a 44 mm wide hexagon to die-cut an aperture in my base card behind which I placed a printed sentiment attached using adhesive foam pads to add a little dimension. I used the same hexagon to die-cut 4 shapes each of which I embossed using my 'Greens' folder.

I inked over the embossed detail using Ripe Persimmon and Spiced Marmalade before adding a little depth to the edges with Fired Brick. Next, I coloured the berries white using a gel pen (Uni-ball Signo by the way, Good white pens are hard to find!) You may need to repeat the white colour up to three times.

 All that was left to do was attach the separate hexagons around the aperture using adhesive foam pads trimming the bottom one to fit the card.


For the second card, I repeated the first three steps moving the aperture to the right and debossing with the 'Snowflakes' pattern.


I used Shabby Shutters, Peacock Feathers and Dusty Concord Distress Inks to add the colour. Once dry, I added tiny 2 mm adhesive gems to the centre of each snowflake and sprayed them with silver 'Spray & Sparkle' to enhance the colours and add a bit off 'Bling'.

I attached the hexagons as before and that, as they say, is that!


This is the sort of card I would be more than happy to send or receive and I'm sure that there are endless colour and embossing combinations that you could play about with to equally good effect.


Wednesday, 30 July 2014

Hexagon greetings


This week I decided to break the square and make a card with six edges using a few sizes from the Framelits Die Set 10PK - Hexagons.


First step was to make my cardbase and for that I folded a white piece of cardstock and chose the largest die from Framelits Hexagons. I let one edge of the die extend out over the fold of the paper so the die wouldn't cut here. Once I had run my sandwich through the Big Shot Starter Kit (Powder Blue & Teal) I was left with a hexagon that opened on one side and could be used as my cardbase.


Next step was to make the patterned paper for my card and I chose matching papers and a single solid cardstock and die cut them using a smaller hexagon. Once I had die cut a few of each paper, I traced a hexagon on a piece of white cardstock (using one of the dies as template) and started to assemble my pattern using the traced lines as my guide. When I had filled out the entire traced area, I ran the paper and the matching die through the Big Shot and was then left with a patterned hexagon-shaped piece of paper. Now all I had to do was put my card together.


Using the labels that come with the Big Shot Starter Kit I diecut two labels and sandwiched those with a handcut banner giving my sentiment some interest. I also tied a piece of seam binding around the patterned paper prior to attaching on the cardbase.


And then I called the card done. When doing something like the patterned paper using simple shaped dies, I don't think you need much in ways of embellishments and thus I kept mine to a minimum.

Supply list:
Big Shot Starter Kit (Powder Blue & Teal)
Framelits Die Set 10PK - Hexagons
Cardstock
Patterned Paper
Seam Binding
Stamp (Papertrey Ink)
Ink (VersaFine)

---o---

I denne uge ville jeg springe boxen og lave et kort med seks kanter, og jeg tog Framelits Die Set 10PK - Hexagons til hjælp.

Første skridt var at lave min kortbase, og til det formål foldede jeg et stykke hvidt karton og placerede den største die fra Framelits - Hexagons, så den hang lidt ud over folden. På den måde bliver der ikke skåret dér, hvor dien hænger ud over kanten. Da jeg havde kørt sandwichen gennem min Big Shot, havde jeg et sekskantet kort lige klar til at dekorere.

Næste skridt var at lave mit mønstrede papir, og her valgte jeg en mindre sekskant-die, som jeg brugte til at udstanse sekskanter i forskellige mønstrede papirer og i karton. Da jeg havde skåret nogle stykker af hvert papir, brugte jeg en af diene til at tegne en sekskant på et stykke hvidt karton. Det fyldte jeg nu ud med mine små sekskanter, og da jeg havde fyldt hele sekskanten ud, kørte jeg den og dien igennem min Big Shot, hvorefter jeg havde et sekskantet stykke mønstret papir til mit kort.

Jeg brugte de labels, der følger med Big Shot Starter Kit (Powder Blue & Teal) til at udstanse to labels, som jeg lagde sammen med et håndklippet grønt banner imellem. På den måde fik kortets tekst også lidt ekstra opmærksomhed. Endelige bandt jeg et stykke seam binding omkring det mønstrede papir. Når man laver kort, som er så busy, som dette, synes jeg ikke, at man behøver alverden af dekorationer.

Ingredienser:
Big Shot Starter Kit (Powder Blue & Teal)
Framelits Die Set 10PK - Hexagons
Karton
Mønstret papir
Seam Binding
Stempel (Papertrey Ink)
Sværte (VersaFine)

Wednesday, 2 July 2014

Hexagon Fun!


Hexagons are such a great design feature in the card maker's arsenal, they're like a circle designed by an engineer. I love their versatility and they are an essential for modern paper crafting styles.Having said all that I didn't know that they could be fun too!

I was looking through some old dies when I came across a decorative strip die called Flower, Folded which is basically a collection of perforated circles which when put together form a really cool 3D flower. I started to wonder what you could do with other shapes to create a similar effect when that little light bulb appeared above my head (maybe that's what caused my bald spot!!!)

It was at this point I grabbed my hexagon Framelits set and the rest as they say is history.

I started by die-cutting six identical hexagons from paper with a different pattern on either side (My Minds Eye - So Sophie range) I then used a tool to crease each one as shown in the diagram below. Once I had all six I placed them carefully onto a rectangle of adhesive tape sheet.


Once they were all stuck down I placed a pearl brad through the centre and matted them onto two further hexagons in contrasting shades of patterned card. Next, I folded a rectangle of stiff ivory card stock in half and placed my large hexagon die overhanging the folded edge (as indicated by the white arrow), this forms the hinge as the die cuts through both layers.

Finally I attached the matted layers to the hinged base card, I think the finished card is pretty cute!


I couldn't stop at one card so I thought I'd try a different colours, I know it's a bit early for Christmas cards but it made such a wicked snowflake. This time I folded the flaps closed and strategically applied some Pinflair Ice Diamond together with a pearl charm in the centre.


I was about to pack my tools away when I thought 'what would it be like using say... Framelits hearts' well here's the answer.I cut six hearts as before and used a set square as a guide to add the creases, this end of the set square has an angle of 45 degrees which was perfect as luck would have it.

And here is the finished card. I'm sure that there is more mileage in this technique but I have to move onto more pressing matters. If you can think of any variations on this theme I would love to hear them.


Wednesday, 11 June 2014

Skoleklar / Ready for school


Wednesday again and this week I decided to create a layout using a few of Sizzix Framelit dies. They are terrific all round dies that can be used for cards, layouts and all kinds of projects.


I find that when using shapes on a layout they stand out less than when using them on a card but that is fine by me: I want to create a whole. I clustered by two pictures on top of a large tag made using the Sizzix Framelits Die Set 9PK - Tags #2. On the buttom of the tag I added a sliver of a different pattern paper die cut with the Sizzix Framelits Die Set 6PK - Squares, Scallop.


I didn't have room to fit in a large title so I felt I needed to anchor the title somewhat. I die cut two tags using Sizzix Framelits Die Set 12PK - Tags, Sentiments and then added my title to the tag. This is a good way to make sure a small title can still be seen.


I even got around to incorporating some hexagons as a contrast to the circles from the balloons.
 
 
Supply list:
Sizzix Big Shot Starter Kit (Powder Blue & Teal)
Sizzix Accessory - Magnetic Platform for Wafer-Thin Dies
Sizzix Framelits Die Set 6PK - Squares, Scallop
Sizzix Framelits Die Set 10PK - Hexagons
Sizzix Framelits Die Set 9PK - Tags #2
Sizzix Framelits Die Set 12PK - Tags, Sentiments
Paper: Echo Park
Stickers: LilyBee
Other: Paper decorations from Bazzill
Cardstock

---o---

Onsdag igen, og jeg havde lyst til at lave et layout i denne uge. Jeg brugte nogle forskellige Sizzix Framelit dies til layoutet, fordi de er så all round dies, som kan bruges på layouts, kort og alle mulige andre projekter.

For mig at se flyder formerne mere sammen, når man bruger dem på et layout i forhold til, hvis man brugte dem på et kort, men det gør ikke noget: Jeg vil jo have, at layoutet bliver et hele. Jeg samlede mine to billeder ovenpå en stor tag lavet med Sizzix Framelits Die Set 9PK - Tags #2. På bunden af taggen tilføjede jeg en lille stribe anderledes mønstret papir udstanset med Sizzix Framelits Die Set 6PK - Squares, Scallop.

Jeg havde ikke rigtig plads til en stor titel, så jeg følte, at det var vigtigt, at give min lille titel en base. Derfor udstansede jeg to tags med Sizzix Framelits Die Set 12PK - Tags, Sentiments, og derpå satte jeg min titel. Det er en god måde at sikre sig, at en lille titel fortsat kan ses.

Jeg fik endda plads til nogle sekskanter, som virker som kontrast til ballonernes cirkelformer.

Ingredienser:
Sizzix Big Shot Starter Kit (Powder Blue & Teal)
Sizzix Accessory - Magnetic Platform for Wafer-Thin Dies
Sizzix Framelits Die Set 6PK - Squares, Scallop
Sizzix Framelits Die Set 10PK - Hexagons
Sizzix Framelits Die Set 9PK - Tags #2
Papir: Echo Park
Stickers: LilyBee
Andet: Paper decorations from Bazzill
Karton

Wednesday, 14 May 2014

Bright and cheerful hexagons


Yet another Wednesday and yet again it is time for me to share a project with you. My mother had asked if I could do a card for a little girl's baptism using bright and happy colours and this is what I came up with.


It is indeed and bright and happy card and I enjoyed creating it using fun papers and various Sizzix dies.


The pattern on the right side of the card was created by die cutting a number of matching patterned papers into hexagons using the Sizzix Frameworks Die - Honeycomb.


Next up I die cut a frame using the same die (in a white piece of scrap paper) to use as a stencil when lining up the hexagons to form a pattern. I simply alligned the stencil where I wanted it, glued down all the hexagons directly on the front of the card base and once I had all of them in place I cut of what ever extended beyond the card base. To finish off the patterned portion of the card I ran a green sliver of paper as well as some glitter tape down the card.


The final touch was to add two tags made using the Sizzix Framelits Die Set 12PK - Tags, Sentiments to house the sentiment and the little girl's name. The tags hang from a piece of baker's twine wrapped around the green paper.


Supply list:
Sizzix Accessory - Magnetic Platform for Wafer-Thin Dies
Sizzix Framelits Die Set 12PK - Tags, Sentiments
Sizzix Frameworks Die - Honeycomb
Patterned paper (Echo Park)
Cardstock
Sticker alphabet
Enamel dot (My Mind's Eye)
Glitter Tape (American Crafts)
Baker's twine

---o---

Endnu en fin onsdag, og jeg har et nyt projekt til jer her på bloggen: Min mor havde bestilt et kort til en barnedåb, og det skulle være i friske, klare farver, hvilket jo heldigvis er en favorit kombination for mig, så her er hvad jeg fandt på.

Mønstret på den højre side af kortet er lavet vha. Sizzix Frameworks Die - Honeycomb. Jeg startede med at udstanse et antal sekskanter i forskellige mønstrede papirer. Herefter udstansede jeg en stencil med samme die, som jeg brugte, da jeg lavede mønstret: Stencillen blev placeret direkte på kortbasen, og så monterede jeg alle sekskanterne. Da jeg havde dem på plads, var der bare tilbage at klippe af, hvor nogle af dem stak ud over kanten på kortet. For at indramme mønsteret lod jeg en grøn strimmel papir og lidt glimmertape løbe hele vejen ned over kortet.

Det sidste punkt på dagsordenen var at tilføje to tags, som jeg lavede med vSizzix Framelits Die Set 12PK - Tags, Sentiments. Herpå satte jeg en hilsen samt den lille piges fine navn. Tagene hænger fra en omgang baker's twine, som er bundet omkring den grønne stripe papir.

Ingredienser:
Sizzix Accessory - Magnetic Platform for Wafer-Thin Dies
Sizzix Framelits Die Set 12PK - Tags, Sentiments
Sizzix Frameworks Die - Honeycomb
Mønsterpapir (Echo Park)
Karton
Sticker alphabet
Enamel dot (My Mind's Eye)
Glitter Tape (American Crafts)
Baker's twine


Friday, 2 May 2014

Summer Hexagons


Hello.

I hope this post finds you all well and enjoying the sunny weather.  Today I have a couple of bright summery cards to share with you.

The theme today is hexagons!  I love hexagons,  they have been used so much in crafting over the past year but they have such a fresh feel to them!

This first card features the Hexagon FramelitsSizzix Textured Impressions Embossing Folders 2PK - Basket Weave & Honeycomb Set and the Sizzix starter Kit.


The second card again uses the Hexagon Framelits and the Sizzix Starter Kit. 


These are great for quick cards for any occasion.

Thats all from me today, as I have lots of lovely samples to be creating for an upcoming show.

Until next time ...

Happy Crafting 


Wednesday, 23 April 2014

Pastel hexagons


 Hexagons are still on trend and I wanted to use them to create a modern and clean card.


I wanted to use hexagons in various sizes and the easiet way to chose them is simply to look at the way they allign on the sheet the come on. I chose the smallest and three larger ones skipping one between each of them.

Next up I chose four pastel colours and decided which order I wanted them to appear in. Using the Magnetic Platform made it easy to cut each hexxie using only small scraps of paper.


I glue the four hexxies together (only lightly since I knew I wanted to stich them down as well) and attached them to a layer of purple and white cardstock.


In order to finish the card I stamped a sentiment in the lower right corner of the white cardstock and mounted everything on a black card base.


Supply list:
Sizzix Framelits Die Set 10PK - Hexagons
Sizzix Accessory - Magnetic Platform for Wafer-Thin Dies
Cardstock
Thread
Stamps: Papertrey Ink

---o---

Sekskanter er en trend, der fortsat kører, og jeg ønskede at bruge sekskanter til at lave et moderne, enkelt kort.

Jeg ville bruge sekskanter i forskellige steder, og den nemmeste måde at vælge størrelser, der passede godt sammen, var ved at lade dem sidde på pappet die'ene kommer på. Jeg valgte den mindste størrelse og derefter tre, som var større; jeg sprang en størrelse over mellem hver.

Næste skridt var at vælge fire pastelfarver samt beslutte hvilken rækkefølge jeg ville have dem i. Ved hjælp af Magnetic Platform var det nemt at udstanse sekskanterne i små stykker restekarton.

Jeg klistrede de fire sekskanter sammen (men kun lidt da jeg vidste, at jeg ville sy ned igennem dem) og satte dem på en sandwich af hvidt og lilla karton.

For at kortet blev helt færdigt, stemplede jeg en tekst i nederste højre hjørne og monterede alt på en sort kortbase.


Ingredienser:
Sizzix Framelits Die Set 10PK - Hexagons
Sizzix Accessory - Magnetic Platform for Wafer-Thin Dies
Karton
Sytråd
Stempler: Papertrey Ink

Tuesday, 8 April 2014

Green & Yellow....


Hi everyone....hope you all had a great week...today I have a card in Spring color Green & Yellow to show you.


Supply list:
657900 Sizzix Big Shot machine 
658609 Sizzix Framelits Die Set 10PK - Hexagons
659430 Sizzix Frameworks Die - Honeycomb
658341 Sizzix Bigz Die - Bird Scroll
659448 Sizzix Texture Fades Embossing Folders 2PK - Chevron & Lattice Set
659573 Sizzix Sizzlits Decorative Strip Die - Spring Greenery 
 
Papers: Kraft-Core shattered collection, Manila Tag # 5, Manila Cardstock
Stamps: Stampers Anonymous Tim Holtz collection
Inks: Distress ink Pad - Mustard Seed, Peeled Paint, Walnut Stain, Dylusions Ink Spray - Cut Grass, Archival Ink - Jet Black
Other: Cheesecloth, Seam Binding Ribbon, Paper Doilies, Tissue Tape, feather

How to do:
Die cut the card in cardstock with 658609 Sizzix Framelits Die Set 10PK - Hexagons
Distress the edges with sandpaper. Stamp background stamps here and there.
Distress Manila Tag # 5 with Distress ink Pad - Mustard Seed and Peeled Paint. Emboss the tag with 659448 Sizzix Texture Fades Embossing Folders 2PK - Chevron & Lattice Set
Die cut the cute bird in Manila Cardstock with 658341 Sizzix Bigz Die - Bird Scroll
Color the bird with Distress ink Pads.
Die cut greenery and framework.
Glue the tag over Paper Doilies with 3D foam. Glue greenery, framework and cheesecloth (color cheesecloth with Distress ink Pad and water) in the front. Spray Dylusions Ink Spray - Cut Grass over the card before you glue the bird with a feather in front.
Stamp a text and glue it to the card with 3D foam.


Thanks for stopping by...wish you a great "Spring Day".
Anne Kristine

♥♥♥♥♥♥

Heisann....håper du har hatt en fin uke... i dag har jeg et kort i vårfargene grønt og gult å vise deg.

Materialer som er brukt:
657900 Sizzix Big Shot machine 
658609 Sizzix Framelits Die Set 10PK - Hexagons
659430 Sizzix Frameworks Die - Honeycomb
658341 Sizzix Bigz Die - Bird Scroll
659448 Sizzix Texture Fades Embossing Folders 2PK - Chevron & Lattice Set
659573 Sizzix Sizzlits Decorative Strip Die - Spring Greenery 
 
Papirs: Kraft-Core shattered collection, Manila Tag # 5, Manila kartong
Stempler: Stampers Anonymous Tim Holtz collection
Inks: Distress ink Pad - Mustard Seed, Peeled Paint, Walnut Stain, Dylusions Ink Spray - Cut Grass, Archival Ink - Jet Black
Annet: Osteklut, Seam Binding bånd, kakeserviett, Tissue Tape, fjær

Beskrivelse:
Stans ut kortet i kartong med 658609 Sizzix Framelits Die Set 10PK - Hexagons
Distress kantene med sandpapir.Stemple bakgrunnstekst her og der.
Distress Manila Tag # 5 med Distress ink Pad - Mustard Seed og Peeled Paint. Emboss tag'en med 659448 Sizzix Texture Fades Embossing Folders 2PK - Chevron & Lattice Set
Stans ut den søte fuglen i Manila kartong med  658341 Sizzix Bigz Die - Bird Scroll
Farg fuglen med Distress ink puter.
Stans ut borden med 659430 Sizzix Frameworks Die - Honeycomb
Lim tag'en over kakeserivetten med 3D puter. Lim gren, bord og osteklut (farg osteklut med Distress ink puter og vann) i front. Spray Dylusions Ink Spray - Cut Grass over kortet før du limer på fugl og fjær. Stemple tekst som limes i front med 3D puter.

Takk for at du stikker innom her og ønsker deg en herlig vårdag!
Anne Kristine