Showing posts with label spring. Show all posts

Friday, 24 April 2015

Layout: Spring Time


Hi Sizzix friends!

During the Easter holidays we discovered new beautiful nature trails in a little village we often visit. And in one of the walks we saw a lot of almond trees in bloom. So to remember these spring days with our family I have made this layout with a picture of a branch of an almond tree. 


The flower die of the Big Shot Plus Kit is perfect for this layout so I have used it and made a different colour combinations!!!


We can see swallows in this season and that’s why I have used the Flying bird die designed by Brenda Walton for Sizzix. I have die-cut two birds and glued them a little apart to create a shadow effect. This bird is fliying to the almond tree, isn’t it? 


I have curved the scrapbook papers to create dimension effect at the page:


I have die-cut the title of this layout with the Alphanumeric dies in the same colour as one of the strips papers.


I’ve chosen these beautiful papers designed in my country, they are very flowery and perfect for my layout because the colours match the photo.


Spring gives us a lot of colour and beautiful flowers but for me the tree's flowers are the most beautiful!!! 


I have used the following Sizzix products:


I hope you have enjoyed this spring layout. Thanks for your visit!


Have a creative and happy Friday!

-------
 ¡Hola a todos!

Durante las vacaciones de Semana Santa descubrimos nuevos senderos en un pequeño pueblo que solemos visitar. En uno de los paseos nos encontramos con unos almendros en flor preciosos. Así que para recordar esos paseos con la familia he realizado esta página con una de las ramas de almendro en flor.

La flor que incluye el kit de a Big Shot Plus era perfecta para esta página. Y, cómo en primavera se puede ver la llegada de las golondrinas, he utilizado el troquel de Flying bird, lo he troquelado en dos papeles para pegarlos un poco desplazados y hacer ese efecto de sombra. Parece que vuele hacía el almendro ¿verdad?

He curvado los extremos de los papeles decorados para darle volumen. Y cómo no, el título lo he troquelado con los Thinlits Alphanumeric utilizando uno de los papeles de las tiras laterales.

Para esta página he utilizado papeles diseñados en nuestra casa. Además eran perfectos para el tema y combinan perfectamente con mi fotografía.


La primavera nos regala colores y flores, pero sin duda las flores de los árboles son las mejores de la estación!


He utilizado los siguientes productos Sizzix:

Espero que os haya gustado esta página primaveral. ¡Gracias por la visita!


¡Os deseo un feliz y creativo viernes!


Friday, 3 April 2015

Easter Gift Jar & Card


Happy Friday everyone,
Last week, I shared with you this little Easter Home Decor Idea. Today I want to share with you a other Easter project. It’s amazing what you can create with the Sizzix Big Shot!
Easter is just around the corner and Sizzix gives you 10 free downloadable papers for all your papercard needs, labels with sentiment are included: Free Paper Downloads for Easter.
For Easter nothing is better that a handmade gift. This Jar Easter Treat Gift and the Card are quick and simple ideas that you can pack along for your Easter Sunday!
 
cafecreativo - sizzix big shot - easter - card - treat - pasqua - regalo ovetti (1)
 
The jars are so versatile and fun! They make great decorations and packages.
 
cafecreativo - sizzix big shot - easter - card - treat - pasqua - regalo ovetti (2)
 
I reuse a jar of honey. I collect these jars and use them for all sorts of fun projects. Then I wash them out and sterilize them in the dishwasher. I also usually paint the lids white. Fill the jars with some Easter candy and embellish with paper and die cut your favorite design. I used Love Bird and Woodland Flower dies design by Craft Asylum.
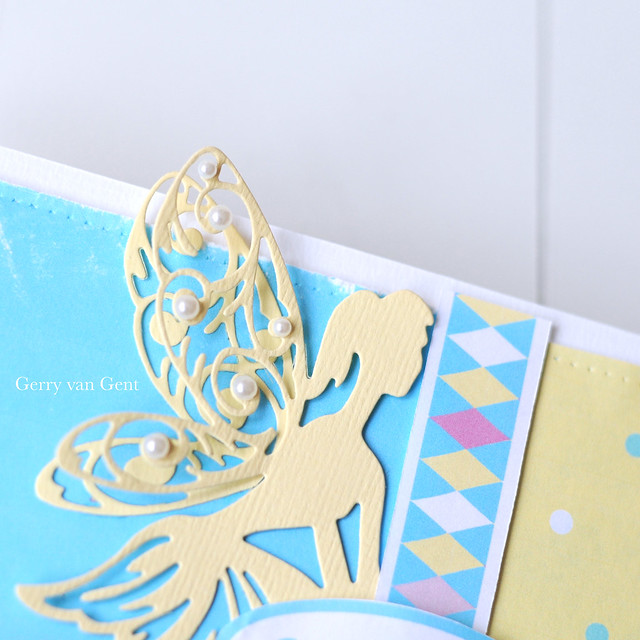
This is the Easter card I made, using a few of the papers and the Fanciful Fairy die design by Pete.
 
cafecreativo - sizzix big shot - easter - card - treat - pasqua - regalo ovetti (3)
 
I hope you enjoy these.
Happy Easter!!!
 
Items used:
jar
cardstock: white, glitter gold
vellum paper
paper doily
acrylic paint: white
spray ink
sequins
sewing machine
foam board tape

**************************************
Flag_of_Italy
Per le amiche italiane! :)

Buon venerdì a tutti,
La settimana scorsa, ho condiviso con voi questa piccola idea di Home Decor per Pasqua. Oggi vorrei condividere con voi un altro progetto, anzi due!
Pasqua è proprio dietro l'angolo e Sizzix ha pensato di regalarvi carte stampabili a per tutte le esigenze di crap e cardmaking: 10 fogli scaricabili gratuitamente, le etichette con l'augurio sono incluse ;) Scarica qui le carte gratuite per Pasqua.
E 'incredibile quello che si può creare con la Big Shot! E per Pasqua ci aiuta a creare tanti bei pensierini fatti a mano.
Questo vasetto accompagnato da un biglietto, ad esempio può essere un piccolo regalo per Pasqua. Idee semplici che si possono realizzare velocemente per la vostra Domenica di Pasqua!
I barattoli di recupero sono così versatili e divertenti e si possono fare delle fantastiche confezioni regalo, senza spendere troppo ;)
Io ad esempio, ho riutilizzato un barattolo del miele. Metto da parte questi vasetti e li uso spesso per “inventarmi” dei regalini. Dopo averli lavati, di solito pitturo i coperchi di bianco. Qui ho riempito il barattolo con gli ovetti di cioccolato ed ho decorato con le carte e le forme tagliate con le fustelle. Ho usato Love Bird e Woodland Flower disegnate da Craft Asylum.
Questa è la card di Pasqua che ho creato, utilizzando sempre alcune delle carte stampabili gratis e la fustella Fanciful Fairy disegnata da Pete.

Spero che questi lavori vi siano piaciuti e vi possano aiutare nei lavori last minute di questi giorni.
Buona Pasqua!!!
Materiali:
barattolo
cartoncini: bianco, oro glitter
carta da lucido
centrino di carta
colore acrilico: bianco
colore spray
paillettes
macchina da cucire
scotch spessorato

Sunday, 22 March 2015

Easter Cards & Free Download Papers by Gerry van Gent


Happy Sunday Sizzix peeps!

Today I created for you two cards using the beautiful and so fresh
Free Easter Paper Downloads - these papers are perfect for your Spring
or Easter projects! The patterns are playful, bright and fun and when you combine
them with your favourite Sizzix dies make your project personal and unique!
both 1

siz

657900 Sizzix Big Shot Machine
NEW 660097 Sizzix Thinlits Die Magical Butterfly
NEW 660095 Sizzix Thinlits Die Fanciful Fairy
*          *         *
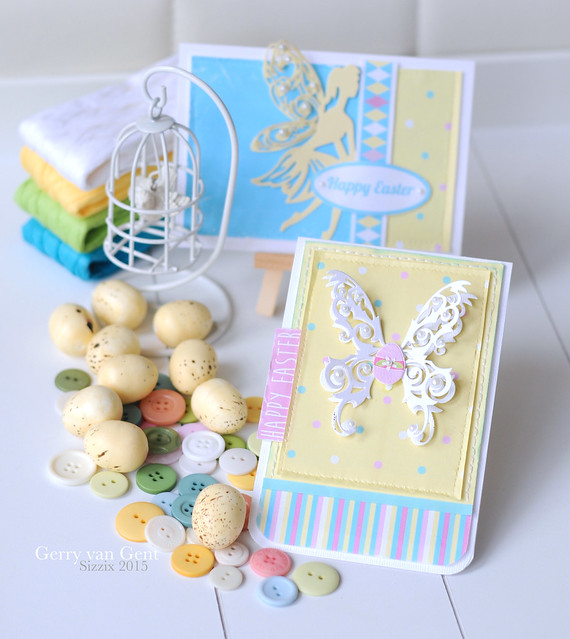
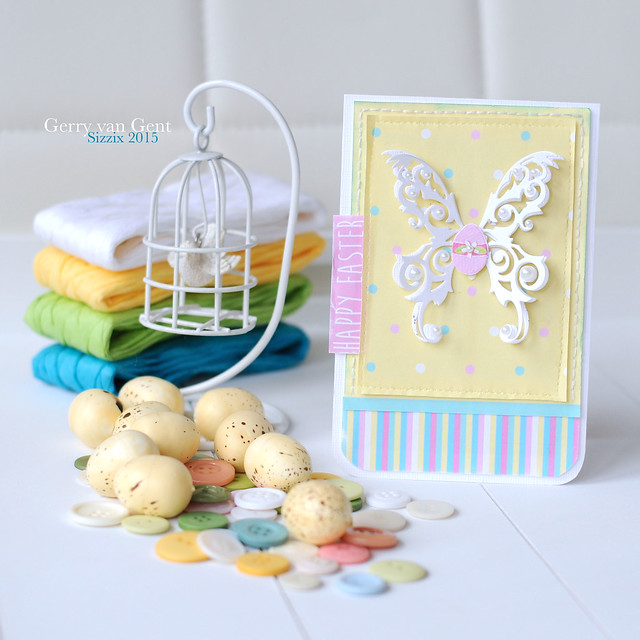
My first card using the FREE EASTER PAPER DOWNLOADS and
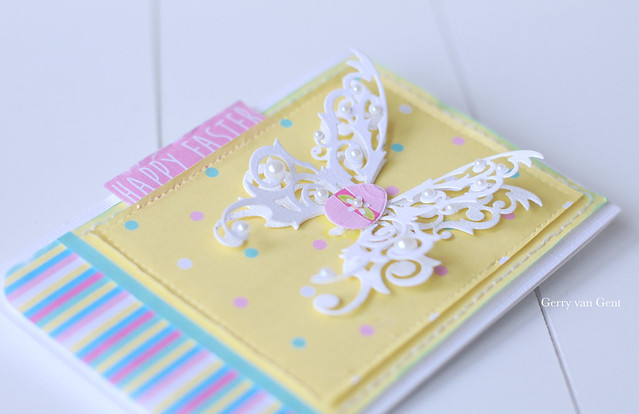
the intricate Magical Butterfly die ... 
Happy easter 2

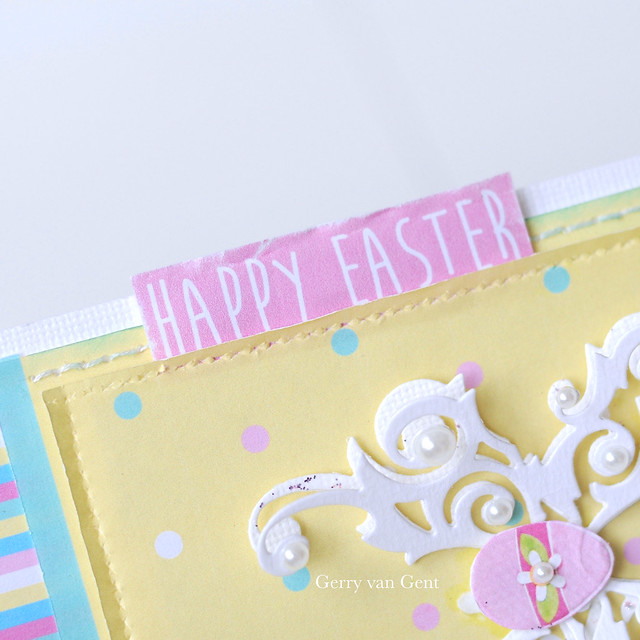
I die cut the butterfly twice and added pearl dots ...
2a

2b

My second card ....this time using the pretty Fanciful Fairy die ...
Happy Easter 1

I die cut the Fanciful Fairy die twice.
From the 2nd die-cut I used only the wings which I added
to the first Fanciful Fairy die. Once again I added pearl dots.
1b

1a

Hope you enjoyed my cards today!

Don't forget to check the FREE EASTER PAPER DOWNLOADS !!!
Free Easter papers 2015

HAVE A CREATIVE SUNDAY!

Tuesday, 17 March 2015

Sizzix project : Little Bird for Kid's room


Hello crafter,
Spring is near and there is a great desire for sunshine!
Today we present a new project for kid's room....that like "ourselves" have the head in the stars and balloons!


NECESSARY:


- SizzixTree Die set
- Cardstocks or paper scrap
- Paper craft
- Paper glitter
- Frame (thick)
- Wire thin
- Glue 
- Hot glue
- Scissors
- double adhesive tape
- Foam board tape


Cut to size back for frame and stick on the foam board tape the square that will be base for composition.
Cut the dies in the various shapes and compose to create the pictures.


Finally paste the big star at the end of wire thin whit hot glue.
Stick on the other end with hot glue and cover with one of the small stars.


I hope you enjoyed it!
See you soon whit a new project......

Pasticci di Carta
Sara


Cari crafter,

la primavera si avvicina e c'è tanta voglia di sole!
Oggi vi presento un progetto adatto alle camere dei nostri bimbi....che come "noi" vivono con la testa tra stelle e palloncini!

OCCORRENTE:

Sizzix big shot machine only
Sizzix Thinlits Die set 3PK  - Happiness Fhrases
Sizzix Thinlits Die 4PK - Speech Bubbles
Sizzix Framelits Die set 23PK - Card, balloons Step-ups
Sizzix Framelits Die set 5PK - Stars
Sizzix Thinlits Die set 5PK - Love Bird
Sizzix Tree Die set
Sizzix Framelits Die set 8PK - Squares
Carta scrap fantasia e tinta unita
Carta craft
Carta glitter
Cornice con spessore interno
Fil di ferro sottile
Colla
Colla a caldo
Forbici
Biadesivo
Biadesivo con spessore

Tagliare a misura lo sfondo per la cornice ed applicare il biadesivo con spessore il quadrato che farà da base alla composizione.
Fustellare le varie sagome e comporle per creare il disegno.

Per ultimo incollare con la colla a caldo la stella grande all'estremità del fil di ferro ed applicare l'altra estremità sempre con la colla a caldo andando a coprire con una delle stelle più piccole.

Spero vi sia piaciuto!
A presto con un nuovo progetto....

Pasticci di Carta
Sara


Sunday, 1 March 2015

Colourful Cards by Gerry van Gent

Hello Sizzix Friends and Happy 1st of March!!

Can you believe it? It is already March? Time surely flies :-)
I am already in a Spring mood and I am absolutely looking forward
to some warm and colourful season like Spring. And by saying this
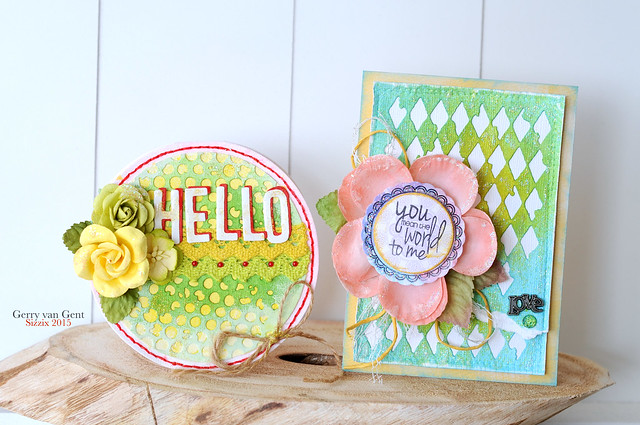
my projects today are two cards in bright, happy and cheerful colours. 

Cards 1
siz
657900 Sizzix Big Shot machine
NEW 660220 Sizzix Thinlits Die Set Mixed Media
658701 Sizzix Framelits Die Set w/Stamps Word Labels
*       *       *
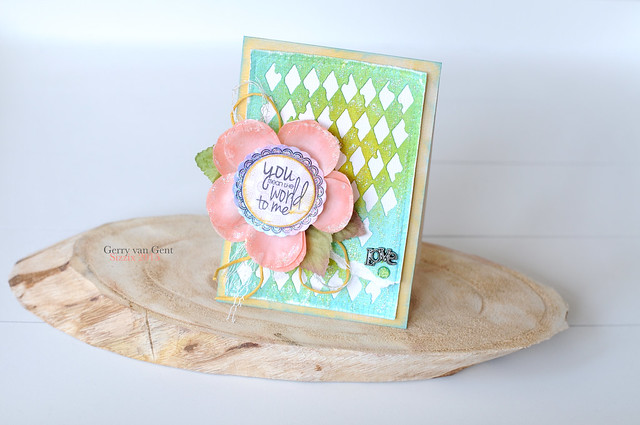
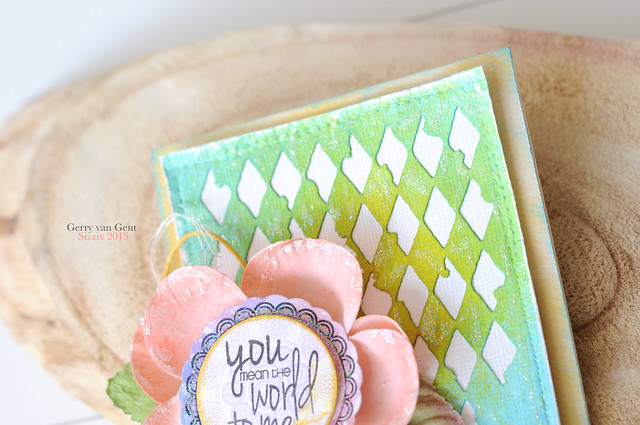
My first card is featuring the diamonds Mixed Media die....
You 1

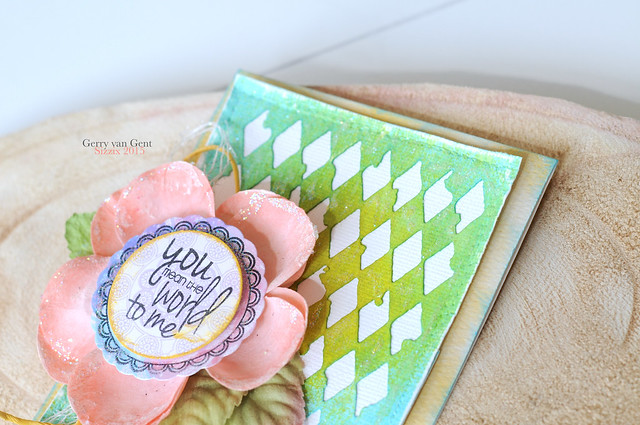
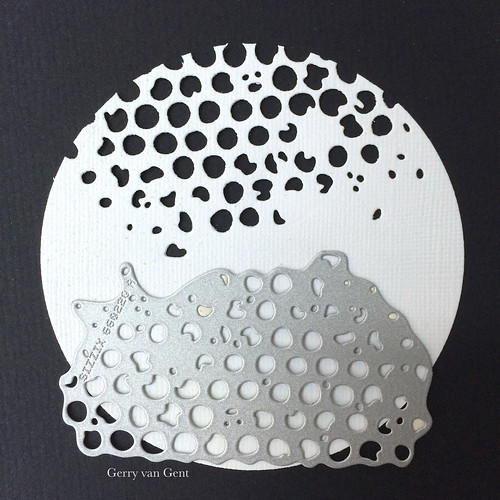
I basically die cut the diamonds twice on a piece of white cardstock.
Then I misted the cardstock and adhered it on top of another white piece of cardstock.
After that I tore it diagonally somewhere in the middle - 
I kind of resized it to fit on the front of my (14 cm x 10 cm) card.
You 6

The stamped and die cut Word Label was used to decorate the flower.
I simply adhered it in the center of the flower.
You 3

I added glitter for a bit of shiny effect.
You 4

You 2

And my second card today...
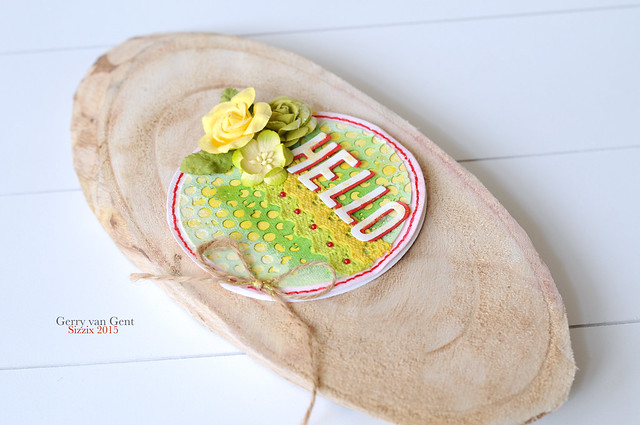
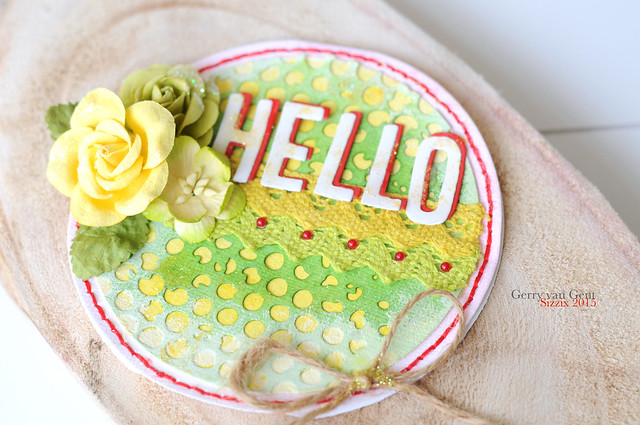
To make this card I used the Circles dies with approx. sizes 4 1/4" and 3 3/4".
Hello 1
siz
657900 Sizzix Big Shot machine
657551 Sizzix Framelits Die Set Circles
NEW 660220 Sizzix Thinlits Die Set Mixed Media
NEW 660210 Sizzix Thinlits Die Set Alphanumeric
*      *      *
I used white cardstock to die cut the Circle with size 3 3/4".
Then I die cut the Mixed Media die twice - top and bottom of the circle.
Once ready I misted it in green and placed it 
underneath another die-cut Circle with size 3 3/4". 
Hello 8

The Alphanumeric letters were die cut twice using white and red cardstock.
The red letters I used as shadow letters.
Hello 3

Hello 5

Hope you enjoyed my "Spring-inspired" cards today!
16:9

Thank you so much for visiting us today!
Have a creative Sunday!

Saturday, 21 February 2015

Butterfly Greeting Cards with Sequins


Hi everybody,
butterflies are always a super fun idea, right? It is almost springtime and I really love to have them on my projects now. A few days ago I have found my big collection of sequins and I had the idea to create some shaking cards with them. All you need are the following things:

Sizzix Big Shot Starter Pack (Powder Blue & Teal) #658300
Or single Big Shot:
Sizzix Big Shot (Powder Blue & Teal) #657900
For the Butterfly I used the Sizzlit in the Starter Pack, but you can also use:
Sizzix Triplits Die Set 13PK - Butterfly #659596
Sizzix Thinlits Die Set 8PK - Butterflies, Intricate #659971
Cardstock, adhesive, stamps, foil for the background of your butterfly and colorspray


Just make some blurs of color and cut out a butterfly shape with your Big Shot and the dies. Glue a piece of foil on the back and build a ring around the butterfly with some pieces of thick cardstock or something similar. The sparkle part of it: Fill it with some of your favorite sequins! :) Last step, just glue your blank card inside to cover the foil. Wait a minute and then, shake your card! :)


The stamp means "a really special moment". I think this stamp fits to so many different occassions. Love it!

You will have some leftovers after die cutting, but please don´t throw them away. They are cute embellishments for upcoming projects like Scrapbooking layouts, some new cards or home deco. ;)


Now I am off for a Girlsday and I will give each of the girls one of these cards. I hope they will like them. :) Have you ever made a shaker card? Do you want a tutorial of how I made others? :)

Have a nice day, xo Julia


------------------------------------------------
Hallo ihr Lieben,
Schmetterlinge gehen immer, oder? Vor allem so kurz vor dem Frühling dürfen sie bei mir nicht fehlen. In den letzten Tagen fiel mir meine Sammlung an Pailetten in die Hände und ich dachte mir, ich bastel mal ein paar Schüttelkarten. :) Dafür benötigt ihr folgende Dinge:


Sizzix Big Shot Starter Pack (Powder Blue & Teal) #658300
Oder die Big Shot einzeln:
Sizzix Big Shot (Powder Blue & Teal) #657900
Für die Schmetterlinge habe ich die Sizzlits aus dem Starter Paket genommen, alternativ gehen aber auch folgende Stanzen:
Sizzix Triplits Die Set 13PK - Butterfly #659596
Sizzix Thinlits Die Set 8PK - Butterflies, Intricate #659971
Sowie: Cardstock (zum Ausstanzen), Kartenrohlinge, Klebemittel, Folie, Stempel und Farbspray für die Kleckse

Einfach mit der Big Shot die gewünschte Form austanzen, Folie dahinter kleben und um diese Form herum auf der Rückseite (auf der auch die Folie klebt) eine Art Damm bzw. Erhöhung bauen. Das geht mit 3D-Klebepads oder aber wie hier mit selbstklebendem Kork. Dort füllt ihr dann die Pailetten rein und klebt euren Kartenrohling drauf. Geht total easy und sieht klasse aus!

Beim Stanzen bleiben diese hübschen Schmetterlinge übrig. Bitte nicht wegschmeißen, die können noch wunderbar für weitere tolle Projekte verwendet werden. :)

Ich bin heute auf einem Mädelstag und werde die Karten direkt an meine Begleitungen verschenken. :) Ich hoffe sie freuen sich! Habt ihr auch schon Schüttelkarten gebastelt? Hättet ihr gerne eine Anleitung wie ich es gemacht habe? :)

Habt einen schönen Tag, xo Julia


Thursday, 24 April 2014

Spring is here ! by Karine


Hello!

Today let me show you a colourful and girly lay-out! Plenty of details surround a tiny picture. Are you up to it?

Supply list:

Papers: Crate Paper, American Crafts
Alphabets: October Afternoon, American Crafts
Frames: Crate Paper
Badge: Freckled Fawn
Stickers: Studio Calico
Enamel Dots: Studio Calico
Stamp Craft Origine
Ink: Prima
Others: Masking Tape

Dies:

658300 Sizzix Big Shot Starter Kit
659107 Sizzix Thinlits Die Set 4PK-Everyday Eclectic

Start by selecting a wood pattern background paper. Try to choose a light coloured paper so as to be able to add plenty of embellishments on it!

In pastel pattern scrap paper pieces, cut out shapes such as hearts, labels or a star. Use your Sizzix dies and Big Shot.
To add a girly effect, work with glitter paper from American Crafts.

Glue your tiny picture. Add some masking tape stripes here and there and some cardboard frames. Now play with your Sizzix embies!

Start with the simpler shapes such as the labels and play with volume by using 3D adhesive foam.

This is an easy lay-out which is ideal when you want to use your scrap paper pieces!


Have a lovely day,

Karine


Bonjour

Je reviens aujourd'hui avec une page colorée et des plus girly ! Un maxmium de détails autour d'une mini photo, ça vous tente ?

Matériel :

Papiers : Crate Paper, American Crafts
Alphabets : October Afternoon, American Crafts
Cadres : Crate Paper
Badge : Freckled Fawn
Stickers : Studio Calico
Enamel Dots : Studio Calico
Tampon : Craft Origine
Encre : Prima
Divers : Masking Tape

Dies utilisés :

658300 Sizzix Big Shot Starter Kit
659107 Sizzix Thinlits Die Set 4PK-Everyday Eclectic

Sélectionnez tout d'abord un imprimé bois en tant que fond de page. Choisissez de préférence un fond clair et susceptible d'accueillir une multitude d'embellissements !

Découpez dans des chutes de papiers imprimés pastels des formes tels des coeurs, des étiquettes, une étoile. Utilisez pour ce faire les dies Sizzix et votre Big Shot.
Pour un côté plus girly, choisissez également du papier pailleté American Crafts.

Collez votre petite photo, ajoutez quelques touches de masking tape, des cadres en carton et jouez maintenant avec vos décorations Sizzix !

Commencez par les formes les plus simples telles les étiquettes et jouez le volume en utilisant du 3D.

Une page toute simple et idéale pour venir à bout de vos chutes de papiers !

Bonne journée

Karine