The project I would like to share today is a gift box I made using the Square Box die. This is a ScoreBoards die, which means it was specially designed to cut and score matboard and thicker materials. Sizzix is the only company producing these dies so they are quite unique. Have you tried one? They go together really quickly. Here's a video I made showing how to assemble this box.
You will need:
658058 Sizzix ScoreBoards XL Die - Box, Square
658443 Sizzix Bigz Dies- Flower, Trinity's
pink matboard 6" x 13" (2)
strong double sided adhesive
stencil and paper- Prima
embossing texture paste
Zots
gray ink
dyed seam binding, buttons, lace
- Die cut Square Box- you will need to cut the die twice to complete the box.
- Place stencil on top of box and spread embossing paste over the box using a credit card. Texturize all sides of the box. Let dry. Add a little gray ink to edges so the paste is not totally white.
- Assemble box as shown in video. Punch a small hole on top of the box. Tie on a button or other closure.
- Die cut four flowers from Prima paper. Curl flower petals and layer large flowers on top of each other with Zots in between each layer. With a tweezer, start curling the smaller petal strip around the tweezer. Add another strip and repeat, until you have a flower center you like. Secure the end of the strip with tape.
- Adhere flower center to flower base by placing Zots glue dot in the center of the top large flower petal. Set curled flower on top of glue dot.
- Tie seam binding to top of box. Place flower and other decor on box. Add gift and give!
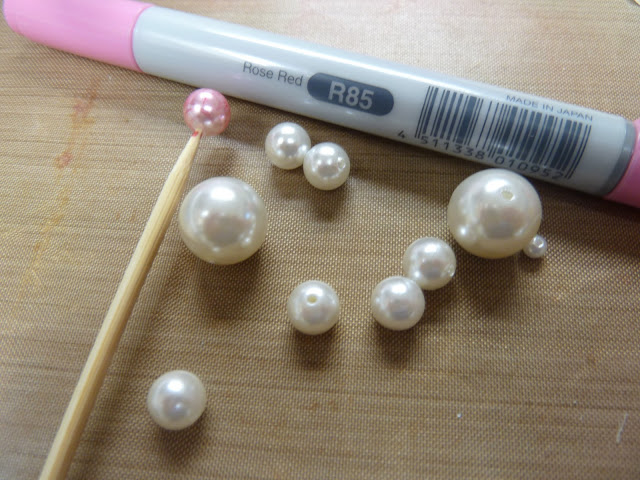
FUN TIP: Did you know you can color pearls with Copic markers? I found a beautiful strand of pearls in a thrift store and took it apart to use in my projects. I can tailor a pearl to fit my decor and love how it came out. I got brave and tried the same with the button closure. It was all silver and I colored that in too. :-)
Hope you liked this project! See you next time...


Beautiful box! Thanks for the tip about coloring the pearls. I never would have thought of that.
ReplyDeleteThanks for your comment Jean!
DeleteThis is beautiful! Love these flowers atop the box...and cool tip about coloring the pearls. Need to try this for sure.
ReplyDeleteI appreciate your checking out my projects Kimberly!
Delete