

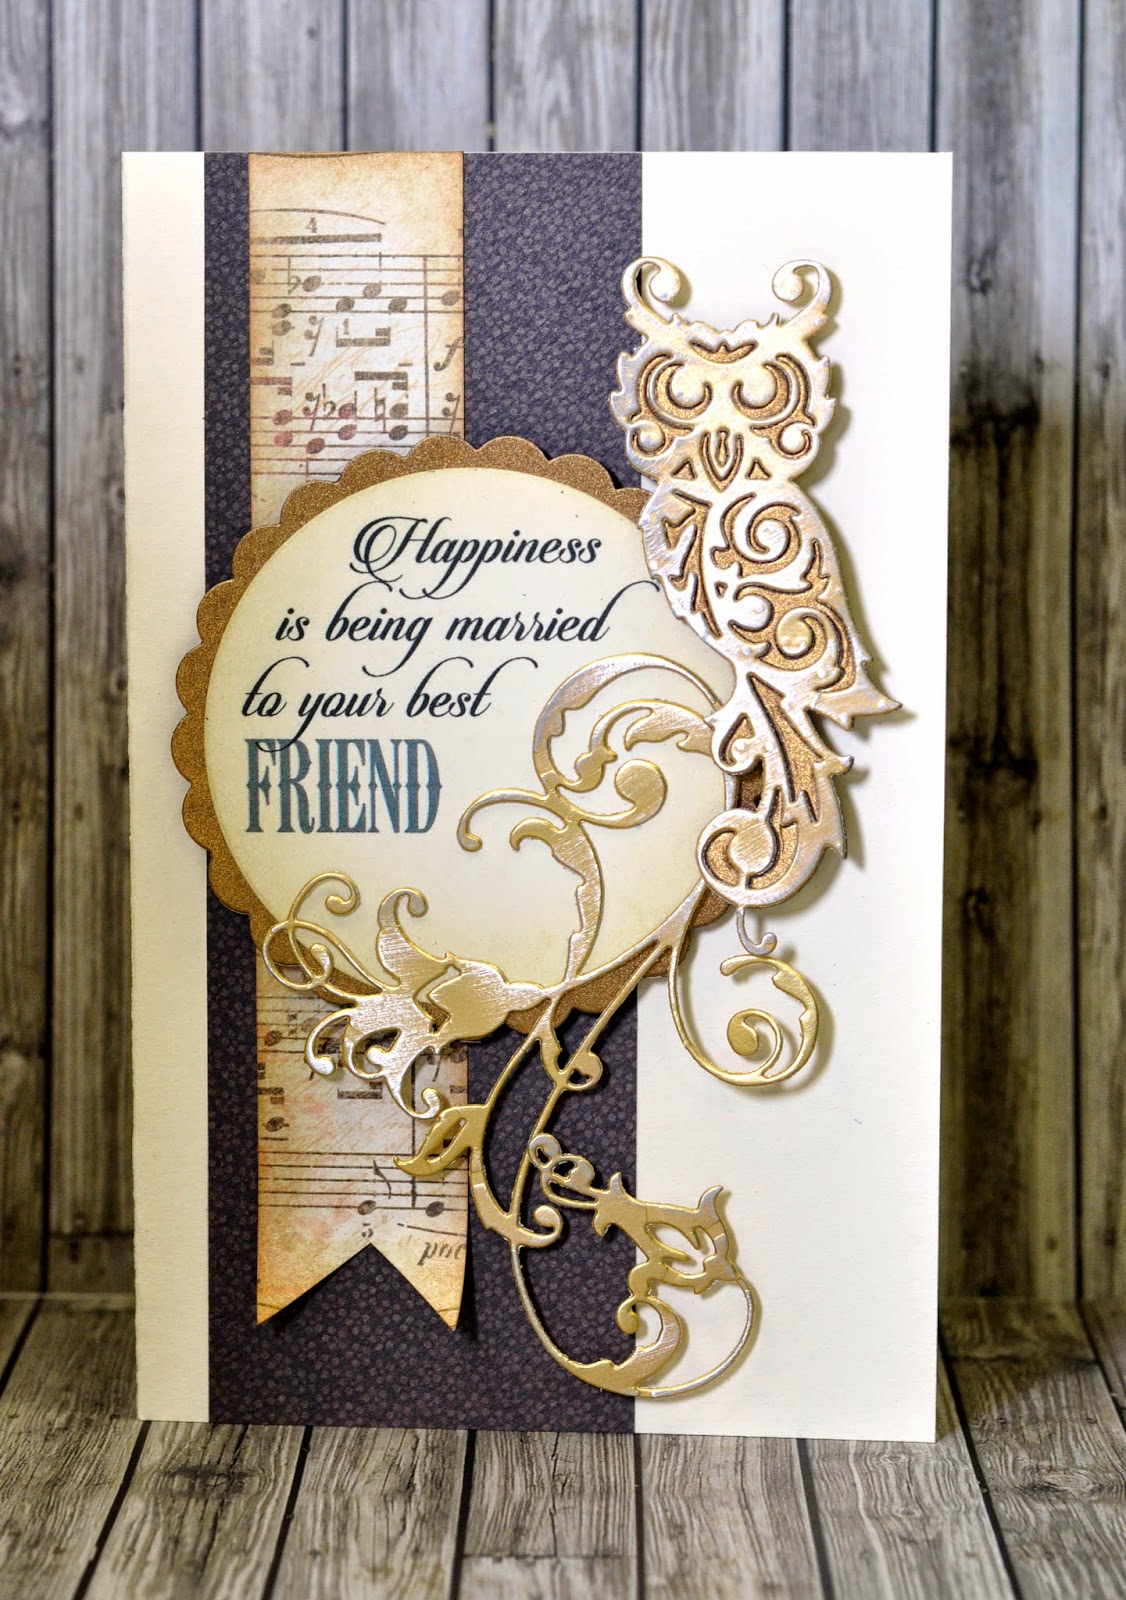
The Elegance in the title belongs to a new collection of dies which shares the same name. The dies in question are very ornate Framelits dies using a Damask style which ties all these dies together thematically allowing us to mix and match.... how thoughtful!
I created this card with Valentines day in mind and I chose a colour palette which has a more masculine feel, Having said that, I'm probably one of very few men who would appreciate the care and effort involved in it's creation, we're such ungrateful creatures!
I have used two of the dies from the collection namely Regal Owl and Graceful Flourish. I also used my trusty Framelits Circles and Scallop Circles of which I am very fond as anyone who reads this blog from time to time will be very aware! Click on the words to follow the link.
I started by dipping into my metallic card box and pulling out some dull gold metallic and some lovely copper coloured card. I die-cut both owls removing the inbetweeny (technical term alert!!) bits from the gold owl. Next, I die-cut the flourish from gold card before gently buffing both gold die-cuts using a fine sanding pad to lightly tarnish the surface. I then took the copper owl and attached it to the rear of the gold owl and I used strips of thin tape to ensure that the tiny bits remain in place.

I printed the legend 'Happiness is being married to your best friend' onto cream card as shown so that it fits within my chosen circle. Next, I die-cut around the phrase with a Framelits circle die before gently inking the edge and matting onto a larger copper coloured die-cut scallop circle. I then attached the flourish as shown.
To make the base card I cut a 35 x 190 mm strip of music pattern paper and snipped one end into a chevron with my scissors. Next, I attached a 70 x 210 mm strip of brown patterned card near the left hand edge of a 130 x 210 mm cream base card. The paper is from my stash and comes from My Minds Eye first Lost & Found collection

Once the base card was assembled I attached all the other elements using foam pads to create a sense of depth and here it is. I do hope you like it?
wau so sweet
ReplyDeleteThanks Pia,they cut out so well and are really easy to work with too!
ReplyDelete