

Every month I do some projects for Sizzix that are for editorials or projects that will (soon) be tutorials on the website and I thought it might be helpful to have a binding tutorial in one place for quick reference (please excuse the 11 billionty photos
There are hundreds of tutorials for binding quilts online, but this is my slightly cheating, ever so easy binding tutorial.
First up you need to measure your quilt around the perimeter - so all 4 sides. Then add on 10" for good measure (to allow for when you miter the corners and to make finishing the ends easier)
Divide the total number by the measurement of the width of your binding fabric. In this case 42" (most fabrics are between 40" and 44" wide from selvedge to selvedge). This number is the how many strips you need to cut.
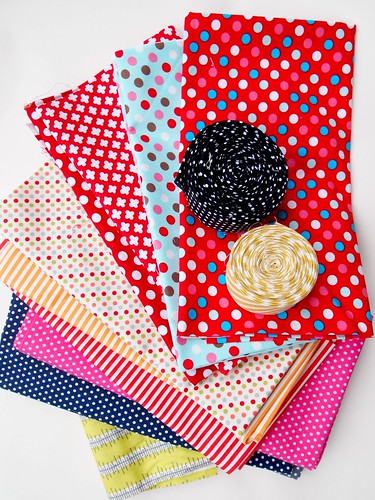
I like to make my double fold binding using the 2 1/2" strip die. This gives you a slightly wide binding on the back of the quilt. This isn't set in stone - some people prefer a narrower binding, but I like the look of the wider binding on the reverse of the quilt, and so that's what we're doing today!
Press your fabric well and trim off the selvedge.
Using the 2 1/2" strip die cut the number of strips you calculated.
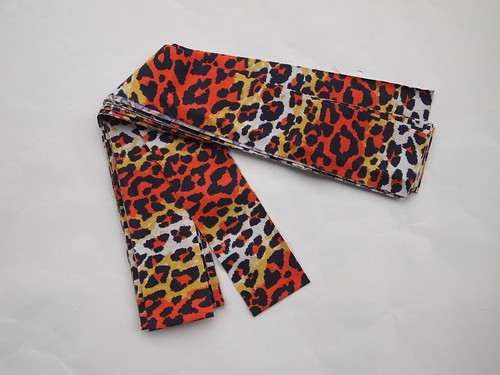
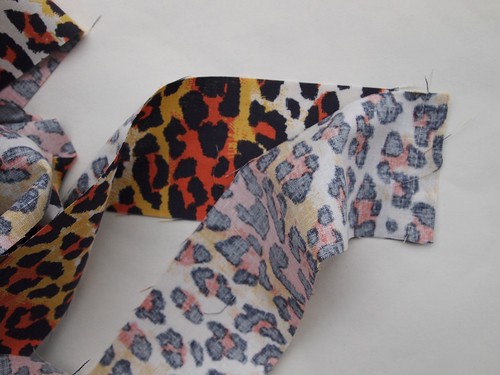
Sew these strips end to end using a generous 1/4" seam. Press the seams to one side, all in the same direction.
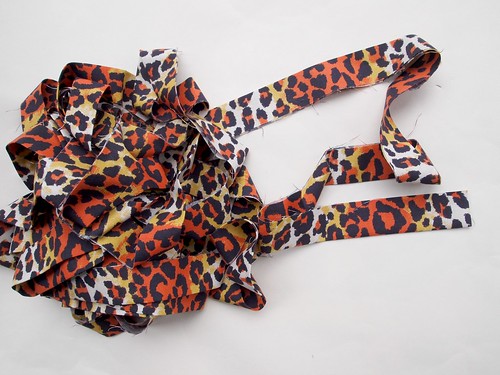
Now fold in half all along the length, wrong sides together, and press.
I like to wind my binding onto an empty thread spool, so I can pop this spool onto the spare spool holder on my machine when I'm sewing on the binding, it helps keep it nice and tidy and stops it getting tangled up as you sew.

Now you're ready to attach the binding to your quilt.
Starting in the middle of one side of your quilt, match up the raw edges of the binding to the raw edge of your quilt. Leave a tail of about 4 or 5"
Every month I do some projects for Sizzix that are for editorials or projects that will (soon) be tutorials on the website and I thought it might be helpful to have a binding tutorial in one place for quick reference (please excuse the 11 billionty photos
There are hundreds of tutorials for binding quilts online, but this is my slightly cheating, ever so easy binding tutorial.
First up you need to measure your quilt around the perimeter - so all 4 sides. Then add on 10" for good measure (to allow for when you miter the corners and to make finishing the ends easier)
Divide the total number by the measurement of the width of your binding fabric. In this case 42" (most fabrics are between 40" and 44" wide from selvedge to selvedge). This number is the how many strips you need to cut.
I like to make my double fold binding using the 2 1/2" strip die. This gives you a slightly wide binding on the back of the quilt. This isn't set in stone - some people prefer a narrower binding, but I like the look of the wider binding on the reverse of the quilt, and so that's what we're doing today!
Press your fabric well and trim off the selvedge.
Using the 2 1/2" strip die cut the number of strips you calculated.
Sew these strips end to end using a generous 1/4" seam. Press the seams to one side, all in the same direction.
Now fold in half all along the length, wrong sides together, and press.
I like to wind my binding onto an empty thread spool, so I can pop this spool onto the spare spool holder on my machine when I'm sewing on the binding, it helps keep it nice and tidy and stops it getting tangled up as you sew.
Now you're ready to attach the binding to your quilt.
Starting in the middle of one side of your quilt, match up the raw edges of the binding to the raw edge of your quilt. Leave a tail of about 4 or 5"
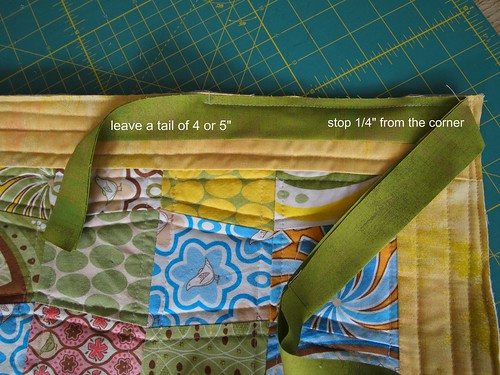
Use a 1/4" seam (a walking foot is a good idea because you're stitching through multiple layers and the binding might be stretchier than the quilt) and sew along until you get to 1/4" from the first corner. Stop and backstitch. Fold up the binding at a 90 degree angle.
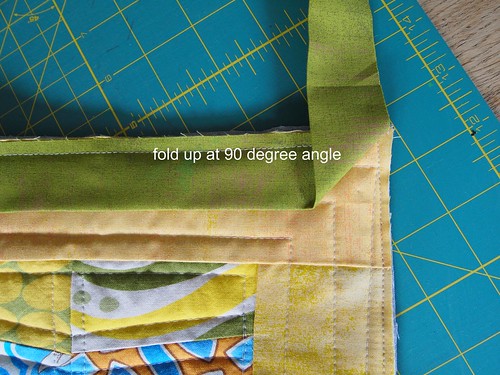
Fold right back onto itself. This gives you a mitered corner that you want when you finish sewing the binding to the reverse of the quilt.
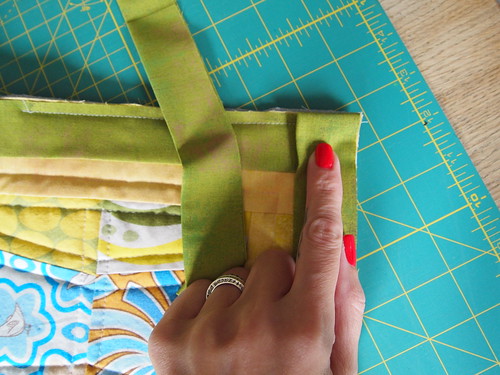
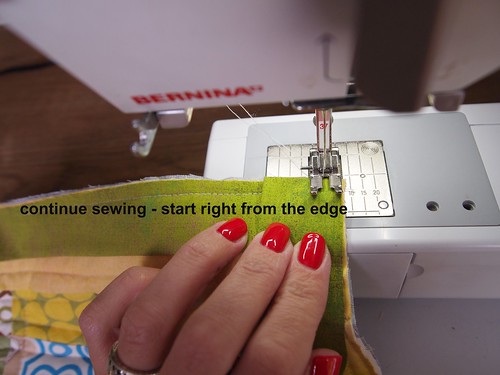
Start sewing again from the very edge. Backstitch again and continue using a 1/4" seam
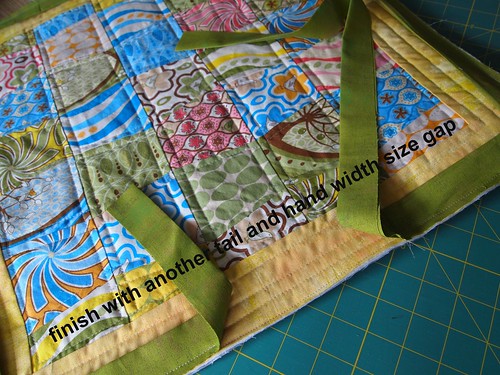
Continue doing the same with the other corners as you just did (stop 1/4" from the end, fold up 90 degrees, fold back down and sew on) and then stop (secure with a backstitch or 2) about a hand's width or so away from where you started. You'll have another tail, just like you started with (or longer - it's ok, you'll trim it in a bit - you can keep all the tails and leftovers from binding and sew them together into one lovely scrappy binding)
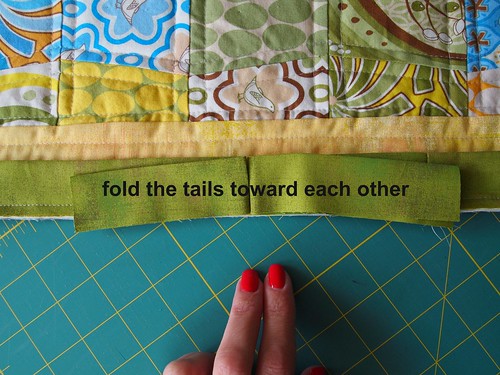
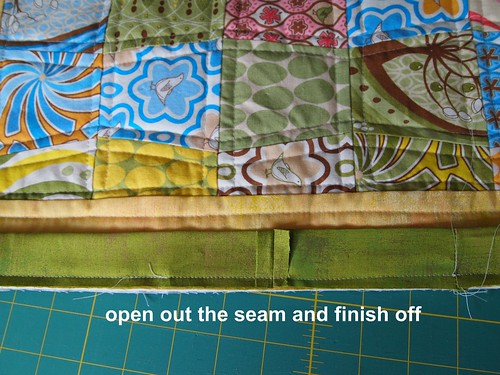
Now this is the cheaty bit. Fold those tails up towards each other and press down to create a fold.
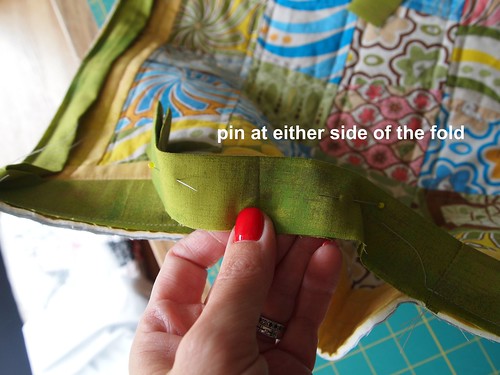
Pin the binding together at either side of the fold
And sew along the fold
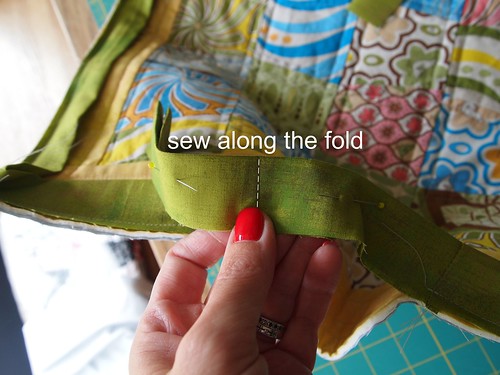
Open out the seam (you can press to one side if you prefer), trim off the tails to 1/4" and finish stitching the binding on.
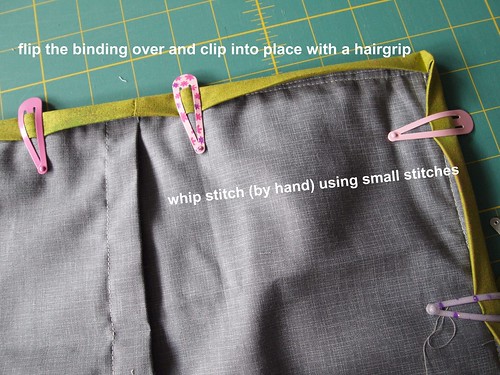
Flip the binding over to the reverse and hold in place with hair clips (if you're cheap like me) or binding clips (which look exactly the same but are silver and not lovely pretty pink clips) Hand stitch the binding to the reverse of the quilt using a thread that matches and small whipstitches.
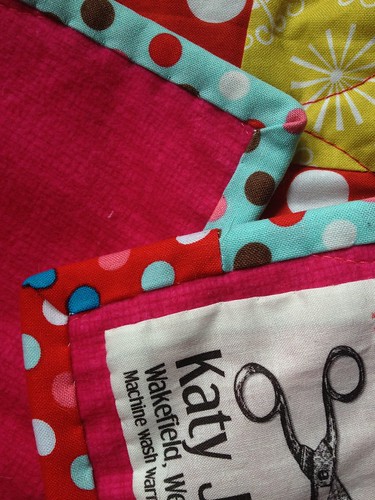
To get nice sharp corners fold the edge of the binding down and stitch up to the corner. Take the next edge and fold down tightly, you might need to wiggle the corner about a bit to get it nice and tidy, but a few wiggles and you'll have a lovely corner. It'll pretty much fall into place without a lot of work, because you did the front correctly when you sewed the binding on, remember?
And that's it.
Go forth and bind!!
Your binding is the way I do it because I have more trouble getting it sewn at the 45 d. angle as most quilters suggest. It is much less frustrating for me. Thank you that it is ok to do it this way. jlblvn@gmail.com
ReplyDeleteLove the idea of winding it round the empty thread spool.
ReplyDeleteOH MY GOODNESS, THIS IS THE FIRST TUTORIAL I'VE UNDERSTOOD FOR JOINING THE ENDS OF BINDING!!! Katy, you cream my corn. :)
ReplyDeleteI like to join my binding pieces and ends at a 45 degree angle, it makes the binding much smoother and without any bulky bits.
ReplyDeleteThat spool idea is smarter than smart, thank you sooo much!
ReplyDeleteYes, this is the first tutorial that I've fully understood. Thank you. Maybe I'll have better bindings now!
ReplyDelete