

Hello again and happy Monday!
This week I'm going to show you how to use the drunkard's path dies for super simple curved piecing without tears and wonderfully precise points.
I don't know about you but sewing curves is not my favourite thing to do, cutting them using templates and scissors is always imprecise and leads to me making mistakes and ending up with a circle that isn't quite round. Or at least, that was my experience before I got the drunkards path dies for my Big Shot.
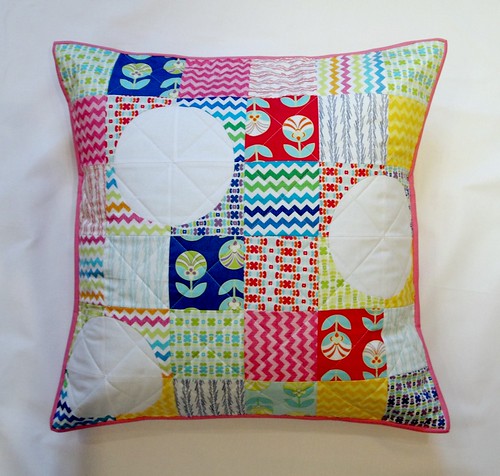
My project was turned into a really big cushion for my sofa. It finishes up at 24" square, so you could make a wall hanging, a table topper or a little quilt for a special someone's favourite dolly or teddy bear. 24" is also a nice size for a baby changing mat that you can fold up and pop into your nappy bag, or a little pram quilt too. It's a really practical size, but you could also make this block a number of times and make a quilt. You'll find the curved piecing is really not as tricky as you may have expected and you might just want to carry on piecing those circles!
4 blocks makes a quilt 48" square, 9 blocks in a 3 x 3 setting makes a quilt 72" square, and so on.
You will need;
Big Shot
Dies;
Sizzix Bigz L Die - drunkard's path arch and fan background 657168
Sizzix Bigz L Die - drunkard's path quarter circle 657169
Sizzix Bigz Die - 4" finished square 657609
a selection of fabrics for the squares and arches, a contrasting solid fabric for the quarter circles
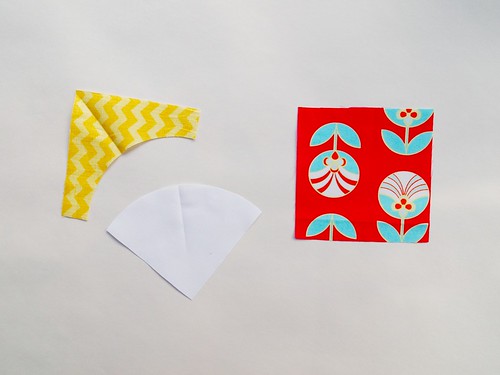
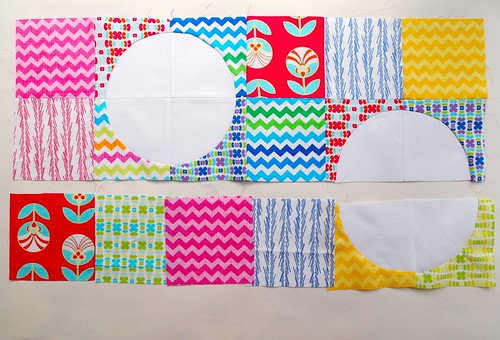
Using the drunkard's path quarter circle die cut a total of 12 quarter circles from the solid fabric
Using the drunkard's path arch and fan die cut a total of 12 arches in a mix of printed fabrics
Using the 4" finished square die cut a total of 24 squares in a mix of printed fabrics
Hello again and happy Monday!
This week I'm going to show you how to use the drunkard's path dies for super simple curved piecing without tears and wonderfully precise points.
I don't know about you but sewing curves is not my favourite thing to do, cutting them using templates and scissors is always imprecise and leads to me making mistakes and ending up with a circle that isn't quite round. Or at least, that was my experience before I got the drunkards path dies for my Big Shot.
My project was turned into a really big cushion for my sofa. It finishes up at 24" square, so you could make a wall hanging, a table topper or a little quilt for a special someone's favourite dolly or teddy bear. 24" is also a nice size for a baby changing mat that you can fold up and pop into your nappy bag, or a little pram quilt too. It's a really practical size, but you could also make this block a number of times and make a quilt. You'll find the curved piecing is really not as tricky as you may have expected and you might just want to carry on piecing those circles!
4 blocks makes a quilt 48" square, 9 blocks in a 3 x 3 setting makes a quilt 72" square, and so on.
You will need;
Big Shot
Dies;
Sizzix Bigz L Die - drunkard's path arch and fan background 657168
Sizzix Bigz L Die - drunkard's path quarter circle 657169
Sizzix Bigz Die - 4" finished square 657609
a selection of fabrics for the squares and arches, a contrasting solid fabric for the quarter circles
Using the drunkard's path quarter circle die cut a total of 12 quarter circles from the solid fabric
Using the drunkard's path arch and fan die cut a total of 12 arches in a mix of printed fabrics
Using the 4" finished square die cut a total of 24 squares in a mix of printed fabrics
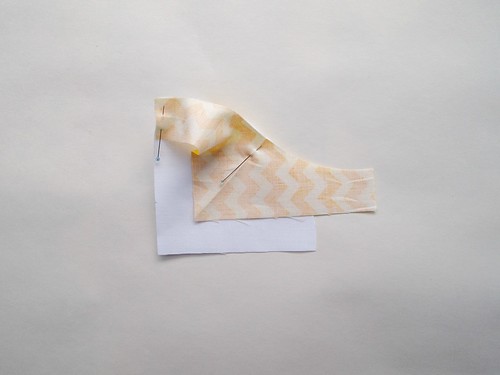
Fold each of the arches and the quarter circles in half and finger press.
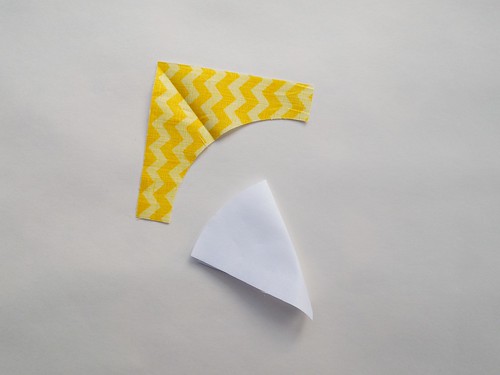
Match up the creases, right sides together, of 1 arch and 1 quarter circle as shown in the picture below;
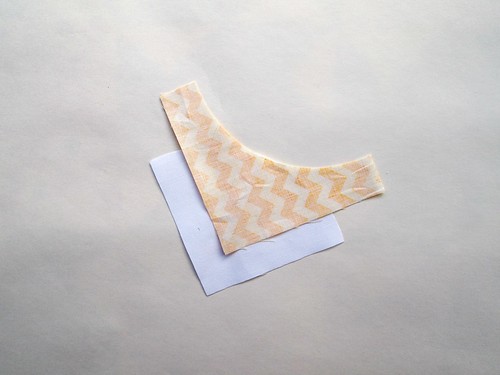
Place a pin at the centre point, and then pin each end. You will notice the arch fabric lifts and 'fights' when you try and make it meet the quarter circle's edge. This is normal - it will not lay flat!
Pin generously all along the curve, easing the fabric and following the curve. You may find it easiest to place your pins at each centre point of 2 other pins, rather than starting at one end and pinning along. Don't try and smooth it completely flat, it won't work, as long as the point at which you are sewing is flat, you can smooth the rest of the curve as you move along.
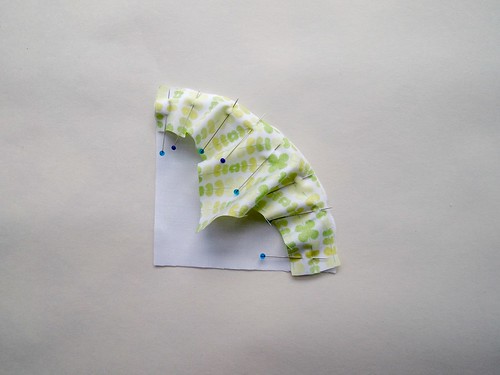
Take the pinned pieces to your machine and sew a quarter inch seam all the way along the curve, removing the pins as you go.
I actually only use a pin at the centre point and then ease the fabric along. I would recommend you try with pins the first time and see how you get on, and if you don't like it, try again with just a pin at the centre point and either end, and then maybe even try with just a pin in the centre. Different people find different methods work best for them - you just need to have a little practise first and see which way you like best.
Keep your needle in the needle down position as you sew, and keep your eye on the point just ahead of where your needle is. Just as you would if you were walking - look where you're going, rather than down at your feet. If the fabric looks like it's about to pucker, stop (with the needle down), lift your presser foot and wriggle the fabrics around a little. You need to gently ease the fabrics to meet, don't pull or try to sew the seam flat like you would with 2 squares. This step is something best tried rather than explained. A good tip is to try on some scrap fabric first, so you don't mess up your good fabric.

When you've sewn all the way to the end your block will look a little like a crown.
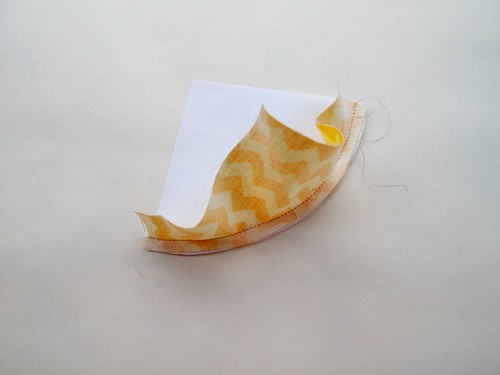
Flip the arch back flat, and gently press, with the seam outwards towards the print fabric of the arch. If you have a pucker or 2 in the seam, you might be able to ease it out as you press, rubbing your fingernail over it. Just don't iron - press press press! If the pucker is particularly bad, just unpick with a seam ripper and try again. It might take you a couple of attempts before you manage it, but this is normal, so don't fret. The first time I sewed curves they were a disaster, I still don't enjoy them all that much but I can sew a nice smooth one (precise cutting thanks to the Big Shot definitely helps!)
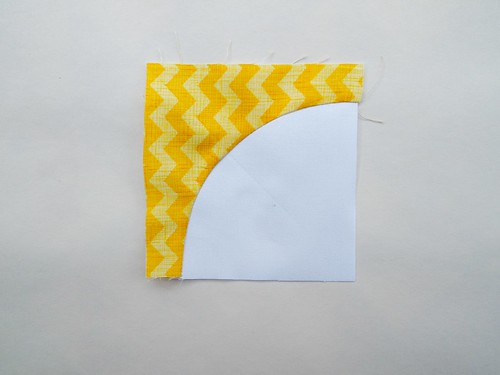
Repeat with the other 11 blocks.
Arrange the squares and the sewn quarter circle blocks in 6 rows of 6. Play around with the layout until you have a configuration you like the look of.
As you sew each row, press the seams to your preferred direction. I pressed mine open, but pressing to the sides is usually recommended in patchwork and quilting as it makes for a stronger seam. If you are pressing to the side, press each even numbered row's seams in one direction (eg; to the left) and each of the odd numbered rows in the opposite direction (eg; to the right) so that the seams butt up against each other nicely and make it easier for you to match the points.
Now comes the difficult part - what do you want to make this into? A cushion, wall hanging, table topper or make more blocks and turn it into a quilt?
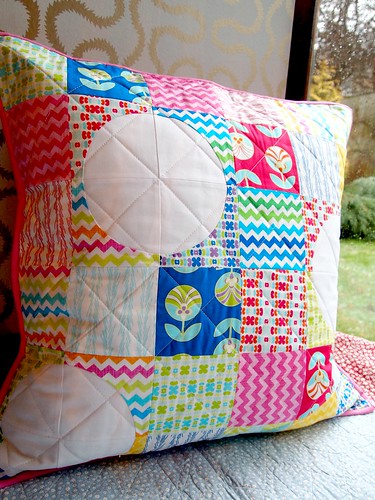
I added wadding and quilted my top (marking my quilting lines with a erasable pen) with a cross hatch design. I then added an envelope style opening and bound just like a quilt for a lovely big squishy cushion.
I hope you enjoyed this week's project and it has inspired you to give curves a try!
See you next week,
Katy
You make it look so doable! I really must overcome my hesitancy of curves this year.
ReplyDeleteMight just have to use this idea for a boy birthday present that is coming up - thanks Katy!
ReplyDeleteI love it!!
ReplyDeleteI am determined to sew that block for my Craftsy BOM (from 2012), I will get it done now, you've made it look so easy, thx! : )
ReplyDeleteI'm going to have a go at the drunkard's path. Sadly I don't have a Big Shot but it is on my list...
ReplyDeleteLove the cushion!
You must feel like you are in Land Of The Giants sat on your sofa!
ReplyDeleteThe cushion looks great x